This feature has been deprecated, please use GA4 BigQuery Export.
By following this guide, you can implement basic event tracking for SegmentStream if you haven't set up Google Analytics 4 tracking on your website or prefer not to.
If you already have Google Tag Manager (GTM) implemented on your website, the steps to implement basic event tracking are straightforward.
SegmentStream admin panel setup
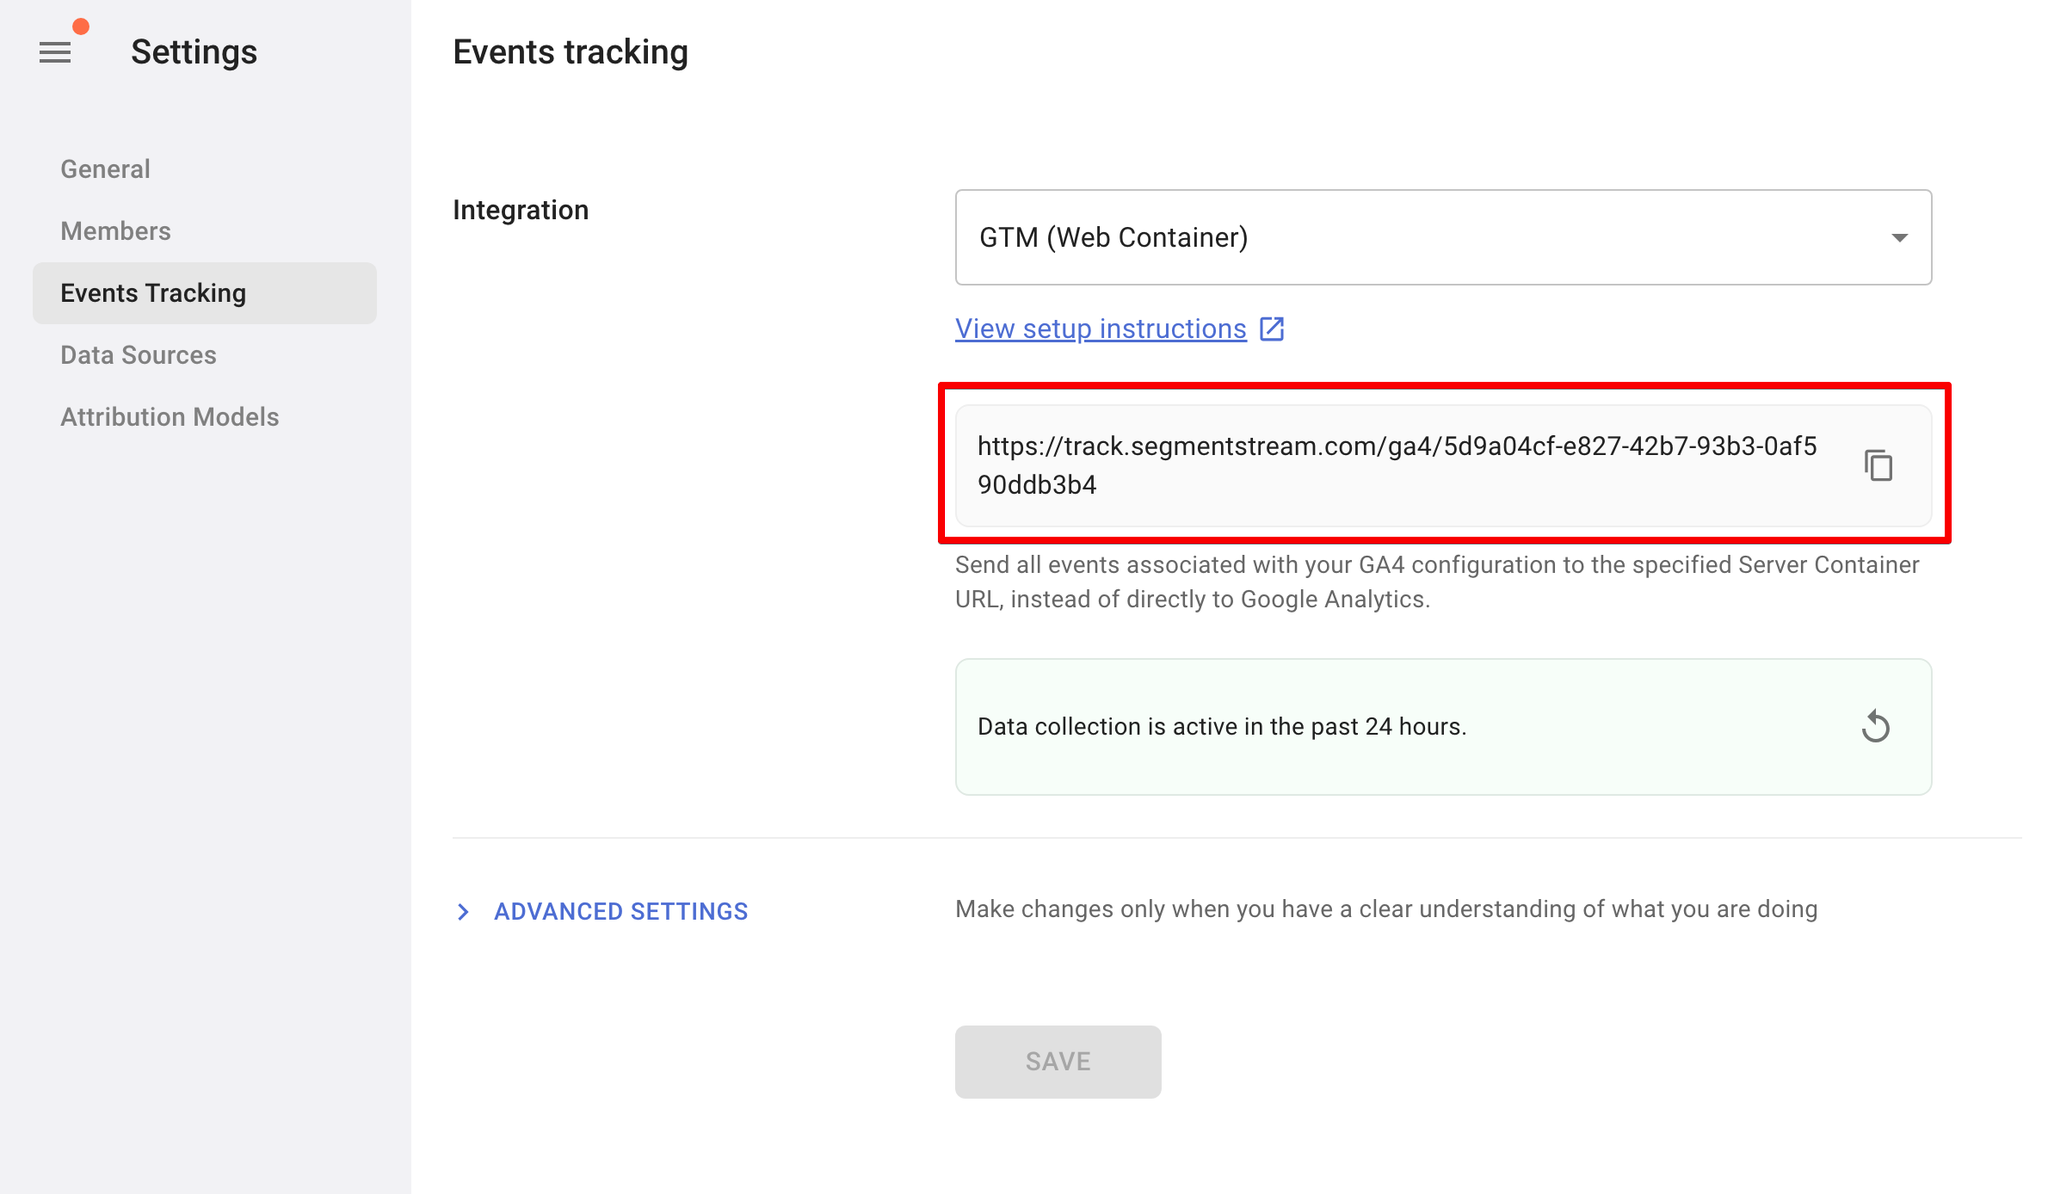
- Inside the admin panel navigate to Settings > Events Tracking.
- Copy the tracking URL found under the View setup instructions link and click SAVE.
Configure Streaming in your GTM
By following these steps, you will automatically send events for user interactions on your site. These interactions include page views, page scrolls, form interactions, outbound clicks, site searches, video engagements, and file downloads.
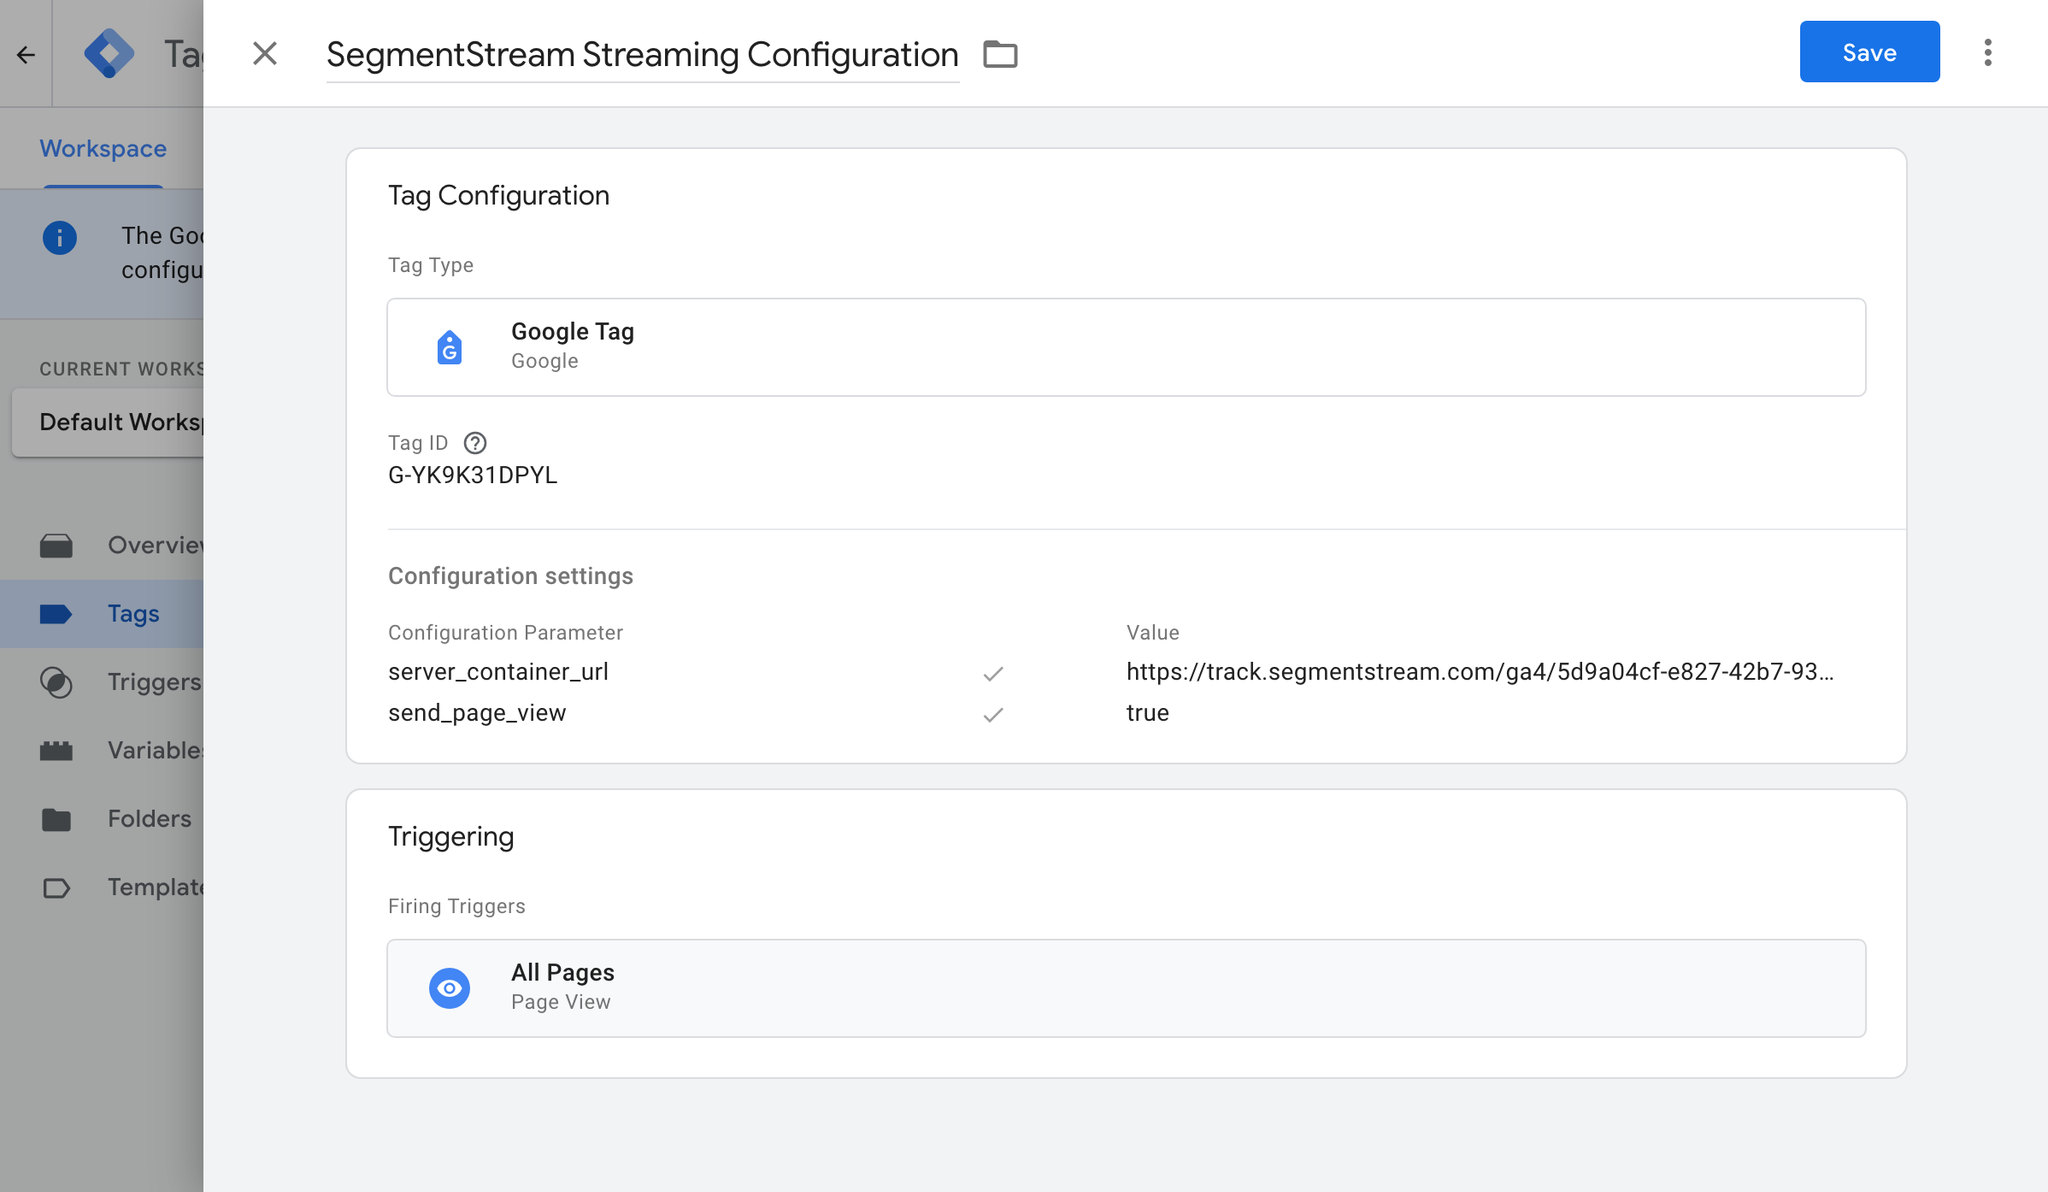
- Go to the Tags section in your Google Tag Manager container.
- Create a new Google Tag.
- Name it SegmentStream Configuration.
- Set the Tag ID to
G-YK9K31DPYL.
- In the Configuration settings, add a
server_container_urlparameter and paste your SegmentStream project's Server Container URL into the value field.
- Set the
send_page_viewparameter and set its value totrue.
- Set the trigger to All Pages.
- Click Save.
Add click event tracking
By tracking all click events, SegmentStream will gain a better understanding of how users interact with your website. This includes clicks on buttons, links, images, videos, forms, and other elements.
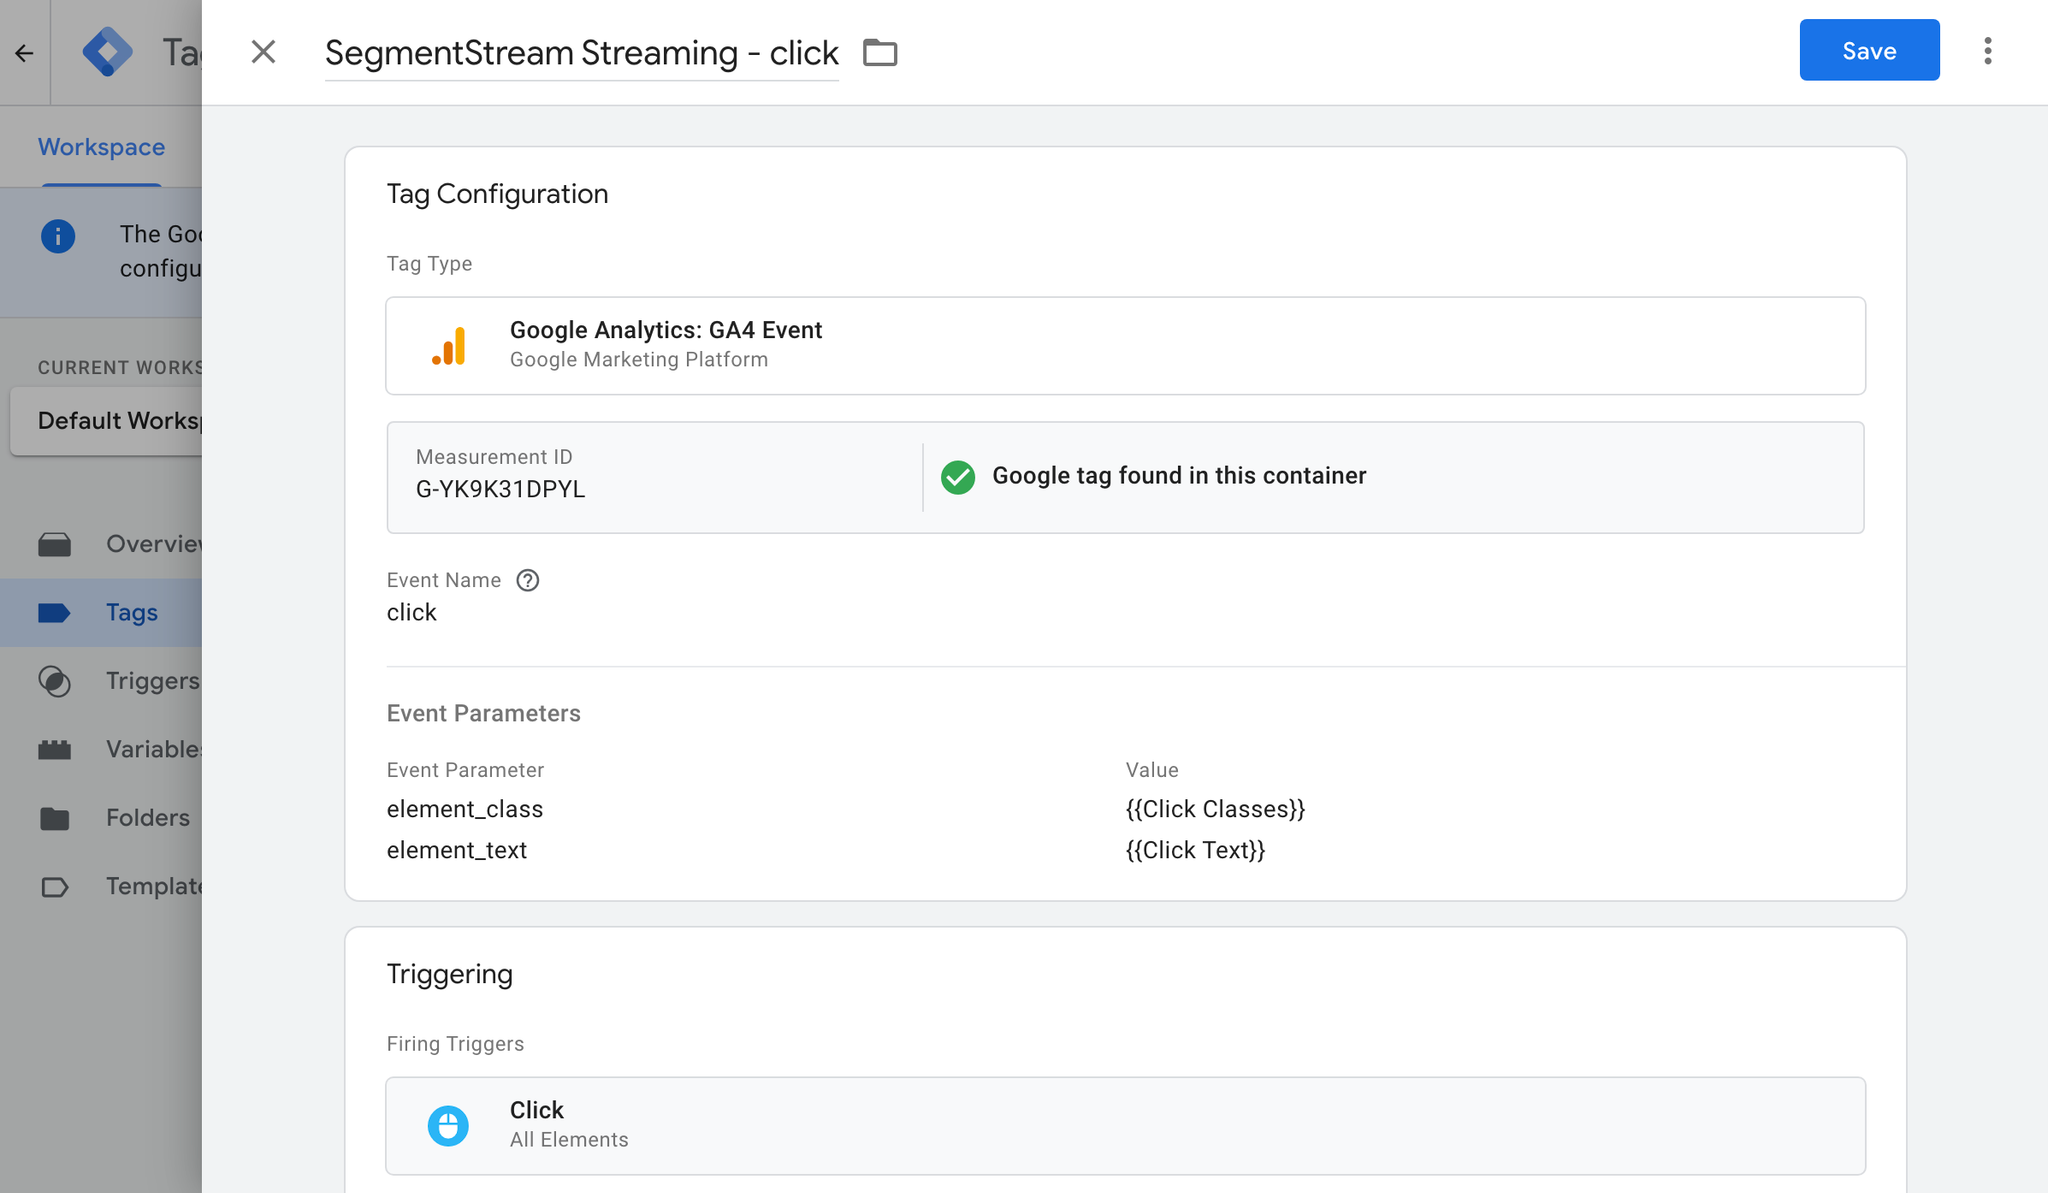
- Go to the Tags section in your Google Tag Manager container.
- Create a new Google Analytics: GA4 Event tag.
- Name it SegmentStream Streaming - click.
- Enter the Measurement ID
G-YK9K31DPYL.
- Set the Event Name to
click.
- In the Event Parameters settings, add the
element_classandelement_textparameters, with the values{{Click Classes}}and{{Click Text}}respectively.
- Set the trigger to Click - All Elements.
- Click Save.
Add purchase event tracking (required for ecommerce websites)
If you are implementing tracking on an ecommerce website, it is required to implement tracking for your purchase events.
Pass data to the data layer
When a purchase is completed on your website, the purchase information should be passed to the data layer, which is the object used by Google Tag Manager to pass information to tags.
SegmentStream requires the following parameters to be passed with the purchase information:
Parameter name | Type | Example value | Description |
transaction_id | string | T_12345 | The unique identifier of a transaction. |
value | number | 25.42 | The monetary value of the event. |
currency | string | USD | Currency of the items associated with the event, in 3-letter ISO 4217 format. |
The following is an example of a data layer purchase event:
javascriptdataLayer.push({ ecommerce: null });
dataLayer.push({
  event: "purchase",
  ecommerce: {
      transaction_id: "T_12345",
      value: 25.42,
      currency: "USD"
  }
});
Track purchase events in GTM
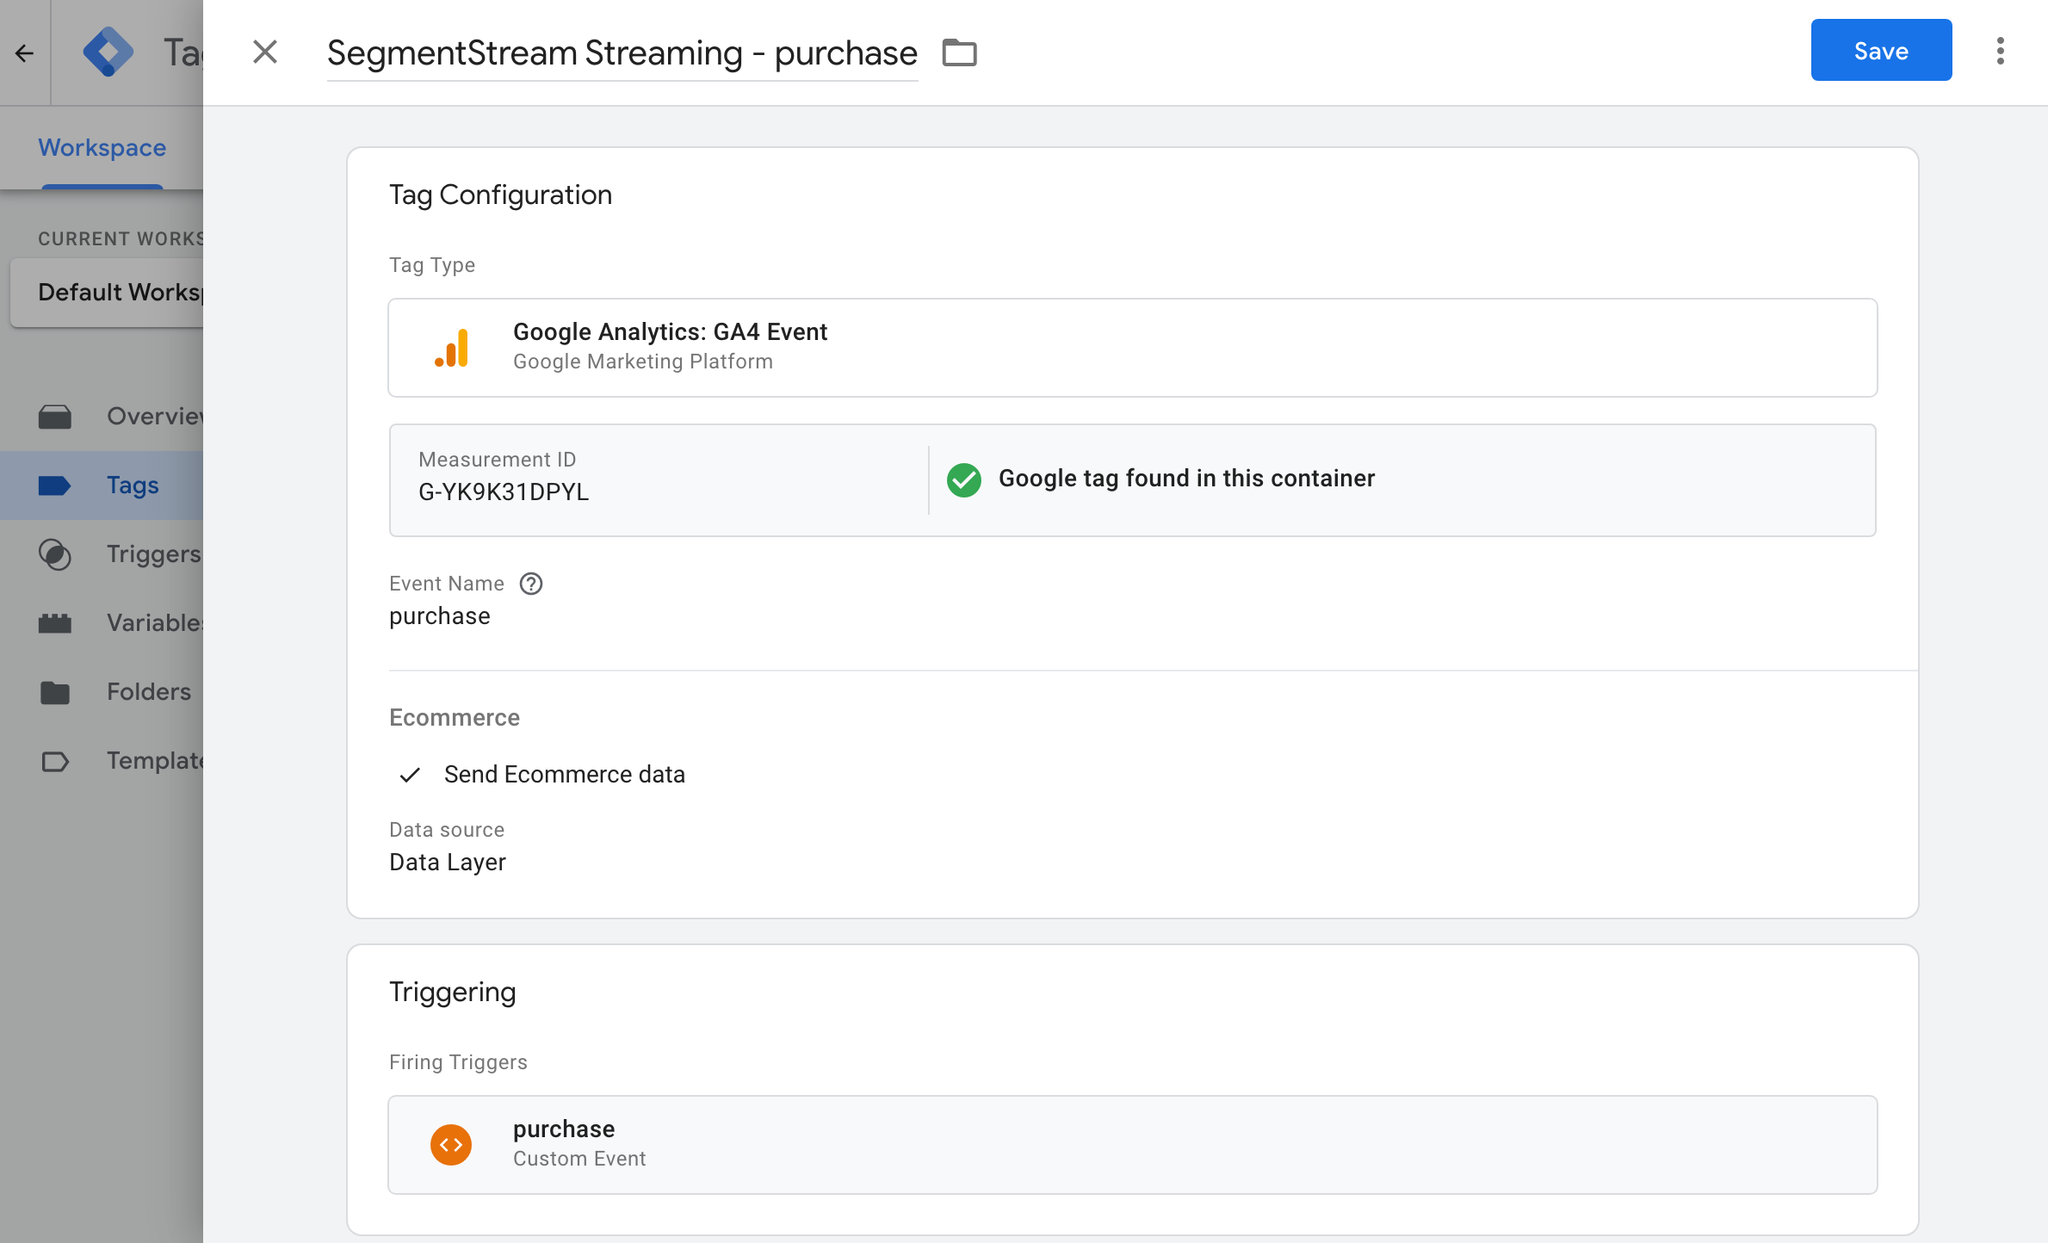
- Go to the Tags section in your Google Tag Manager container.
- Create a new Google Analytics: GA4 Event tag.
- Name it SegmentStream Streaming - purchase.
- Enter the Measurement ID
G-YK9K31DPYL.
- Set the Event Name to
purchase.
- Go to More Settings → Ecommerce, check the Send Ecommerce data option.
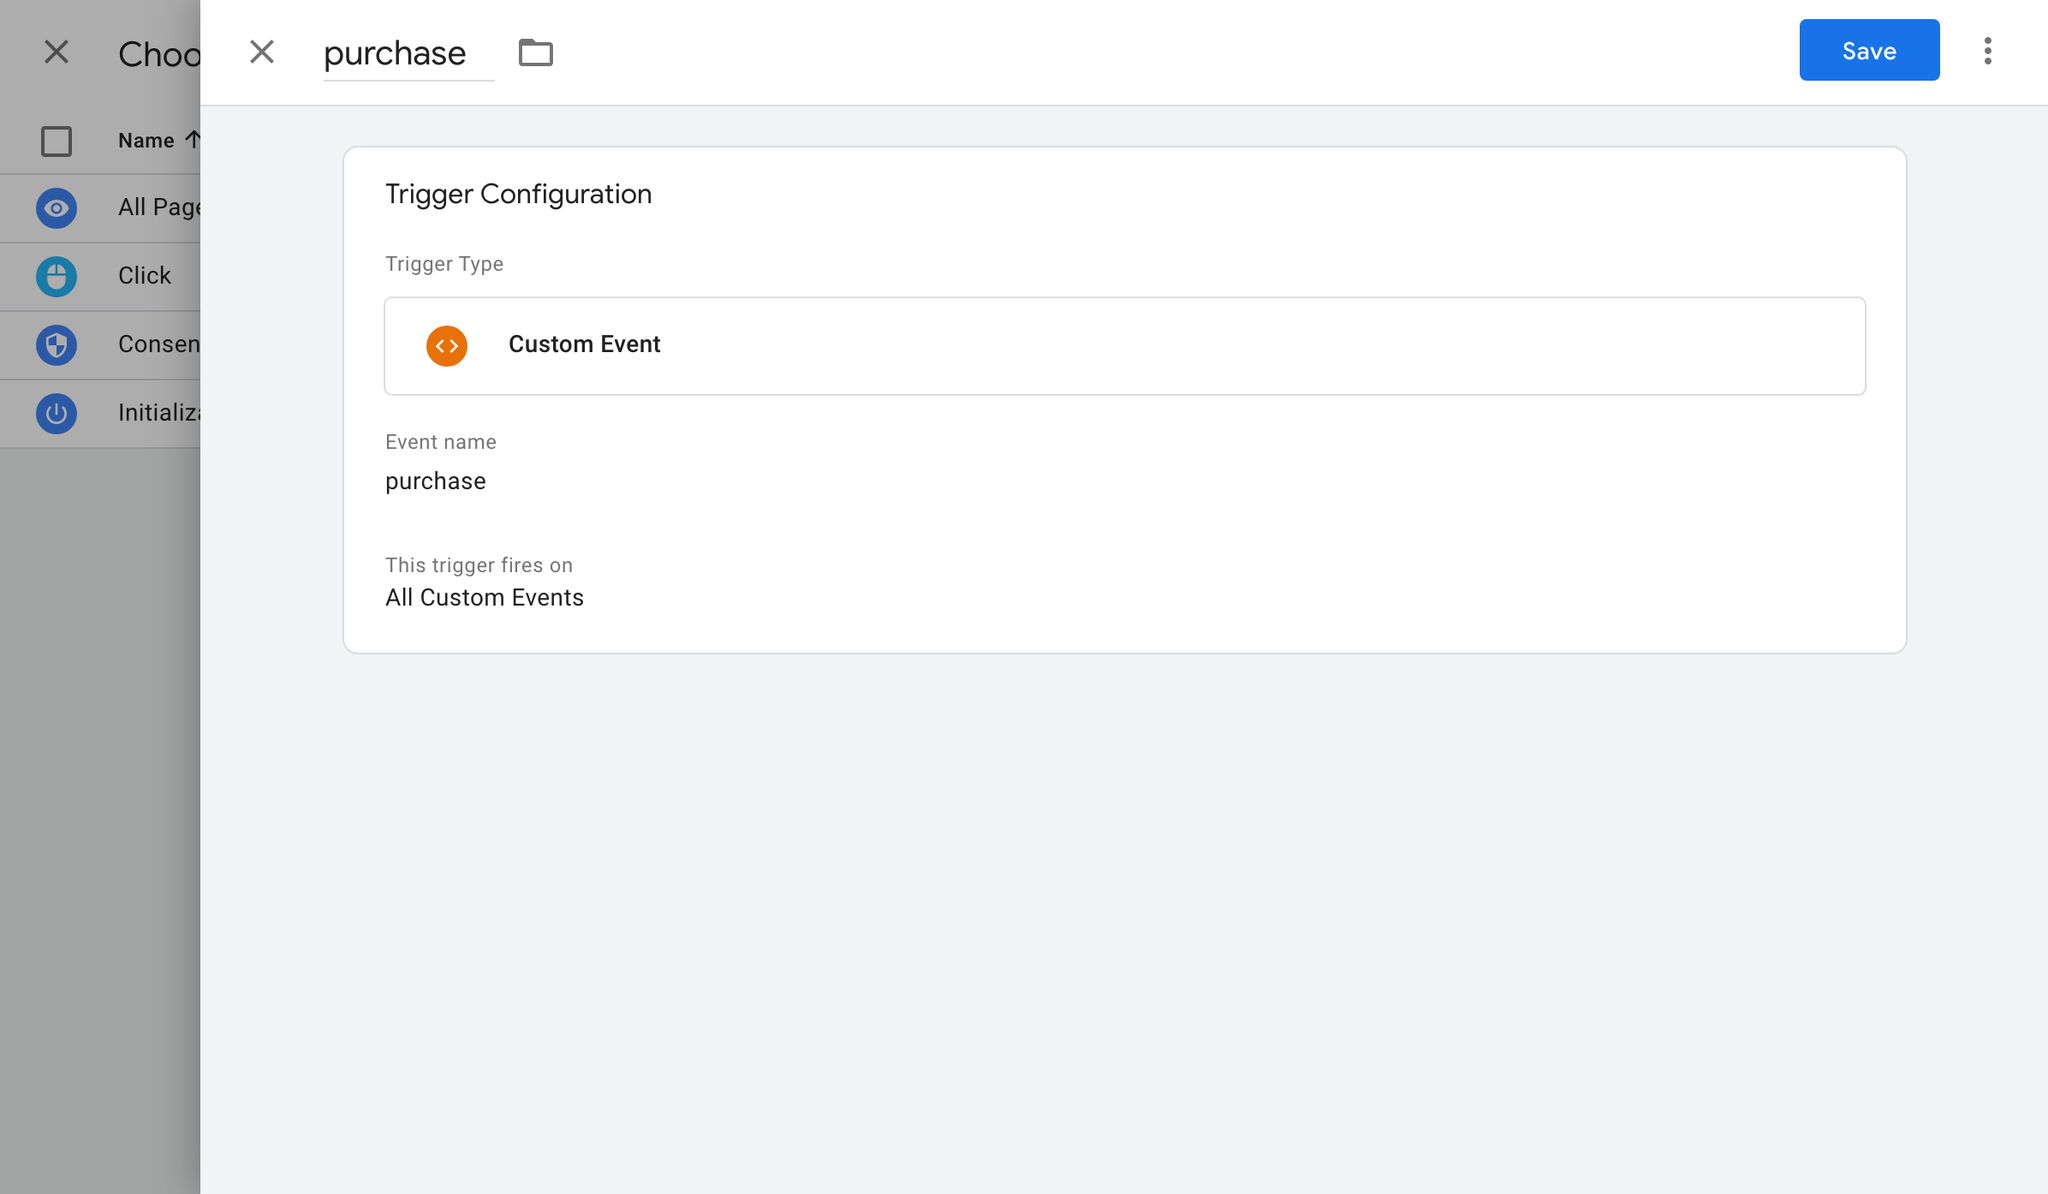
- Create a new Custom Event trigger with the Event name
purchase.
- Click Save.
Test and publish your GTM container
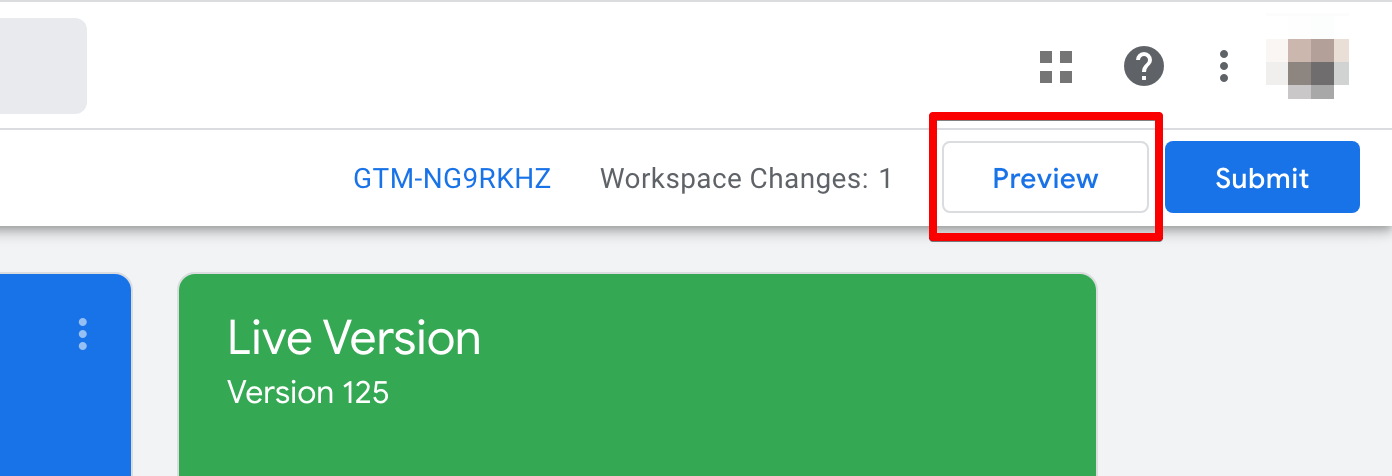
- Use the GTM Preview functionality to test if the setup is correct before publishing the changes.
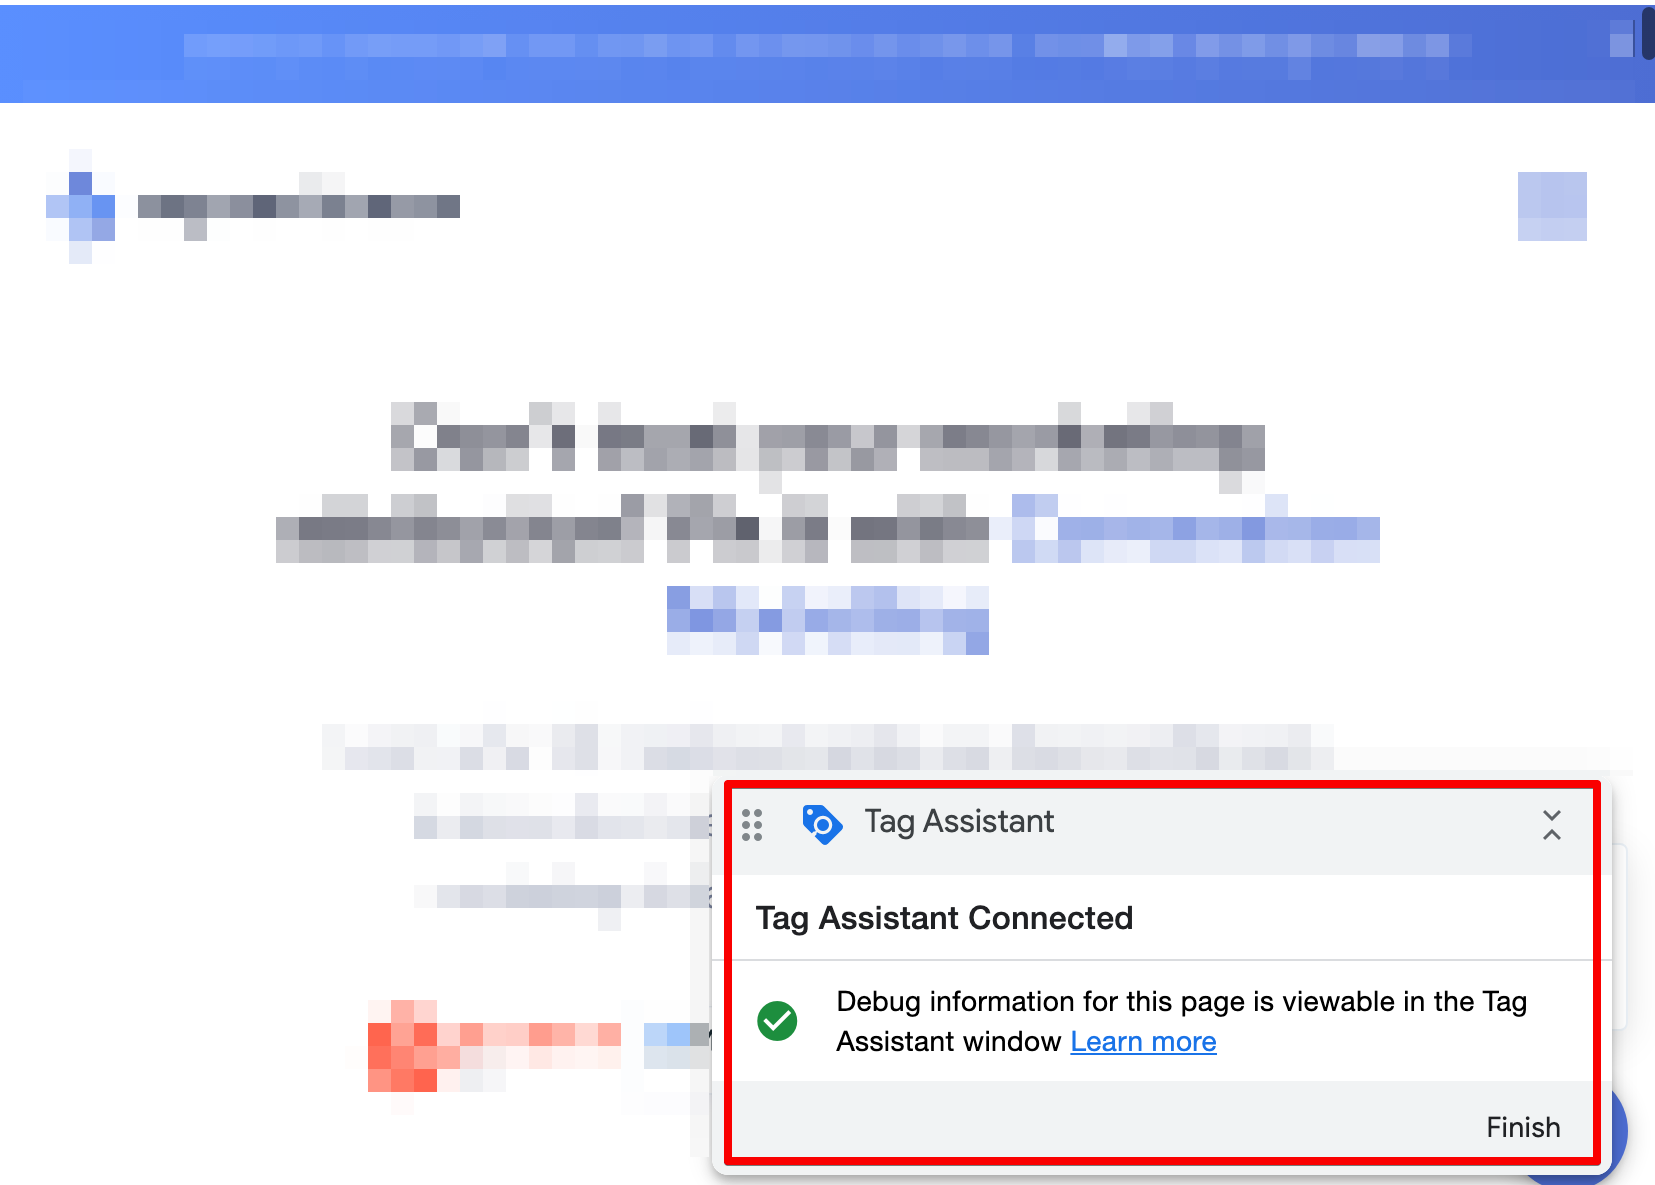
- If the Preview container is successfully connected to your website you should see a notification.
- Next, click through a couple of pages on your website to make sure events are being sent to SegmentStream.
- Then, open your Google Analytics settings page in the SegmentStream admin panel.
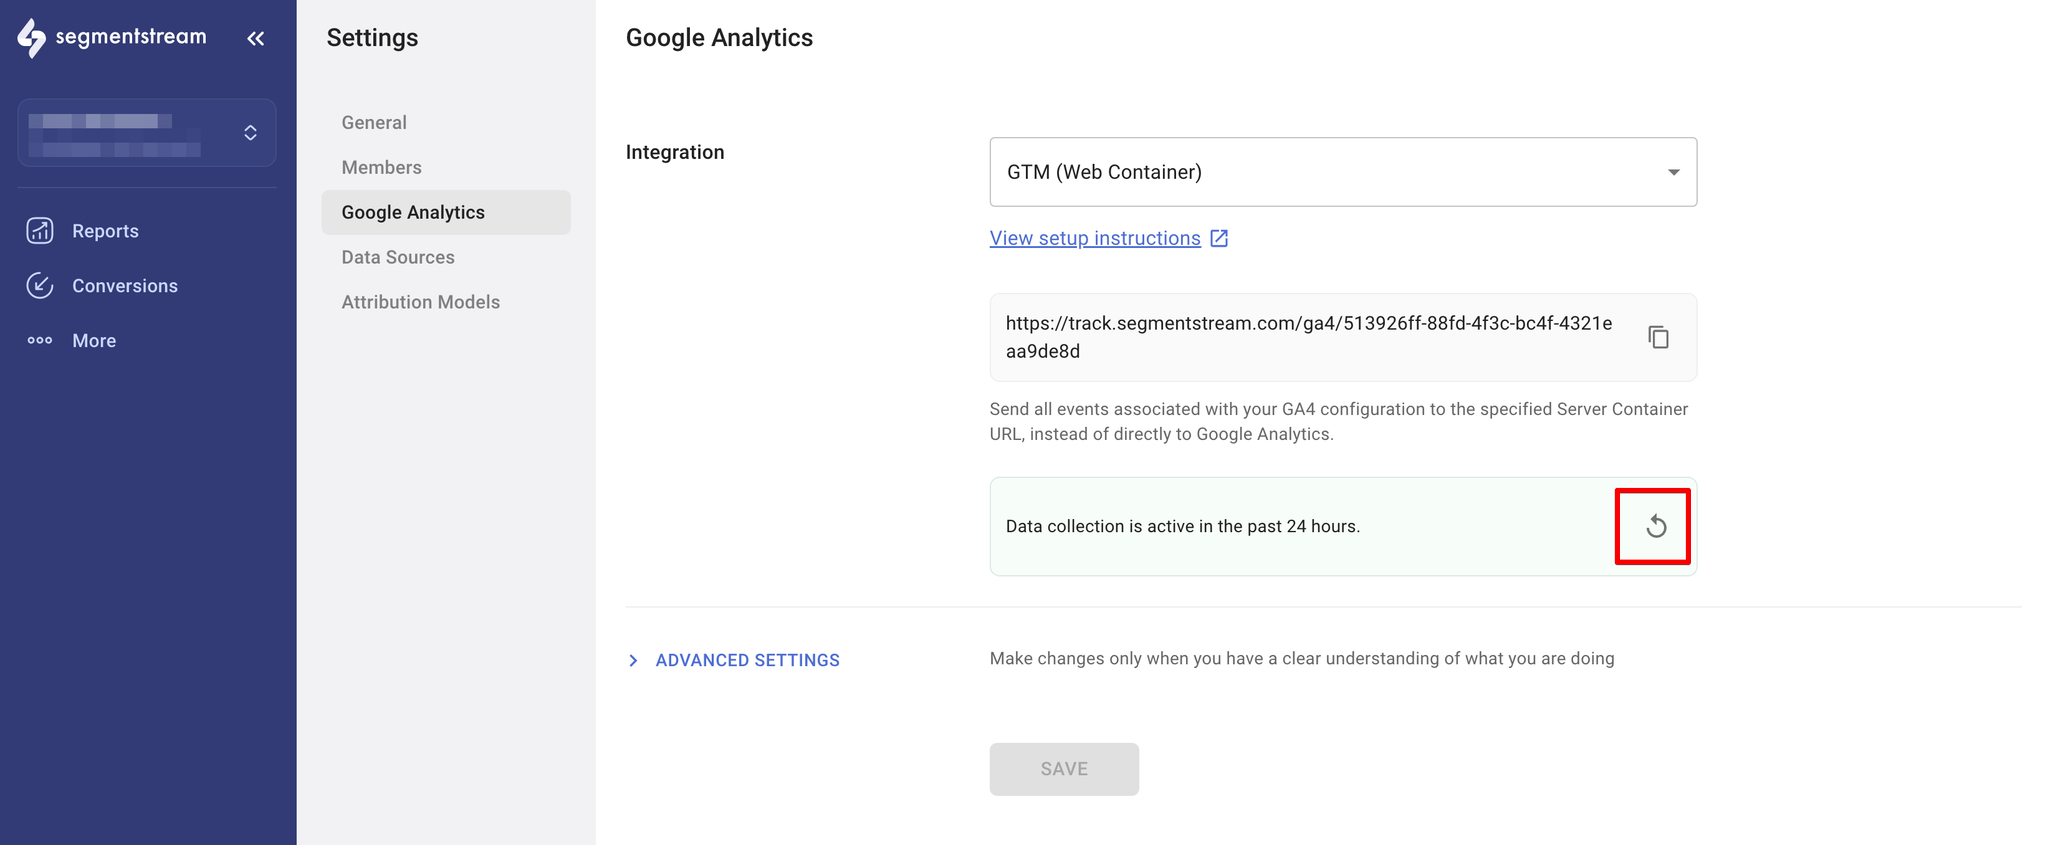
- If the message is highlighted in red, try clicking on the refresh button.
- If the message persists, it means that data hasn't been collected yet. You should make sure you followed the guide correctly or contact our support team.
- If you see a message highlighted with green, informing you that data has been collected, you can Publish the GTM container.
