1
Create an account
Use the link provided by your SegmentStream manager. You will be asked to enter your name, the name of your company, and the country where your business resides.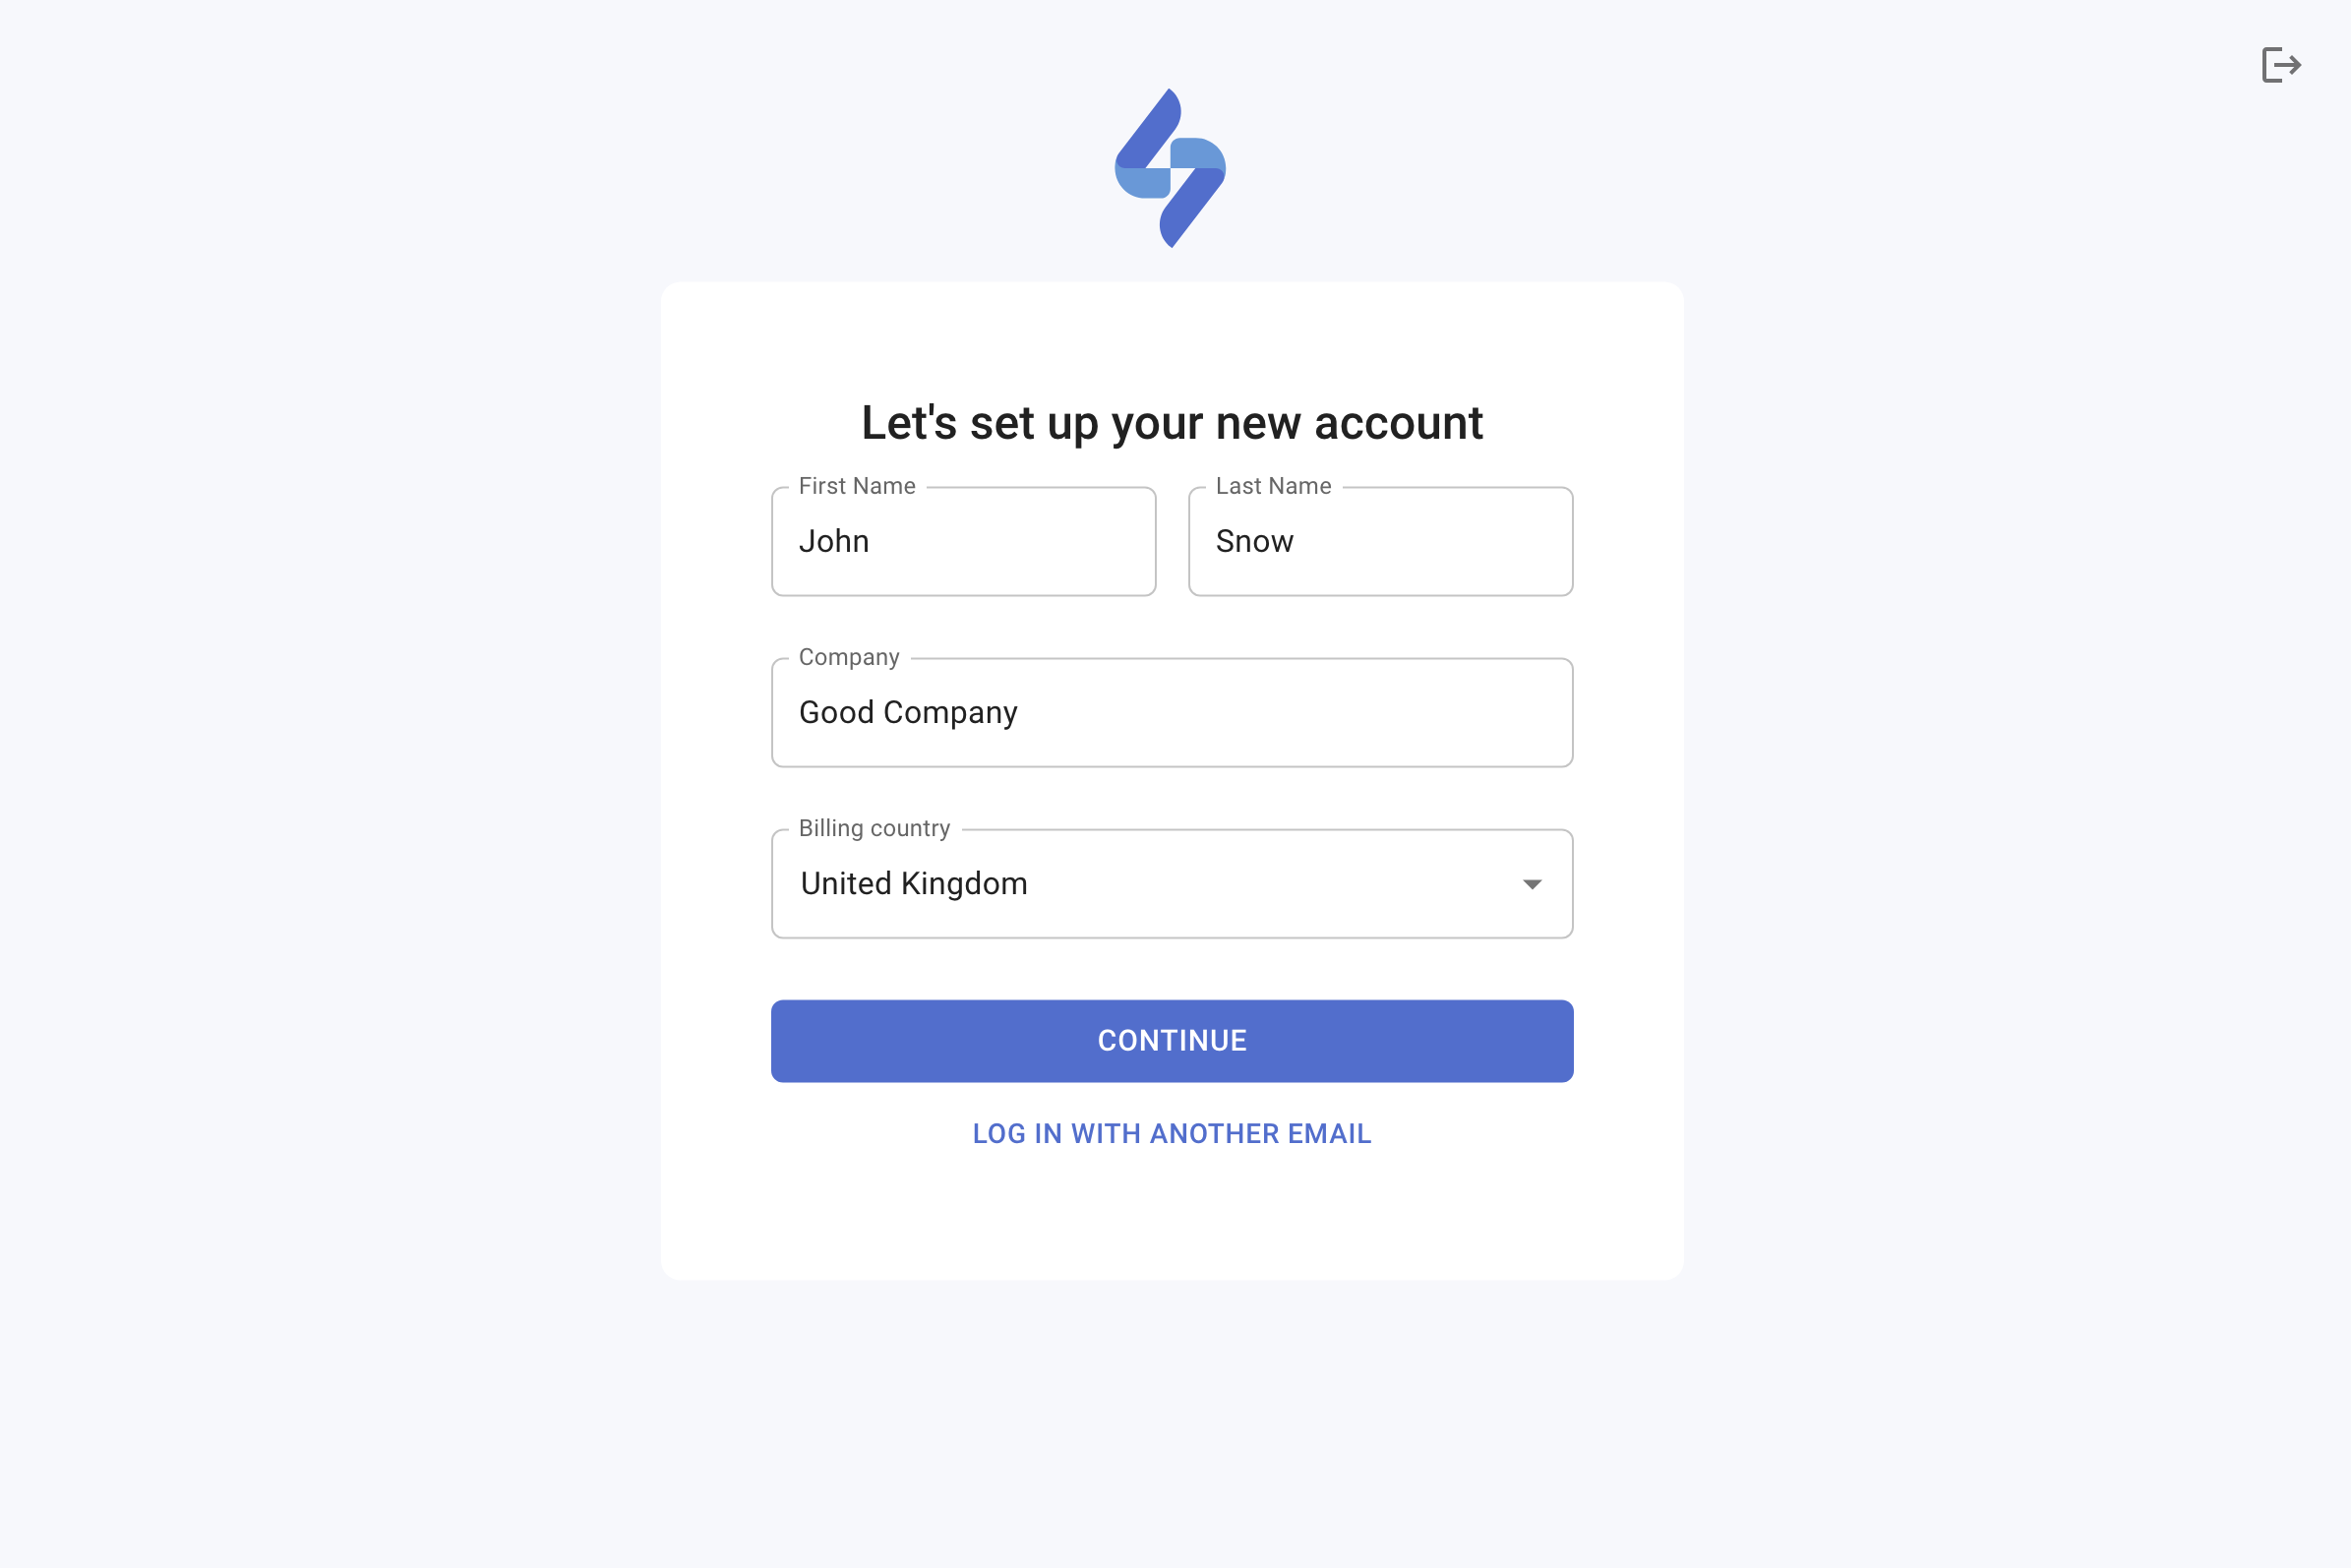
2
Create a project
Enter the project name as it will appear in the SegmentStream interface, the currency and timezone for reporting, and the location of the servers that will process the project’s data.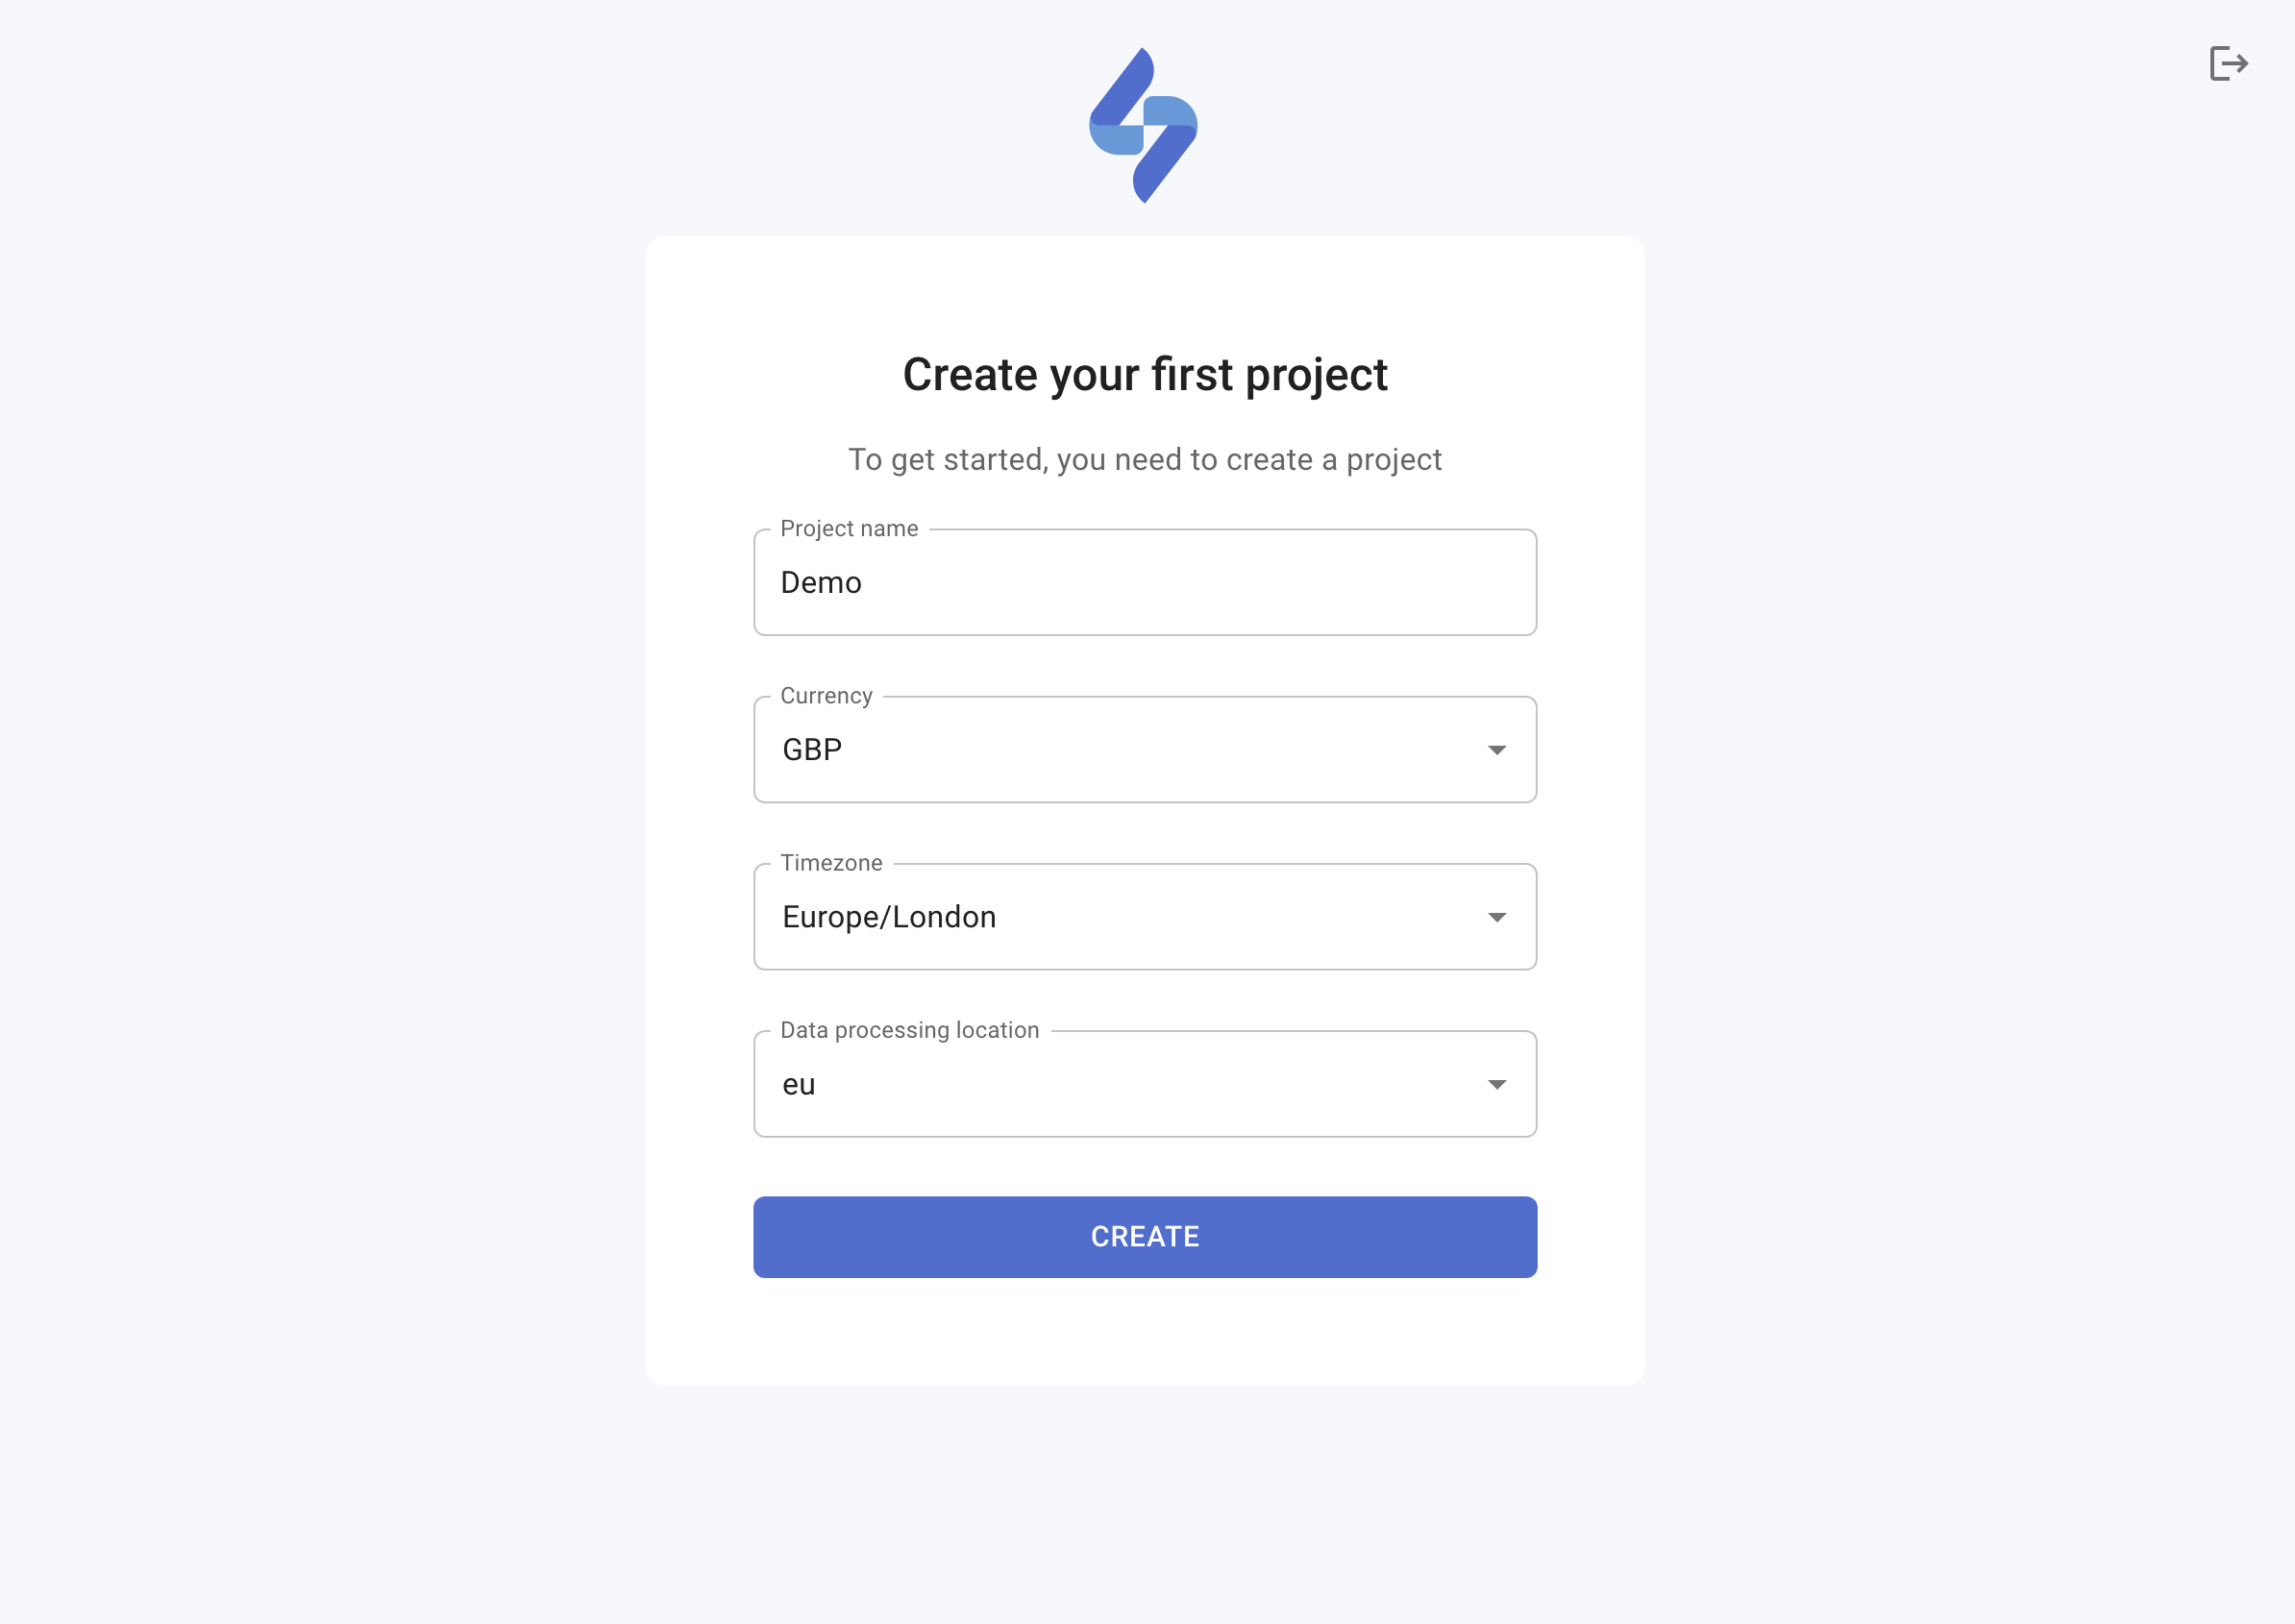
3
Add team members
To invite other people to the project, click + INVITE on the Members page, enter their email, select the permissions, and click SEND.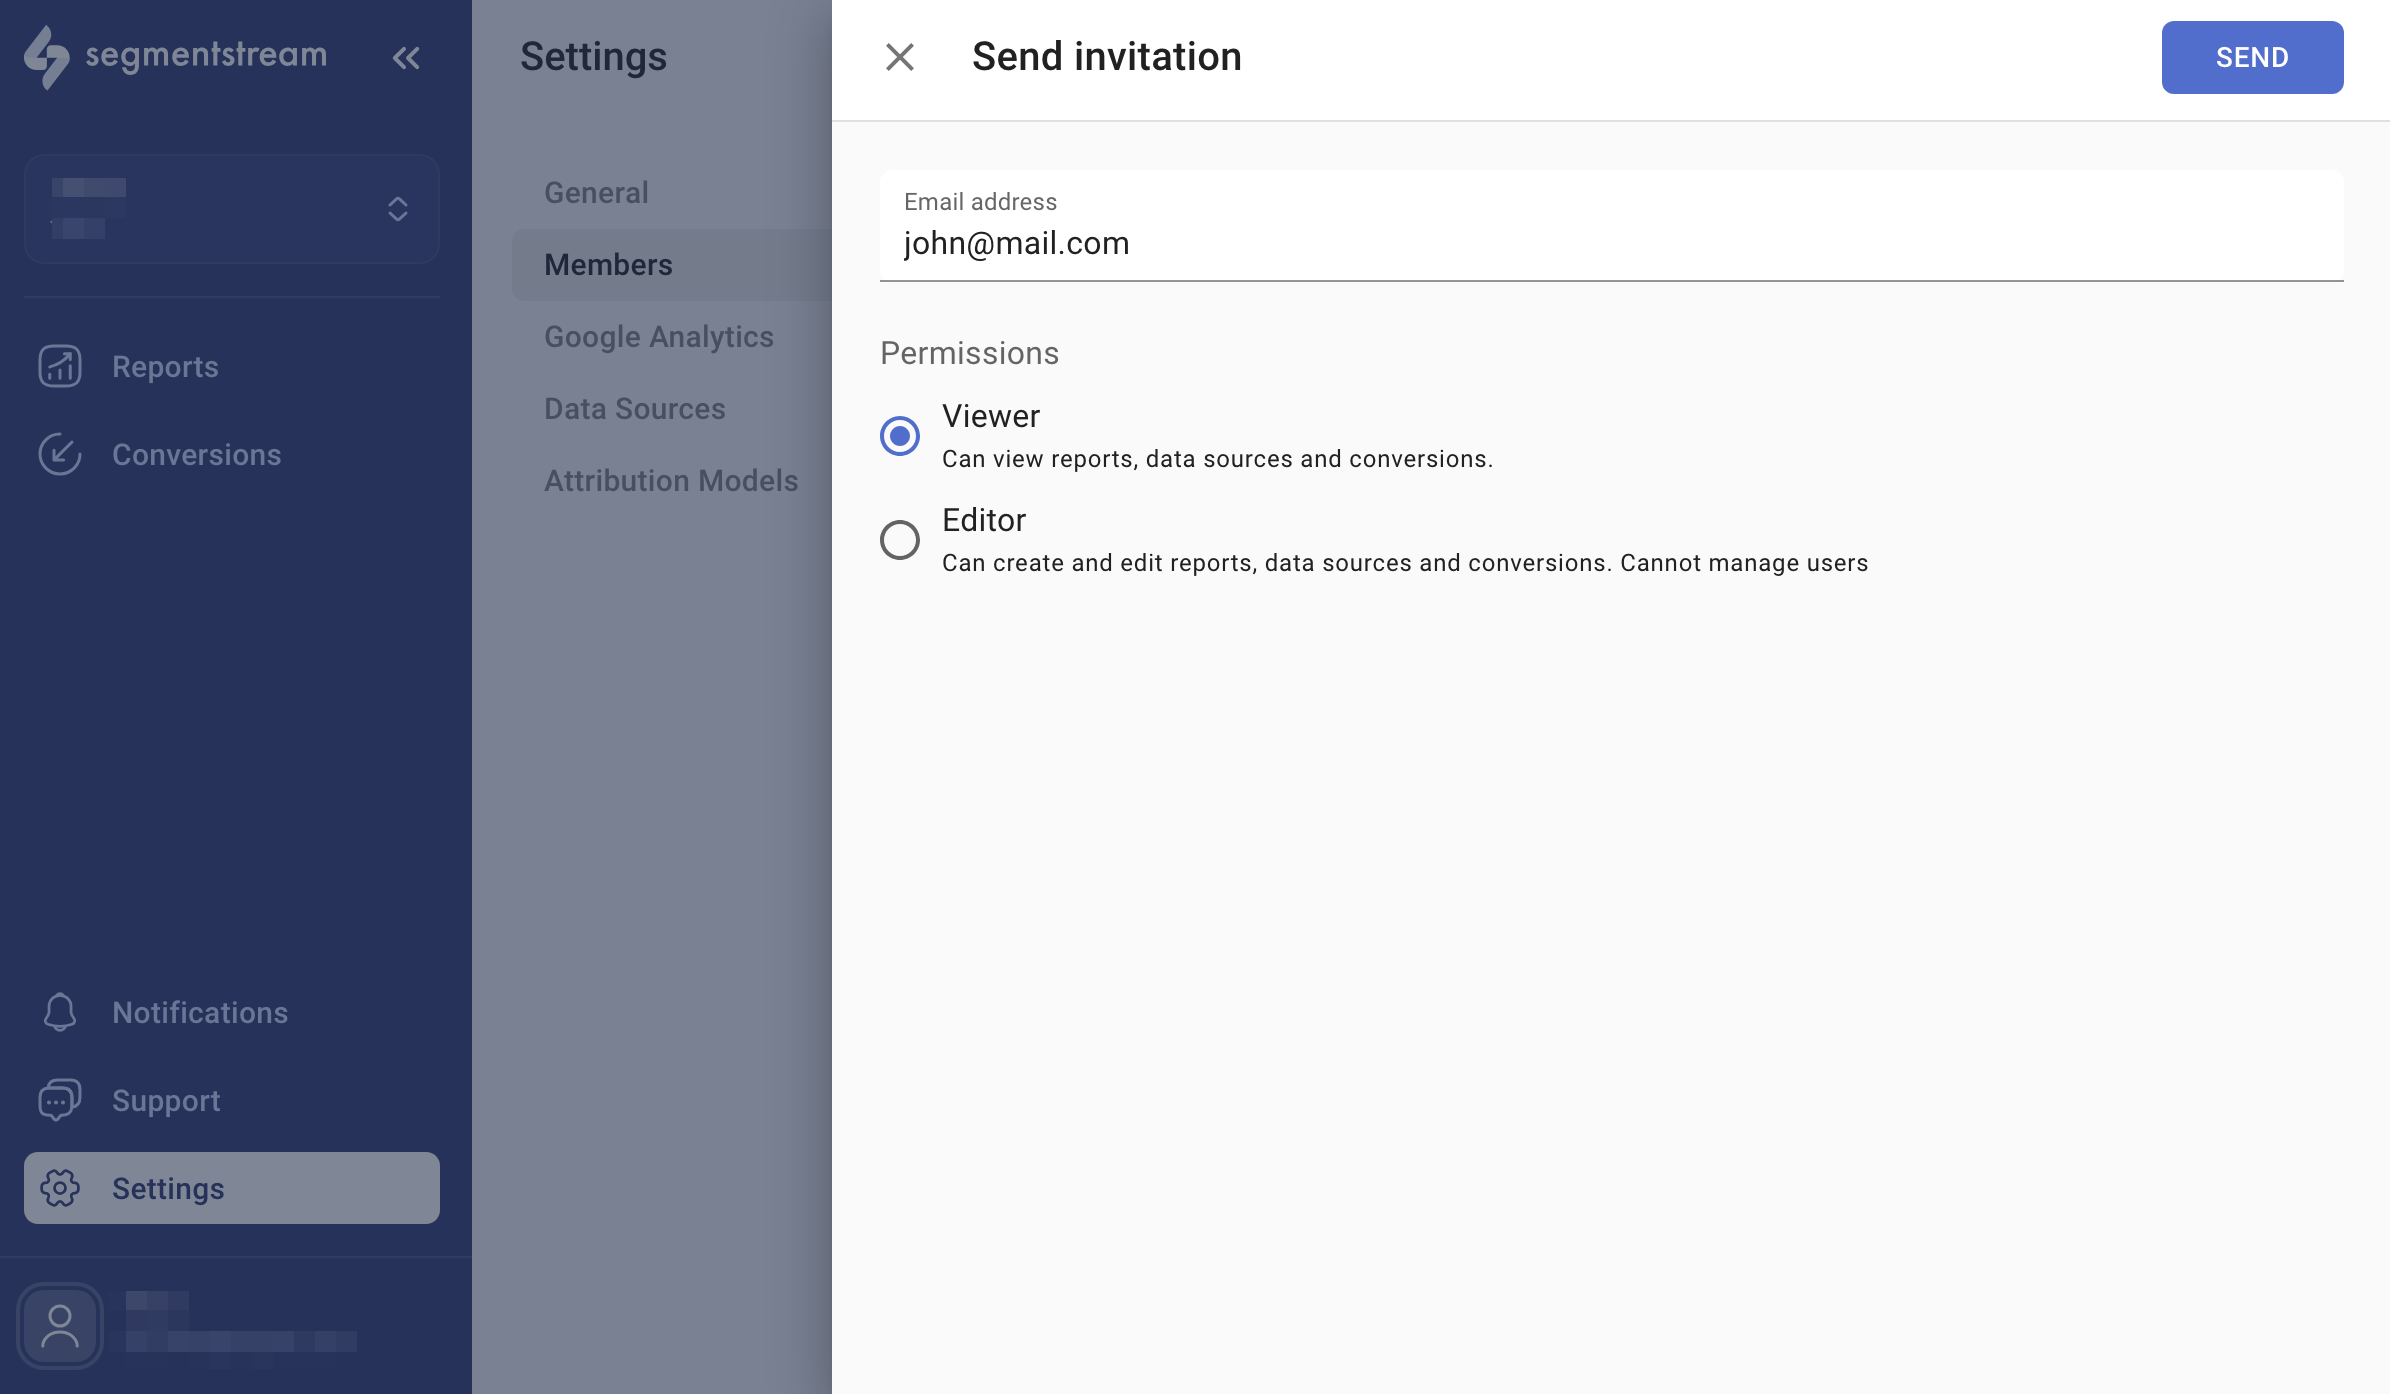
4
Configure data warehouse
Connect a data warehouse to store and process your project’s data. Google BigQuery is the recommended option — read the data warehouse guide for setup instructions.
5
Set up event tracking
If Google Analytics 4 is already implemented on your website or app, integrating event tracking through the native GA4 BigQuery Link feature is the most straightforward approach.Refer to the event tracking guide for detailed information and additional options.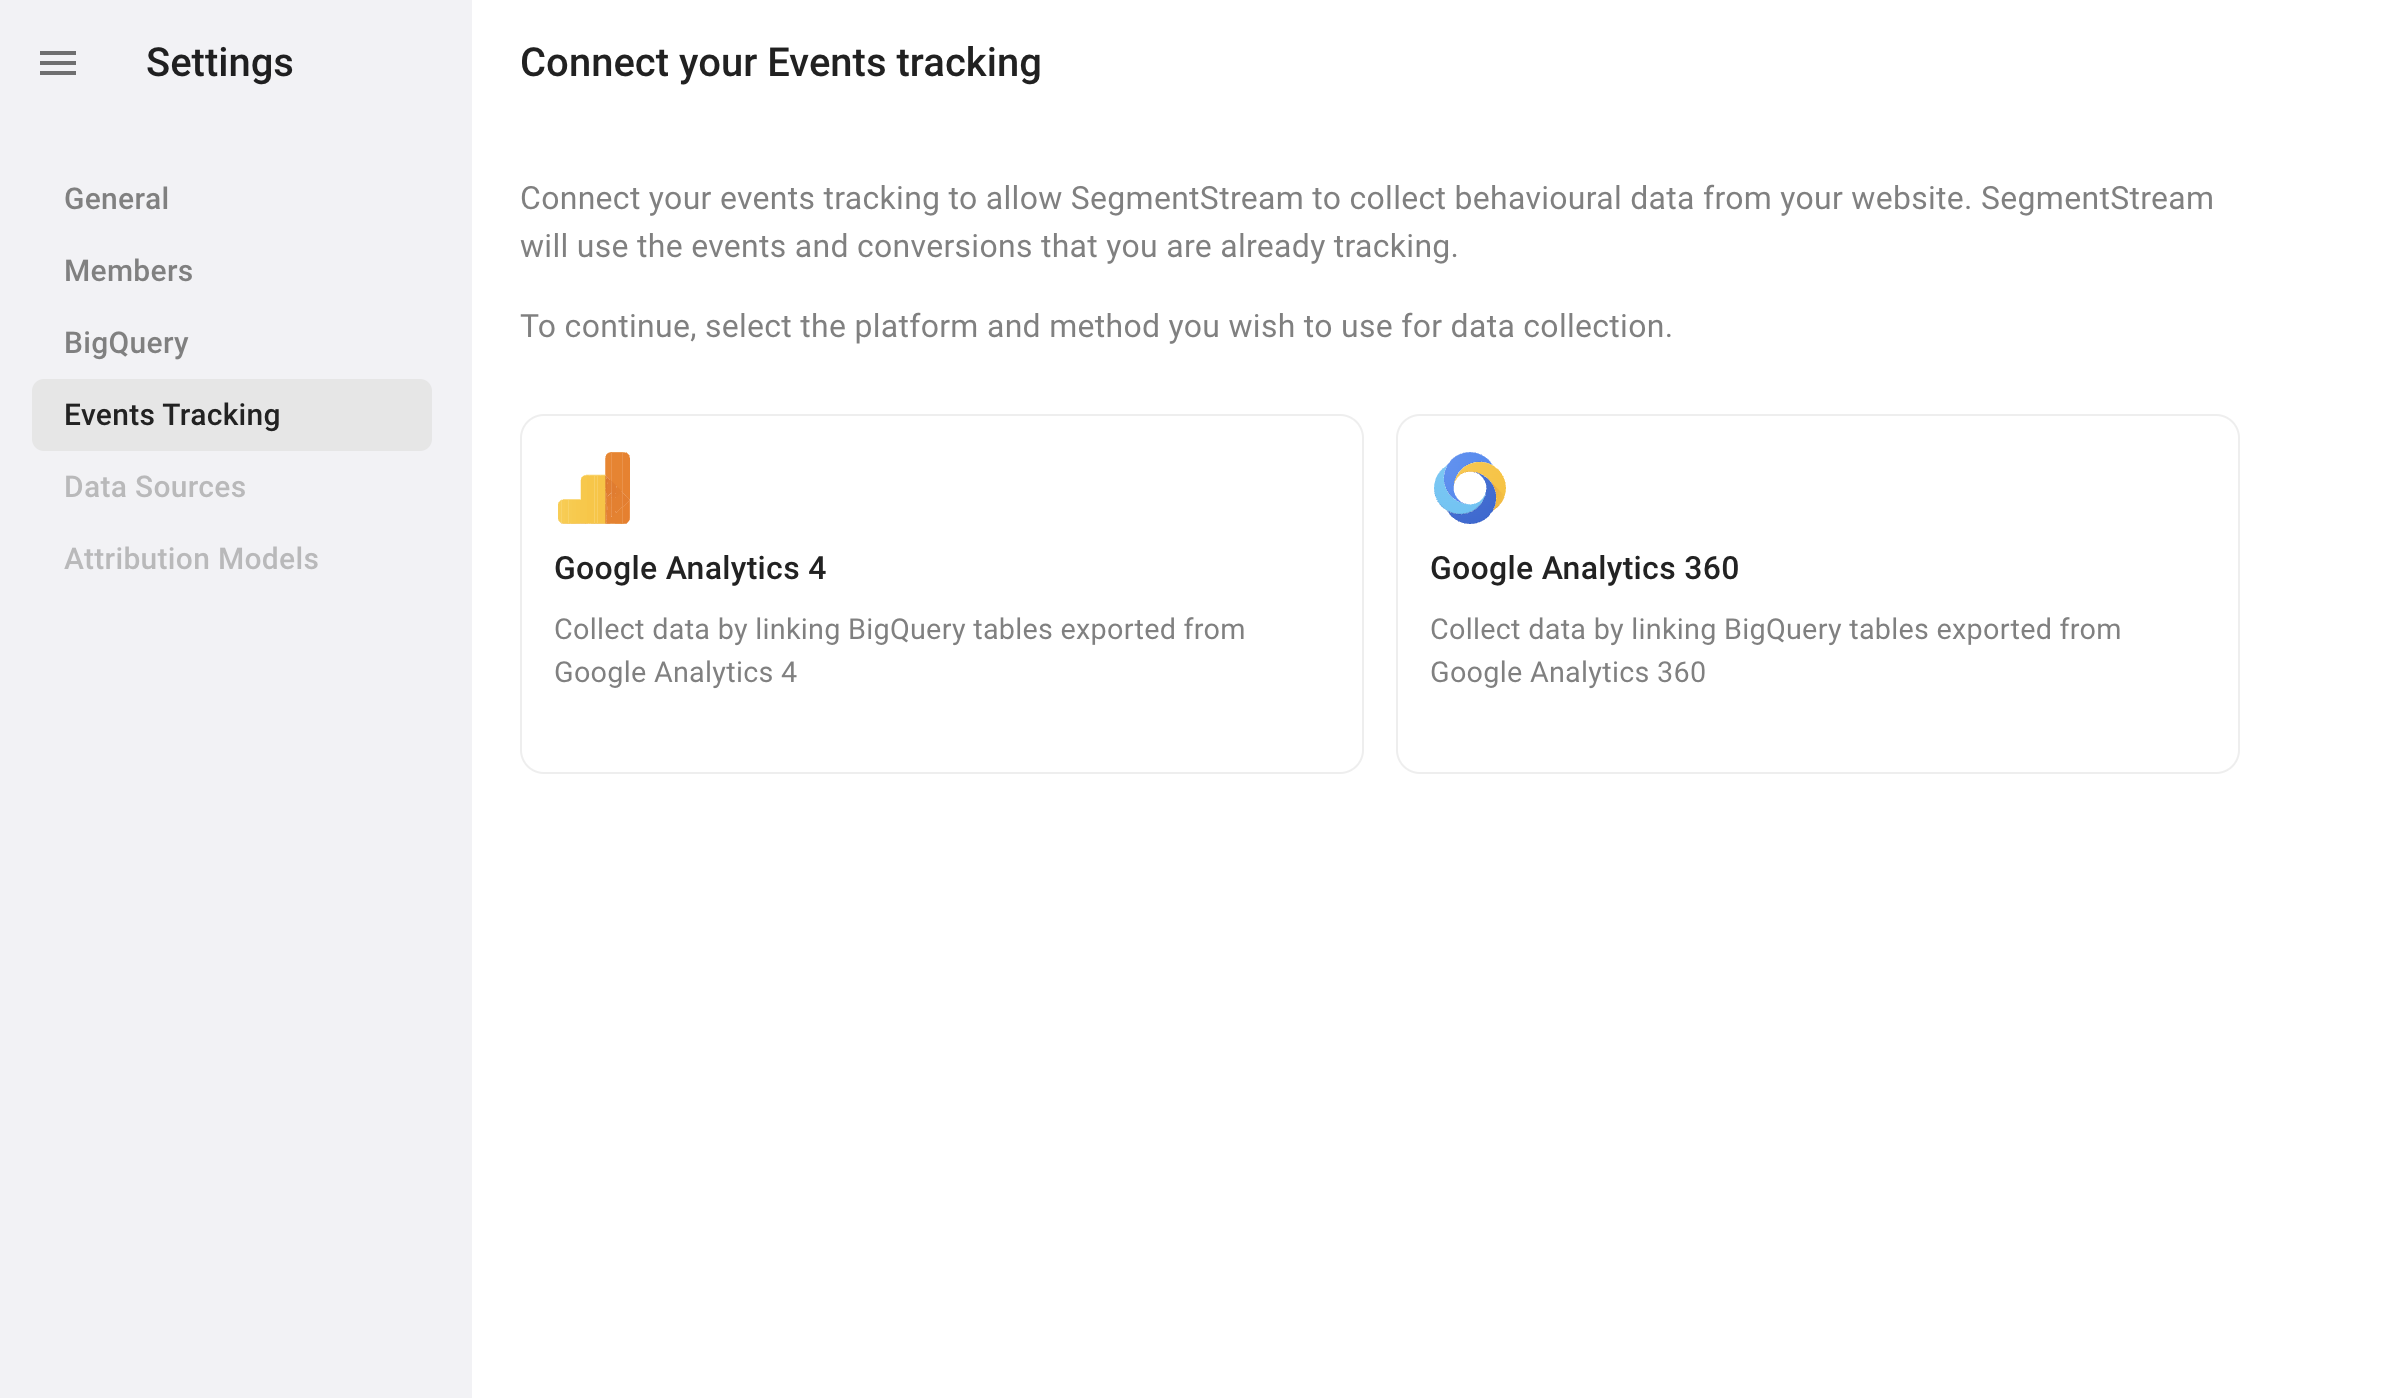
6
Connect advertising platforms
Follow the data sources guide to connect your advertising platforms.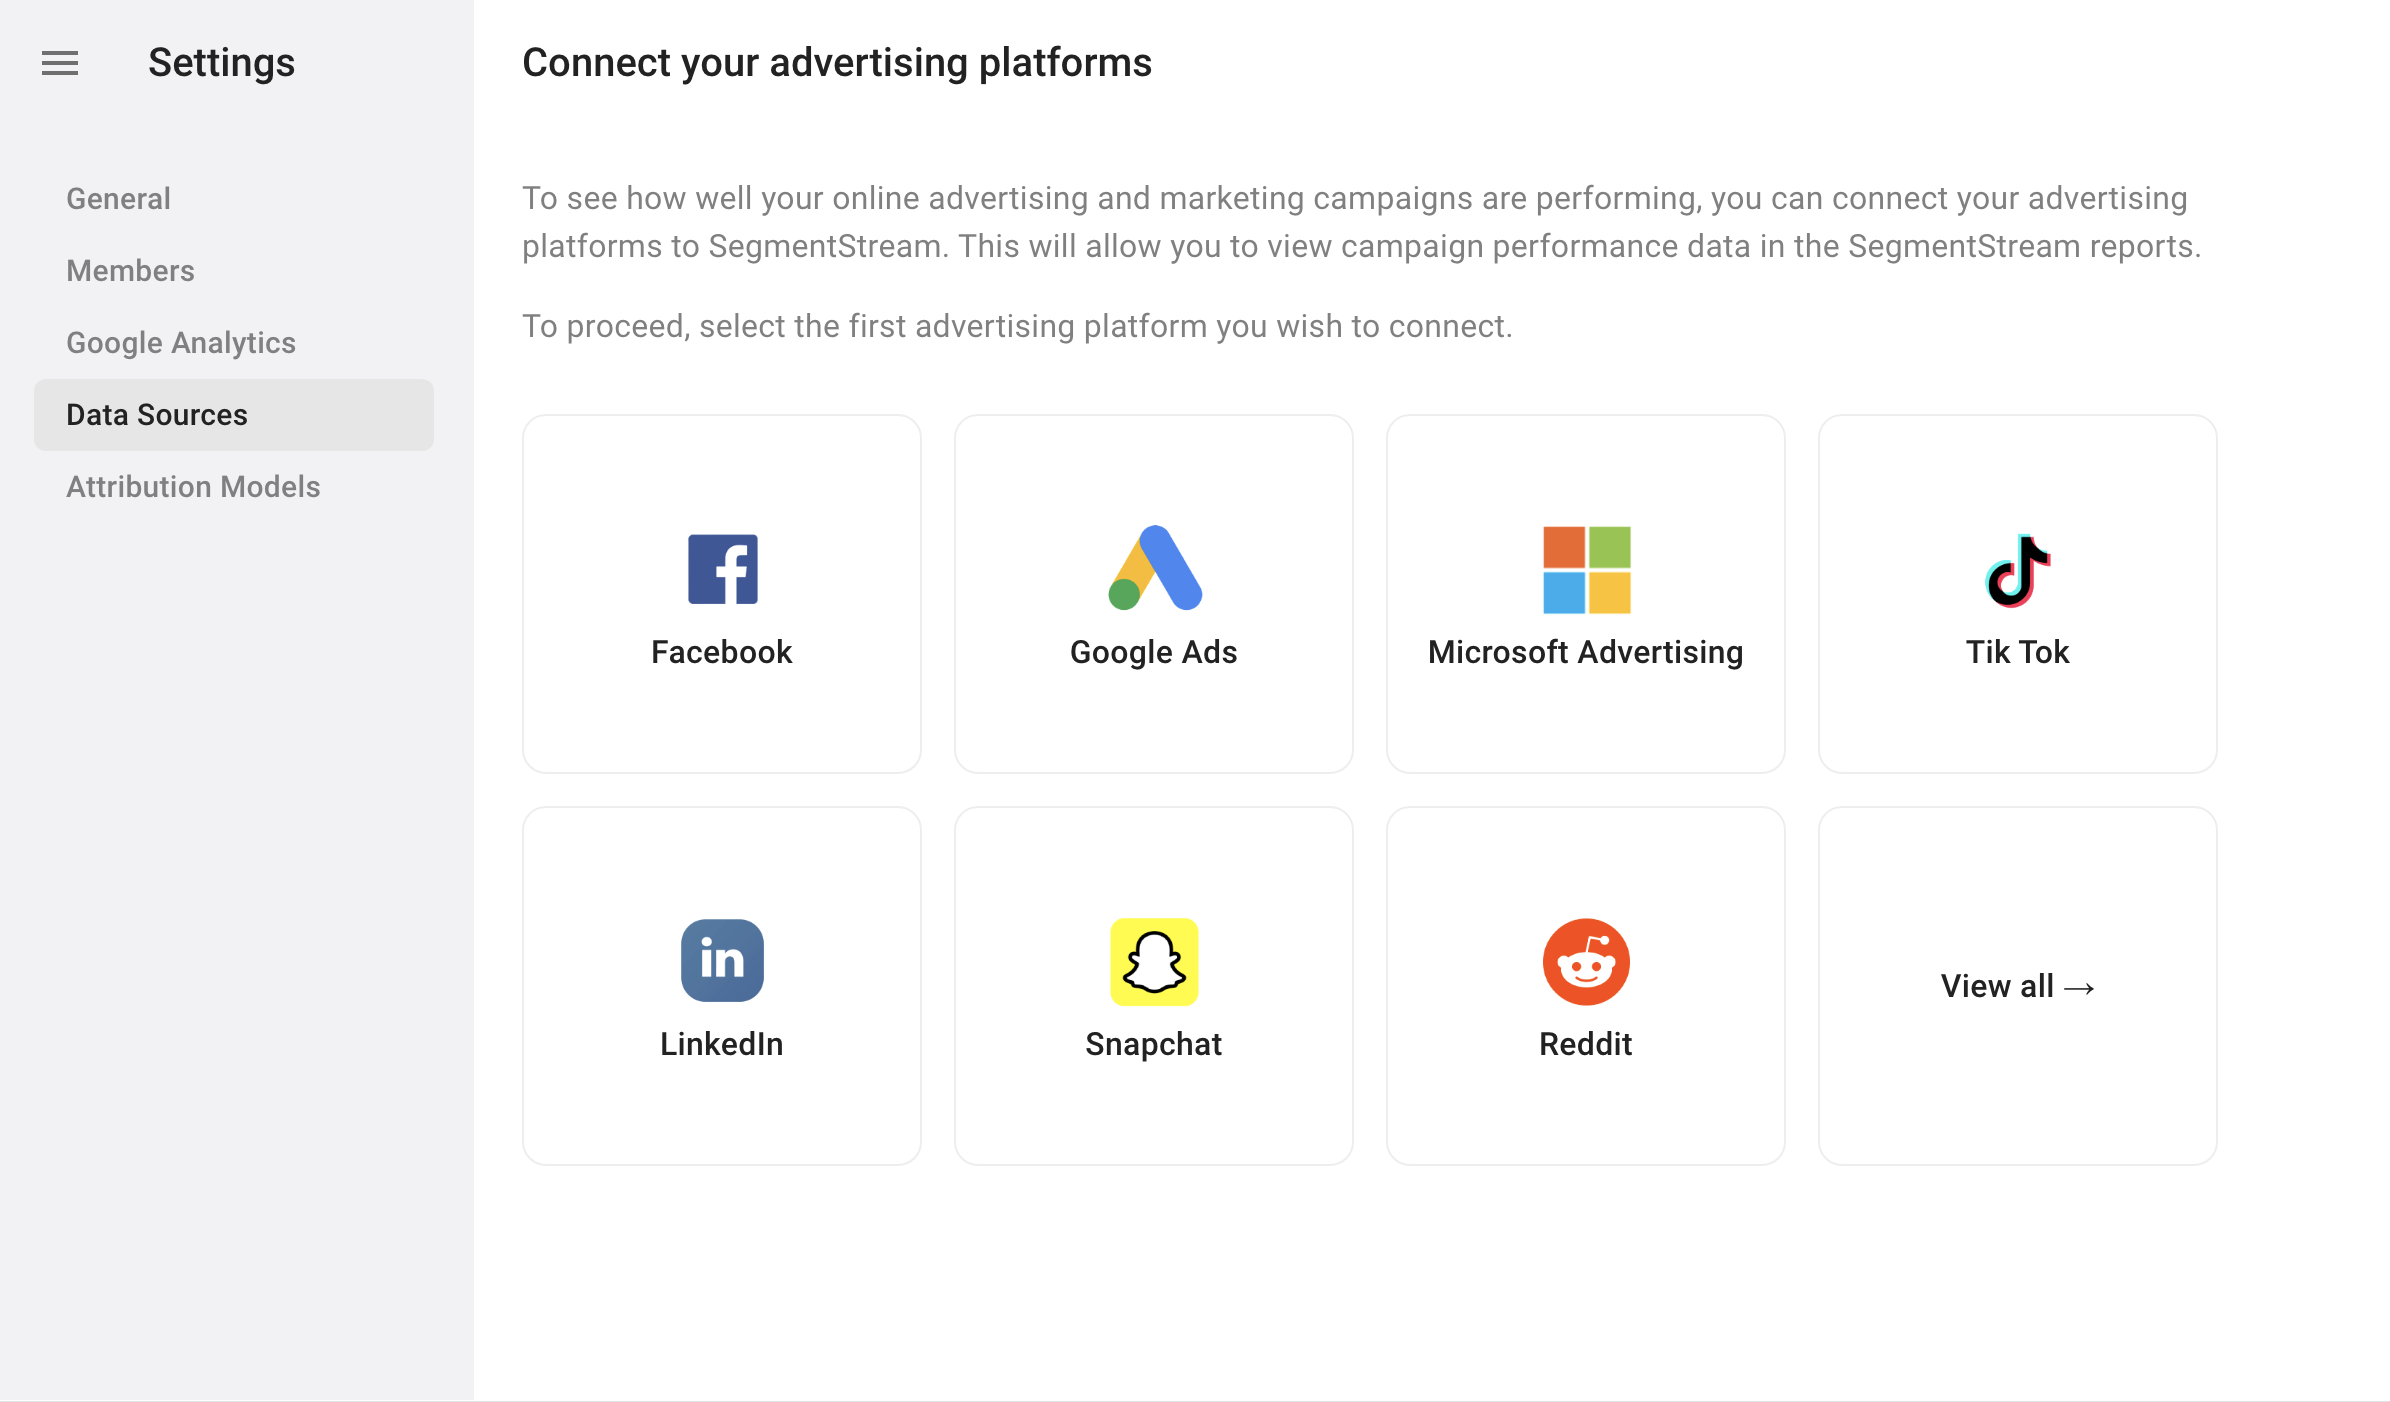
7
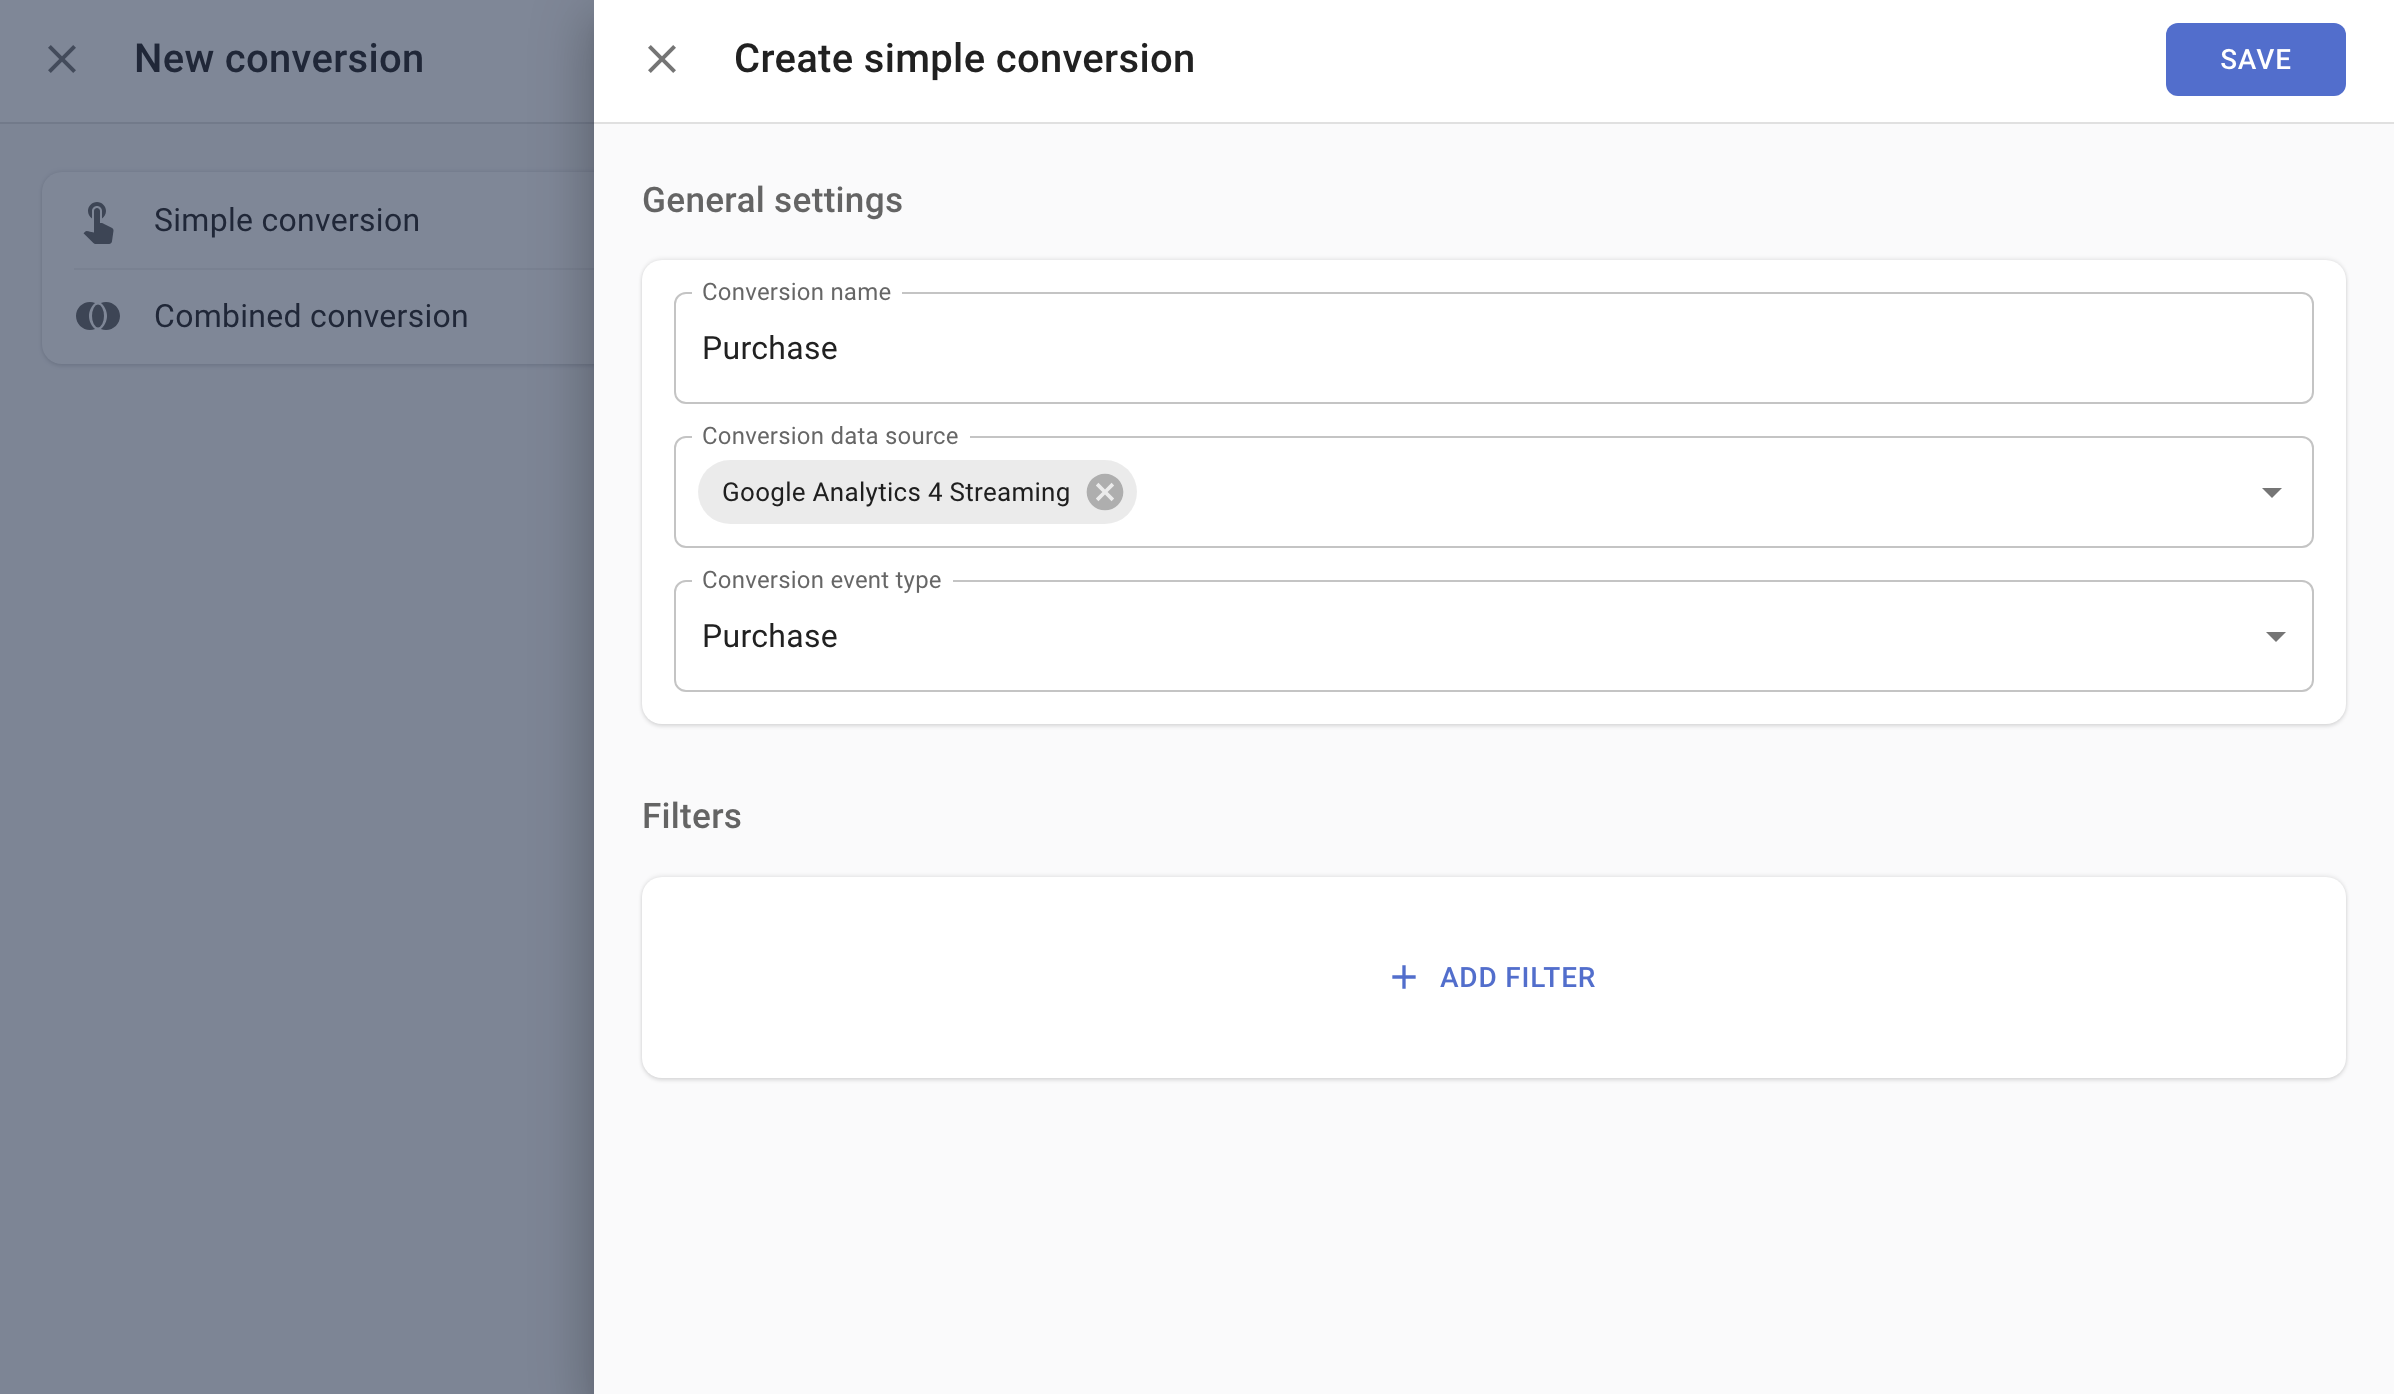
Create conversions
For an e-commerce website, the main conversion is typically the purchase event. To track a purchase conversion based on your GA4 data:
- Navigate to the Conversions page
- Click + ADD and select Simple conversion
- Enter a conversion name (for example, “Purchase”)
- Make sure the Purchase conversion event type is selected
-
Click SAVE
8
Configure attribution reports
Go to the reports page and add the conversion you created to every report. After a full day has passed since event tracking was set up, you will be able to see data on sessions and ad platform costs.Refer to the Attribution documentation to understand how to use reports to their full potential.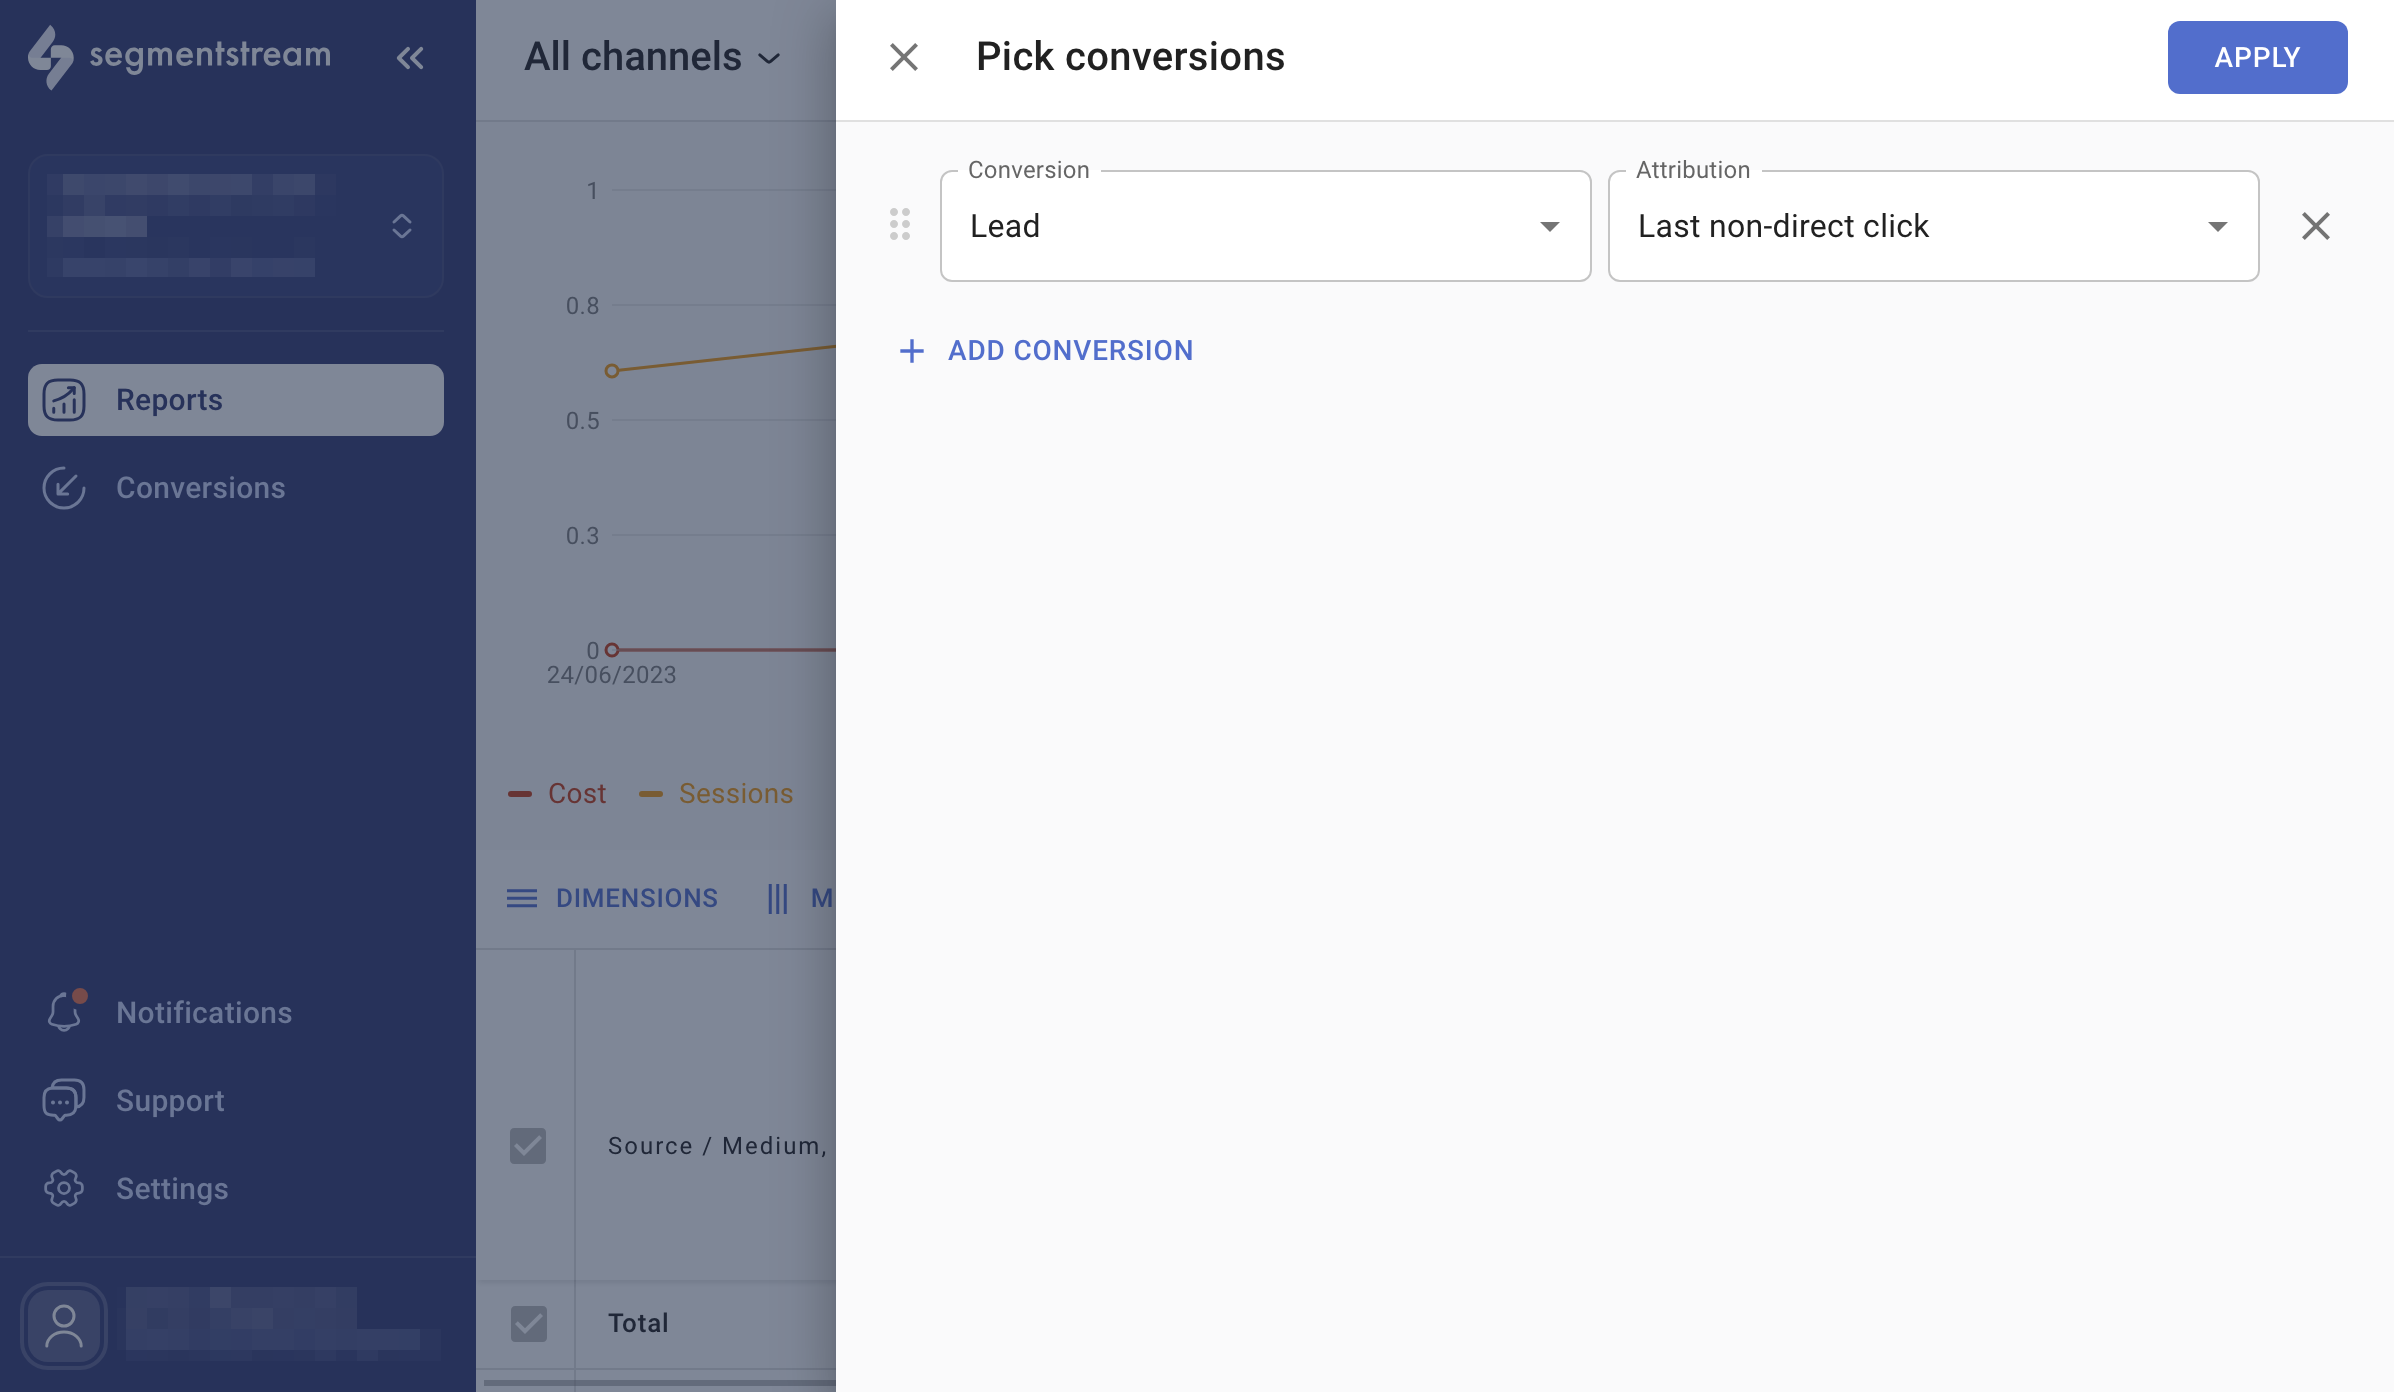
9
Set up your optimization portfolio
Once your data starts flowing, create an optimization portfolio to use the SegmentStream marketing mix optimization tool.Refer to the Optimization documentation for more information.
10
Implement SegmentStream SDK
To improve user stitching and attribution quality, install the SegmentStream SDK. The SDK preserves ad platform click IDs during internal navigation and sends cookieless pings for first-party measurement.Refer to the SDK guide for detailed implementation instructions. If you need help with the setup, contact support.
11
Setup complete
You can now use the portfolio dashboards and reports to make informed decisions on your marketing strategy.