Before you begin
You should have an existing Google account.1. Create a Google Cloud Platform account
BigQuery is a part of Google Cloud Platform. To use BigQuery you need to have a Google Cloud Platform account.1
Navigate to Google Cloud Platform
Go to the Google Cloud Platform page and click Get started for free.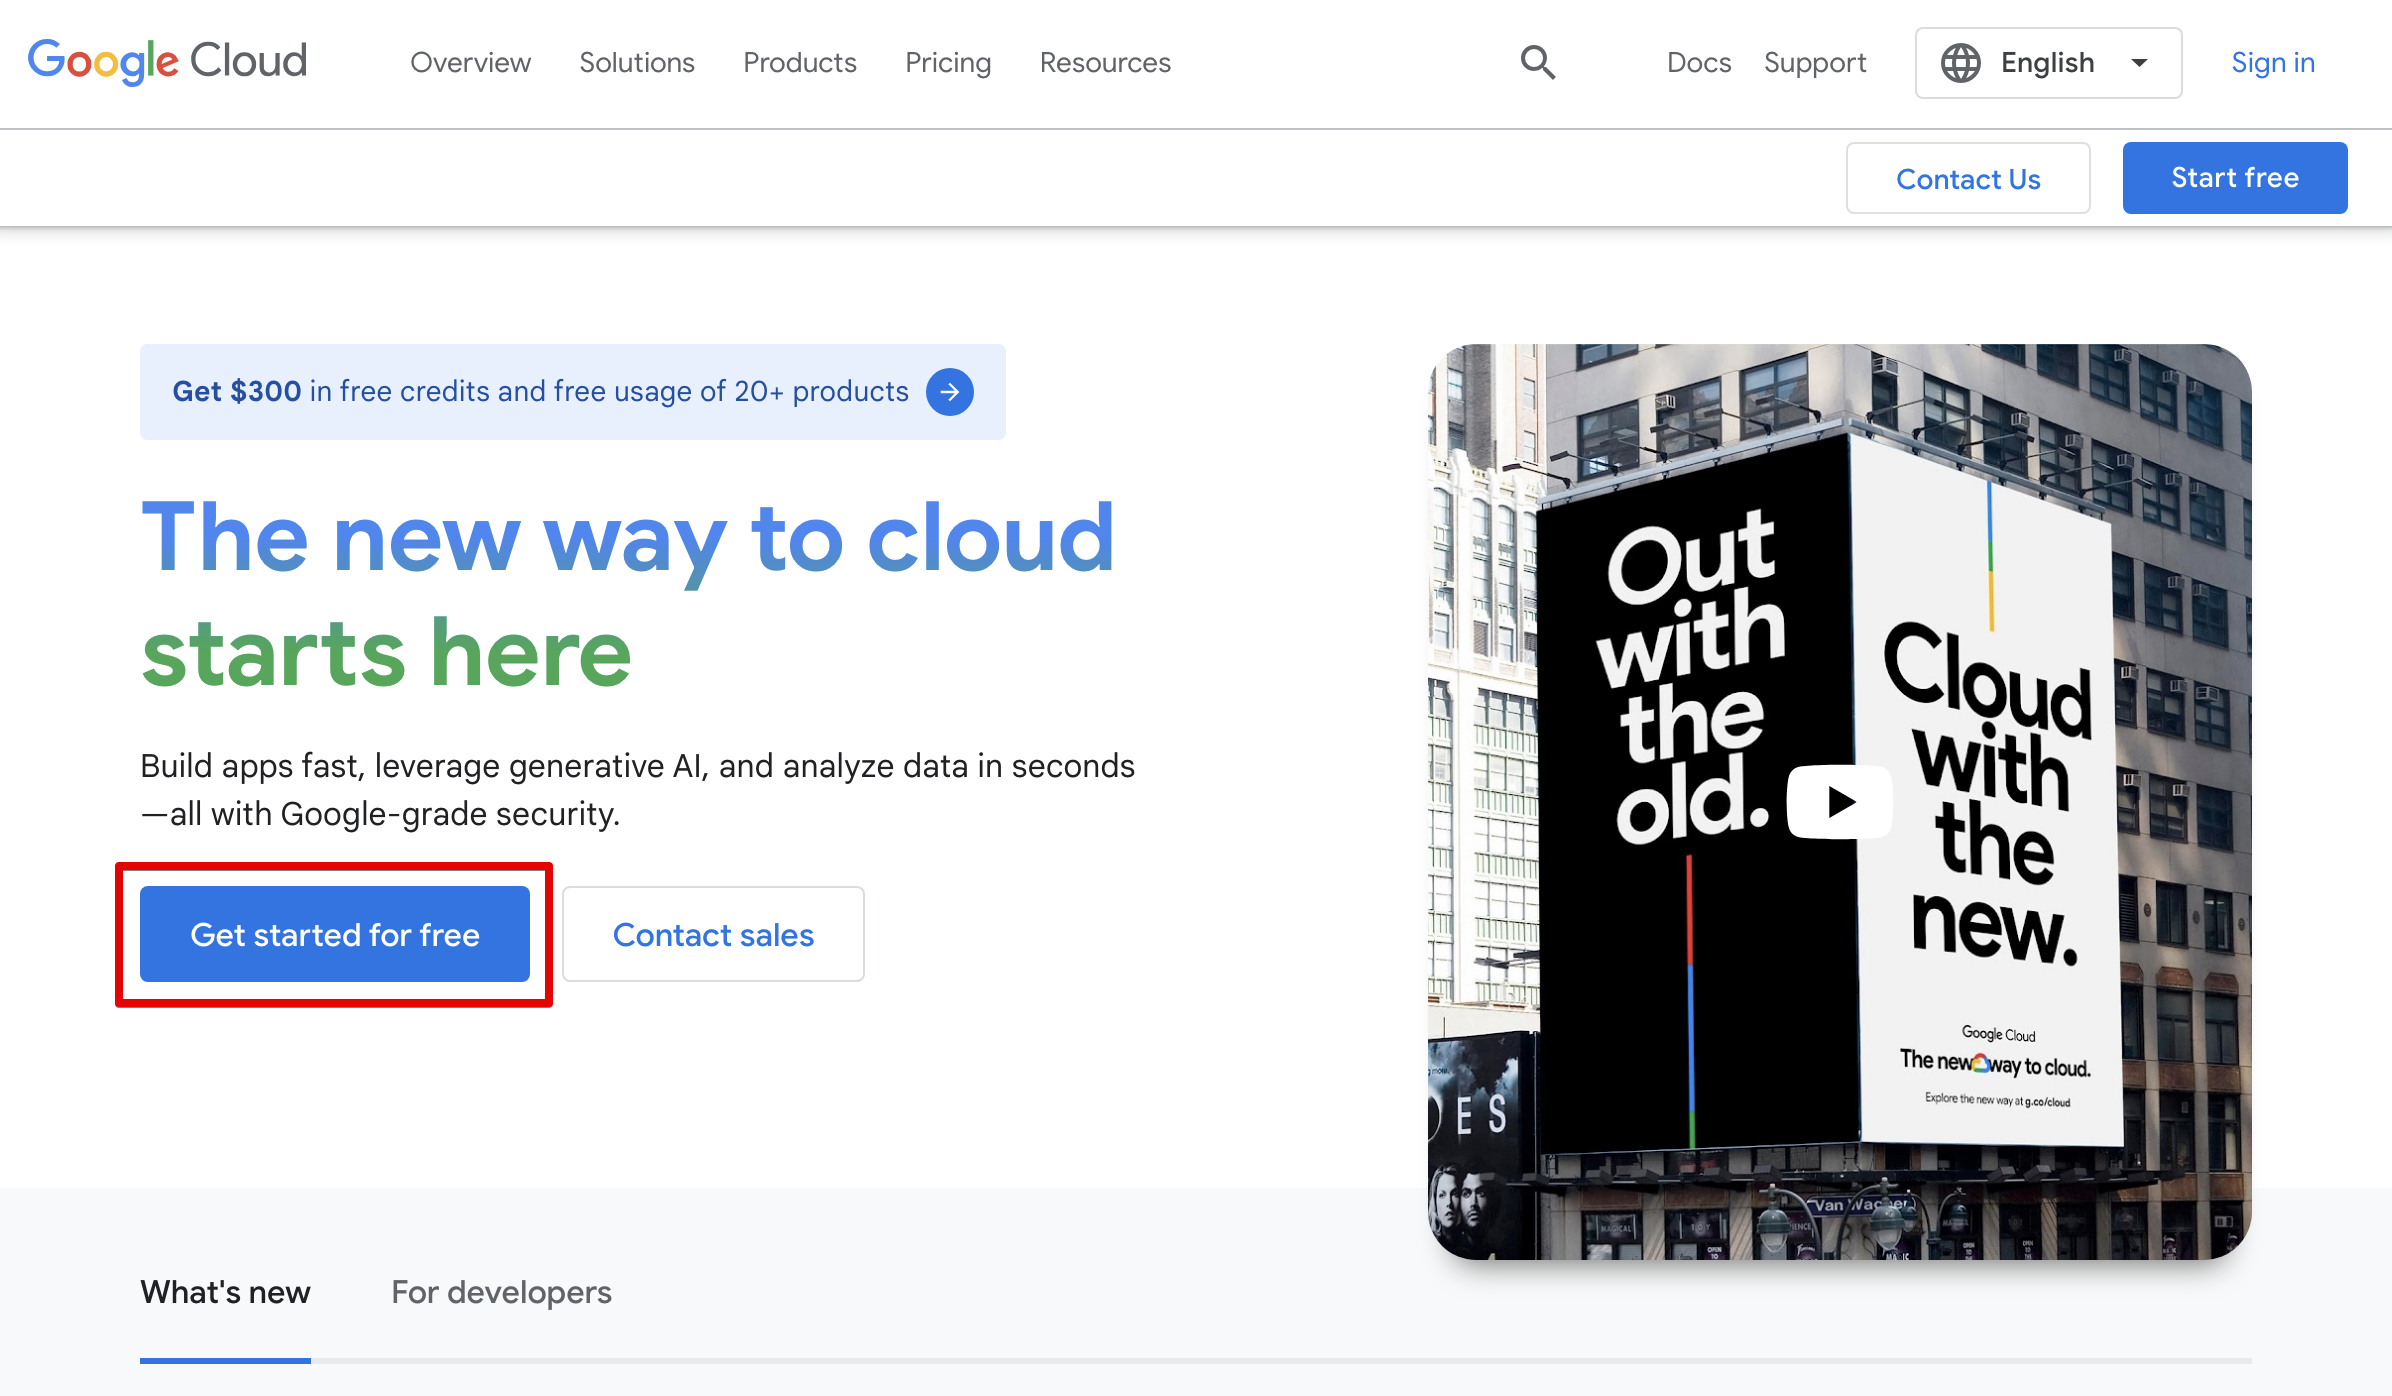
2
Log in to your Google Account
Log in to your Google Account.
3
Complete registration
Fill in the registration form. Provide valid payment details — it’s important, as you need an account with an active payment method to use BigQuery with SegmentStream.
2. Set up a billing account
To use BigQuery with SegmentStream you need an active billing account so that you’ll be able to use Google Cloud Platform resources. Free Tier Google Cloud accounts don’t support some BigQuery services which are required to use SegmentStream.Upgrading a Free Tier account
Go to the main page of your Google Cloud Platform project and click ACTIVATE FULL ACCOUNT.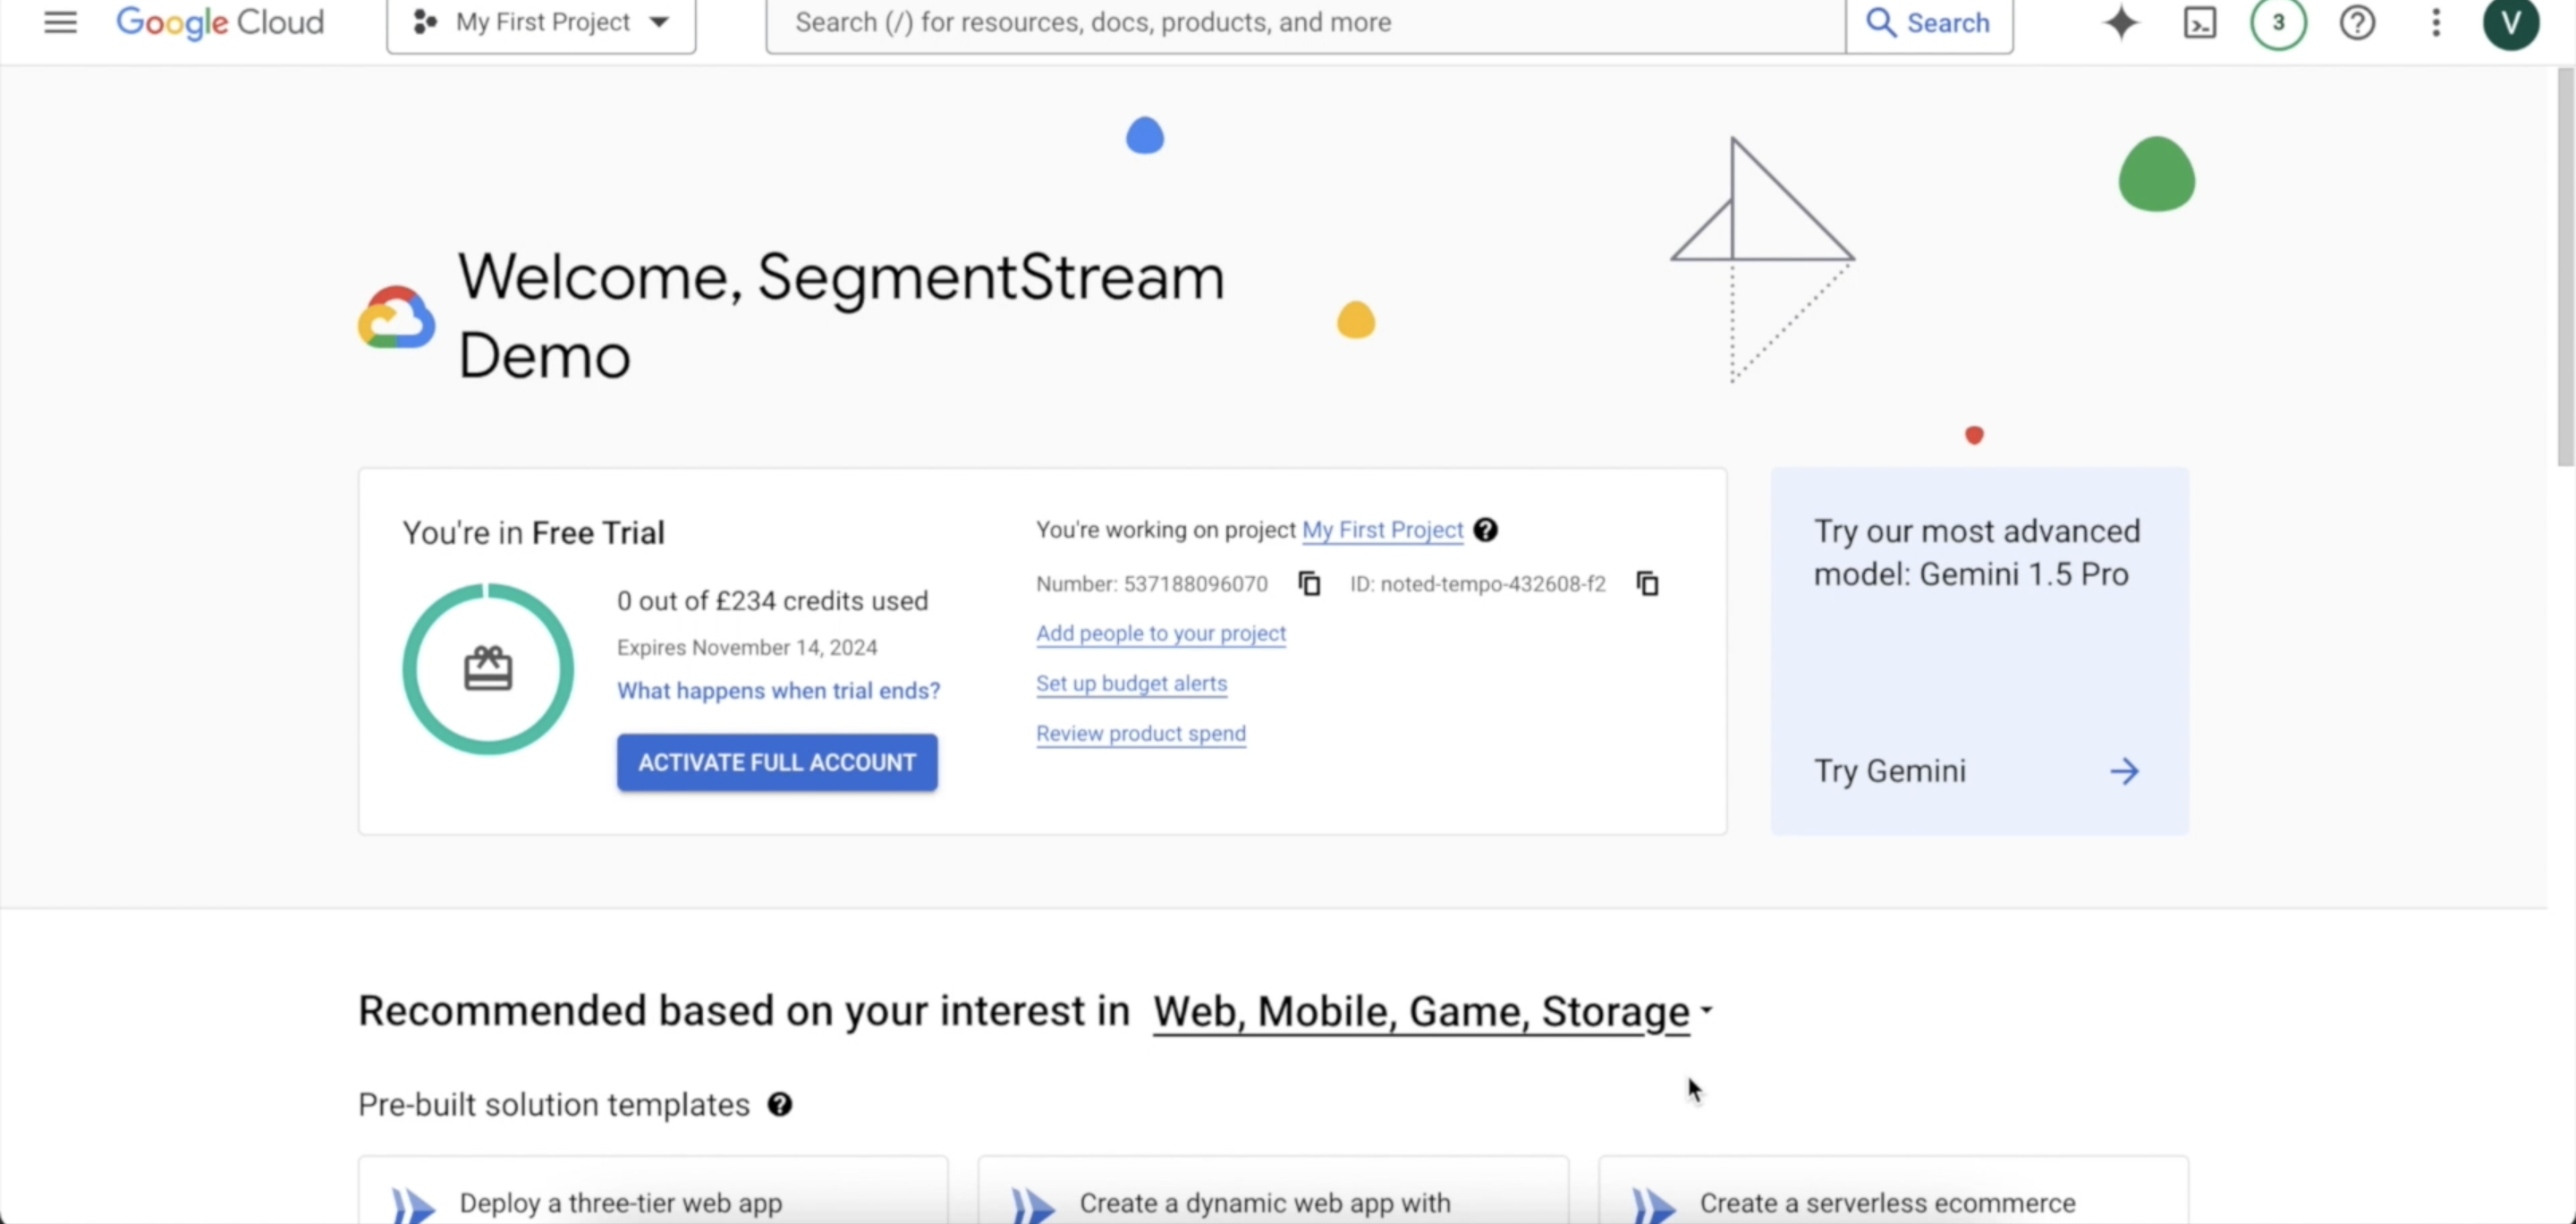
Checking billing account status
If you don’t have an ACTIVATE FULL ACCOUNT button on the main project page, check that you have an active billing account with a valid payment method:1
Go to billing
Go to the Google Cloud Platform Billing page.
2
Check billing accounts
Check that you have at least one billing account with active status.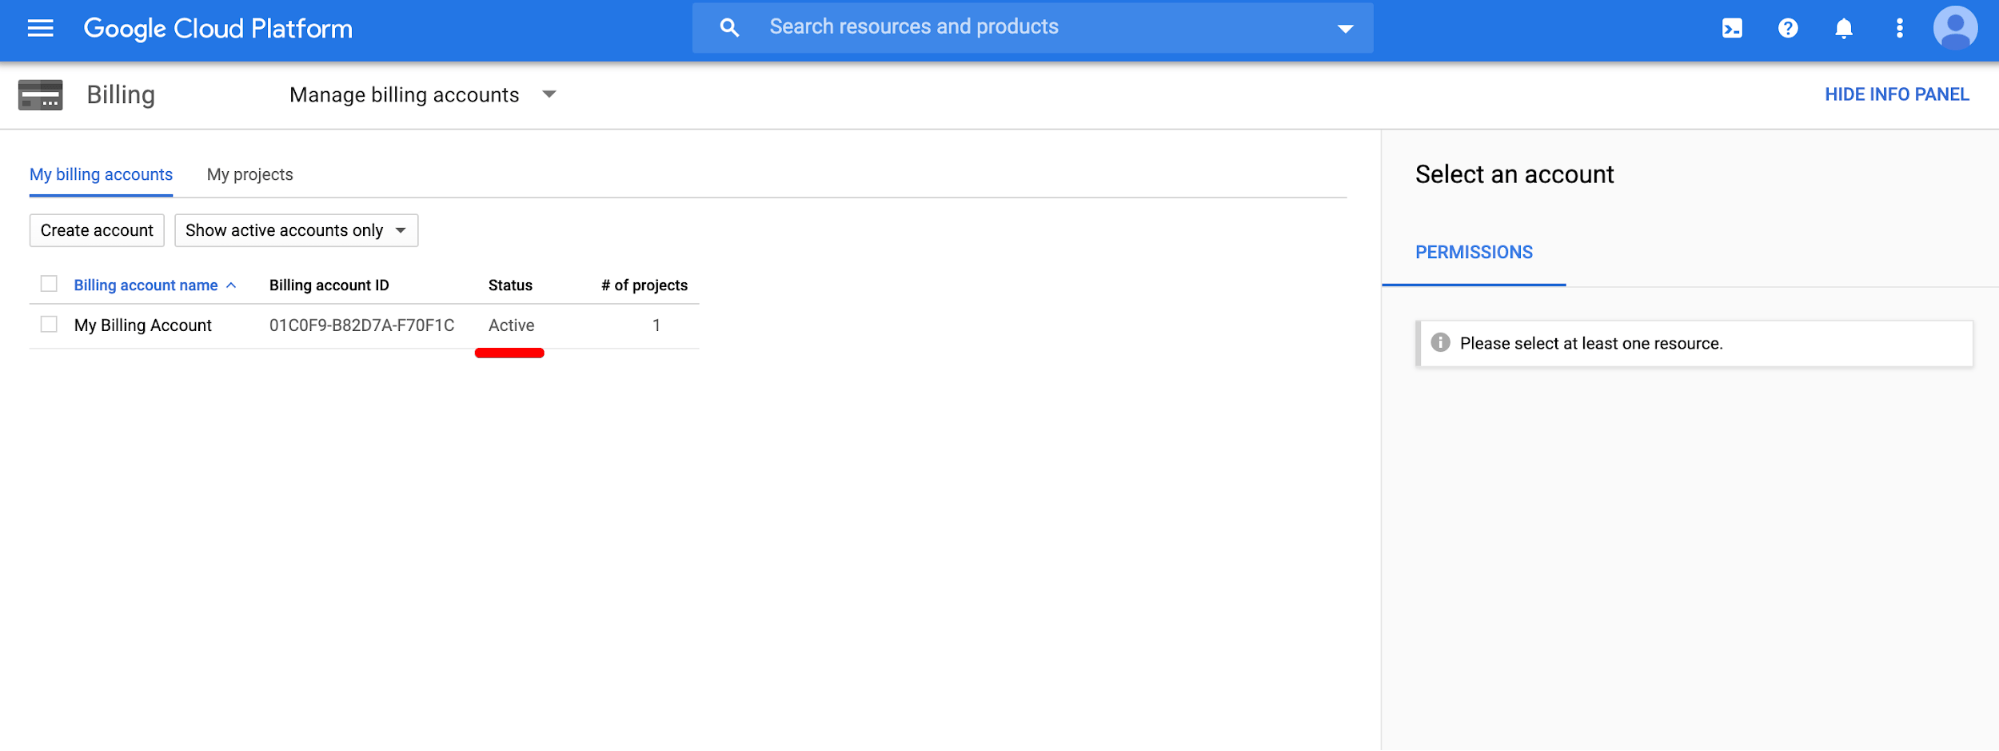
3
Link billing to project
Click on MY PROJECTS, and confirm that the billing account is linked to the project that you want to connect with SegmentStream. If it isn’t linked, click the “more icon” then Change billing to link an active billing account.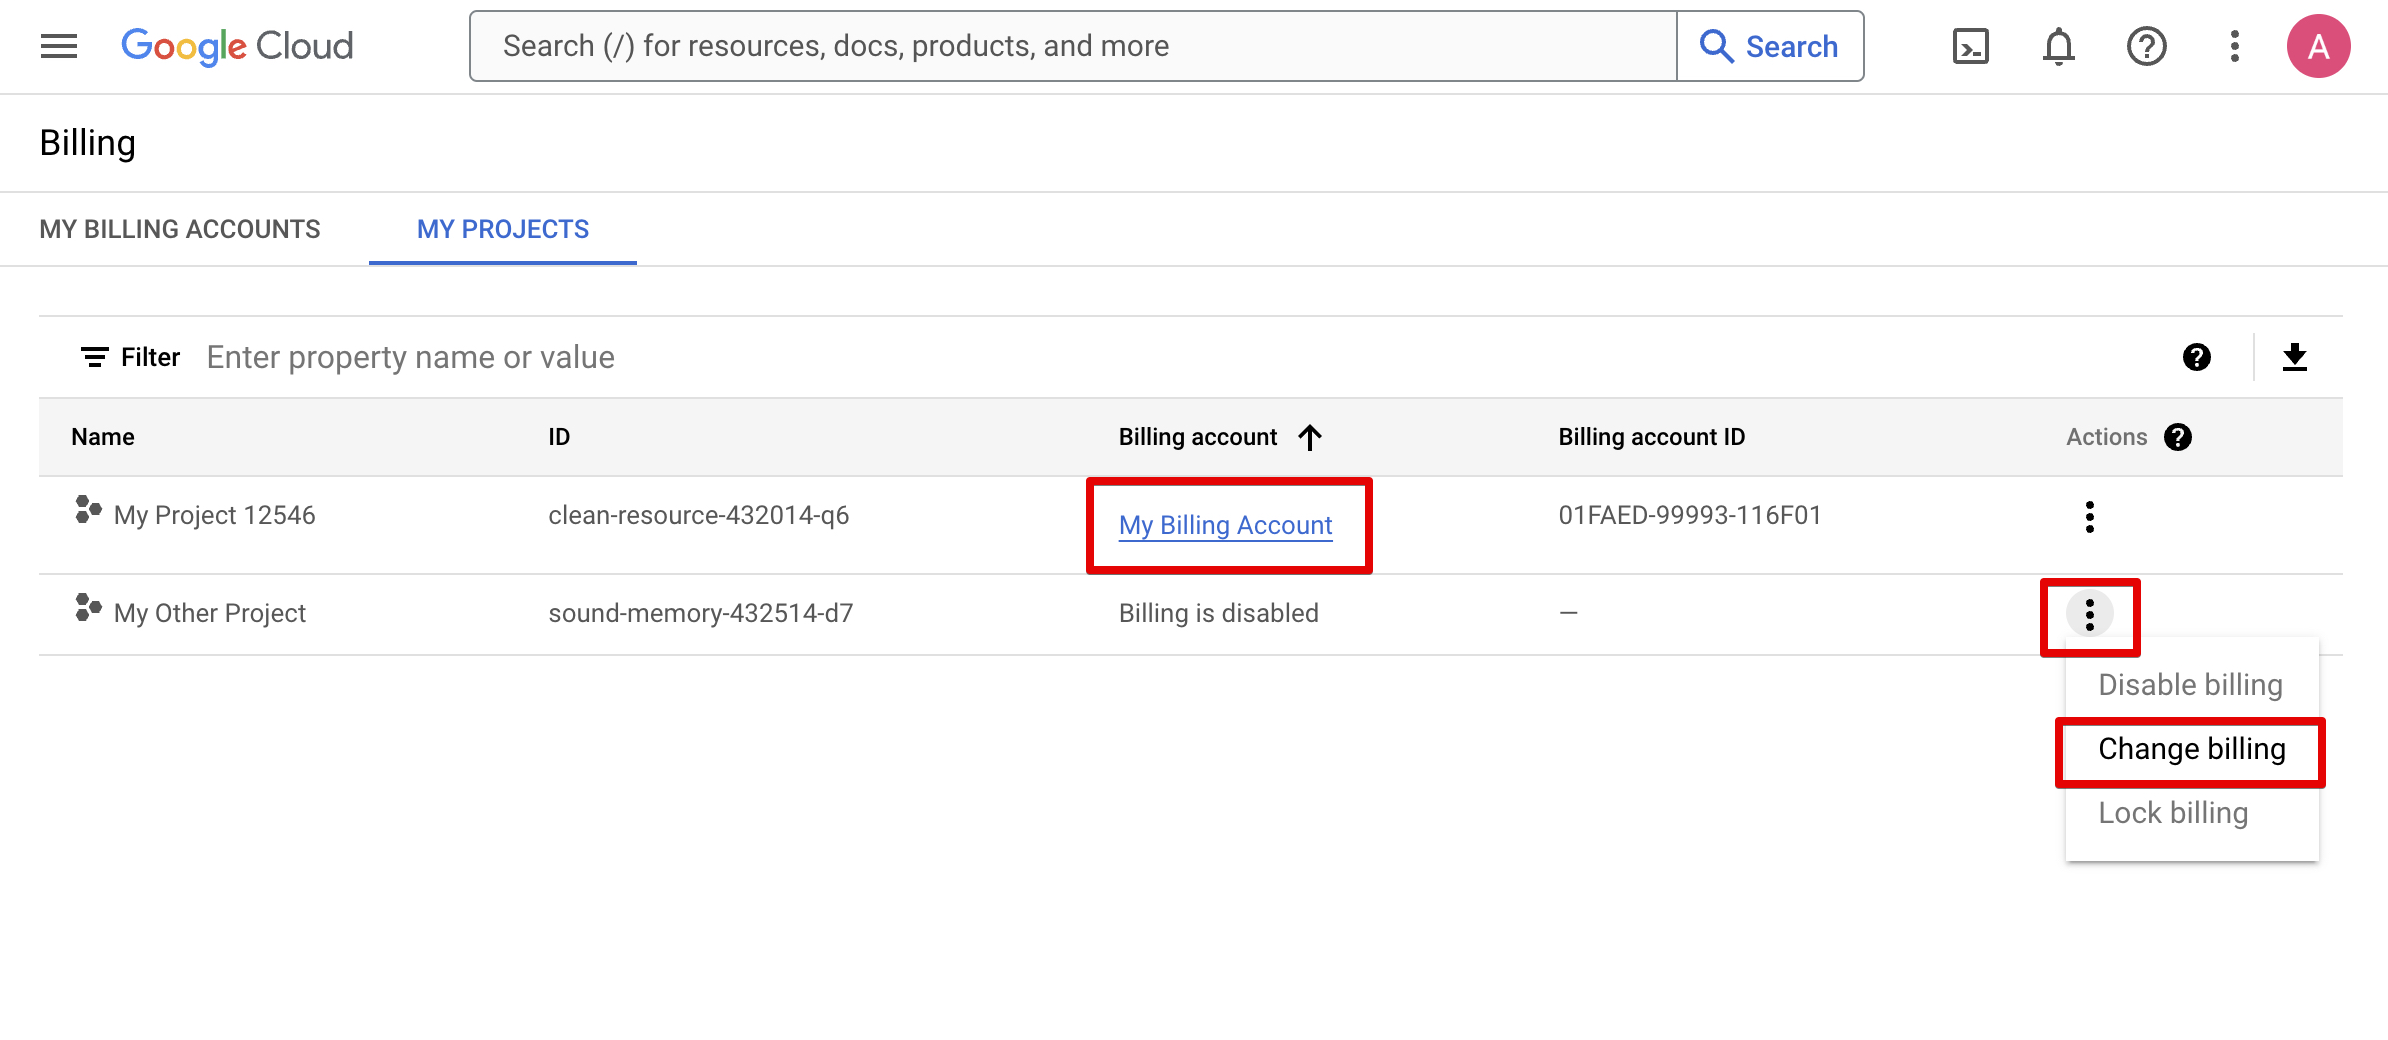
4
Verify account status
Click on the account name and follow instructions to set the status to active if it is different.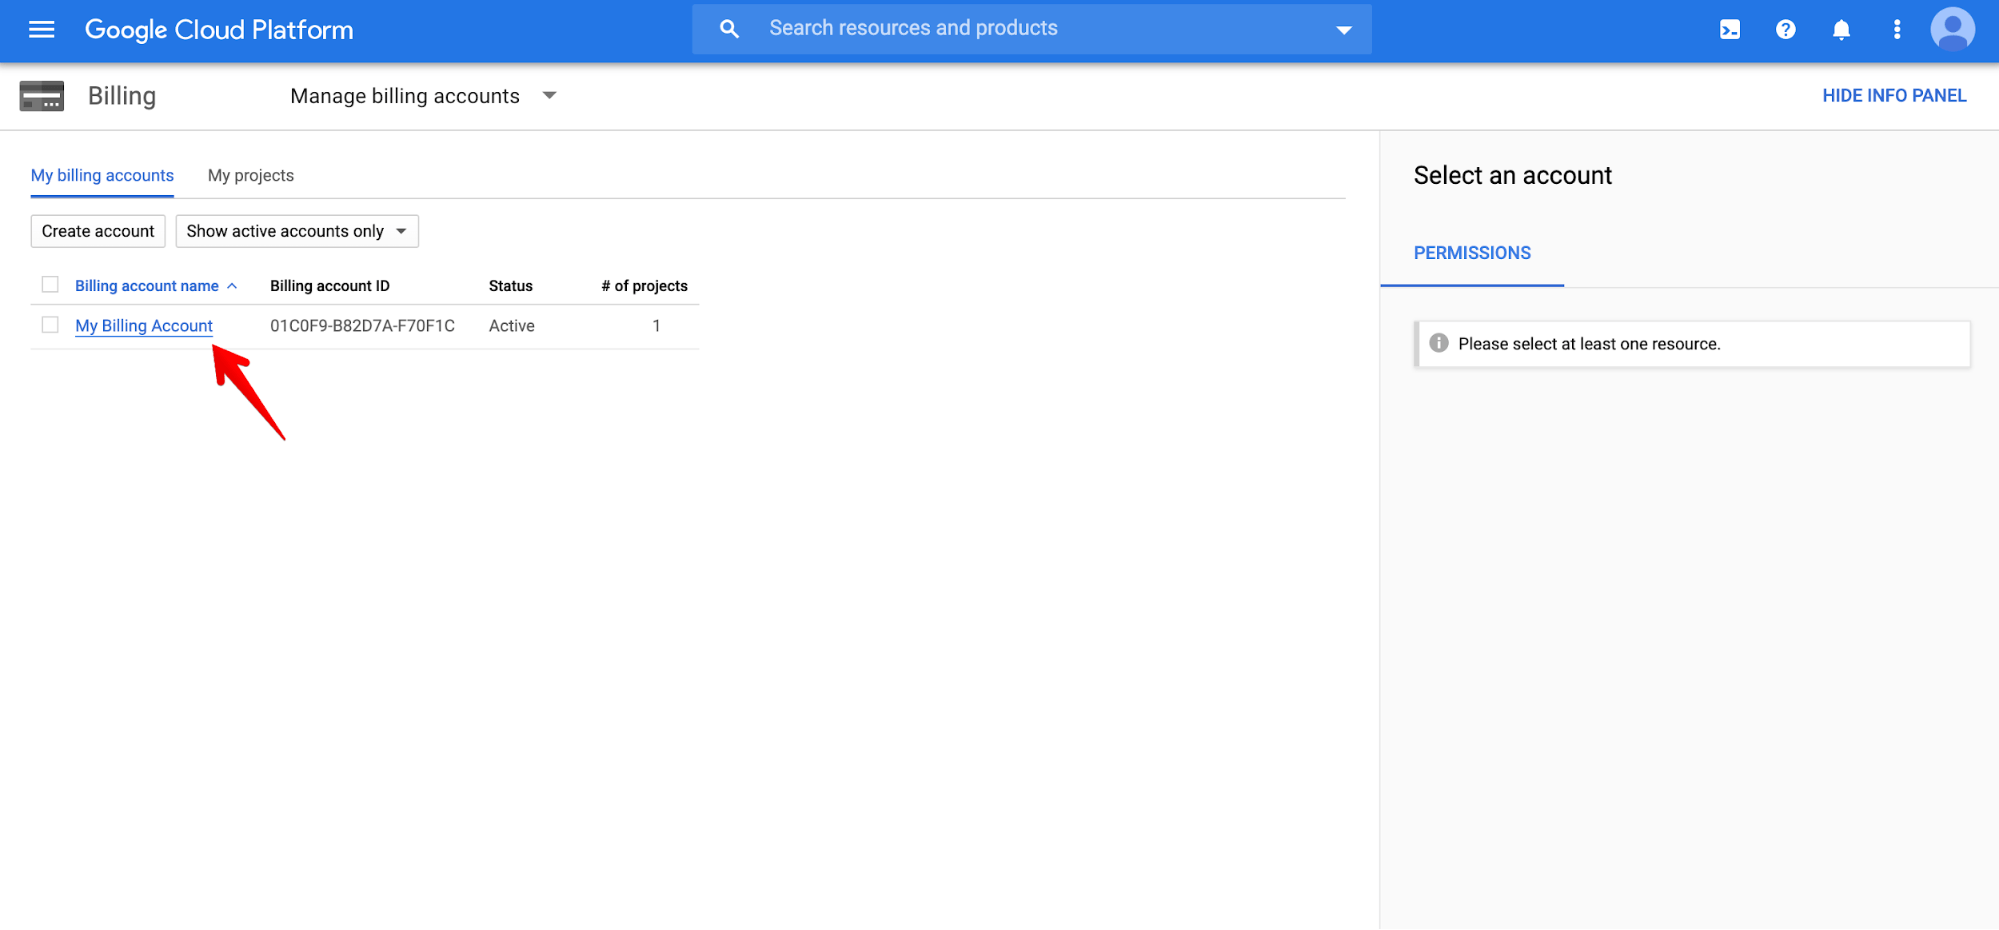
5
Validate payment info
Validate your payment info (1) and check that you don’t have any critical (red) billing health check issues (2).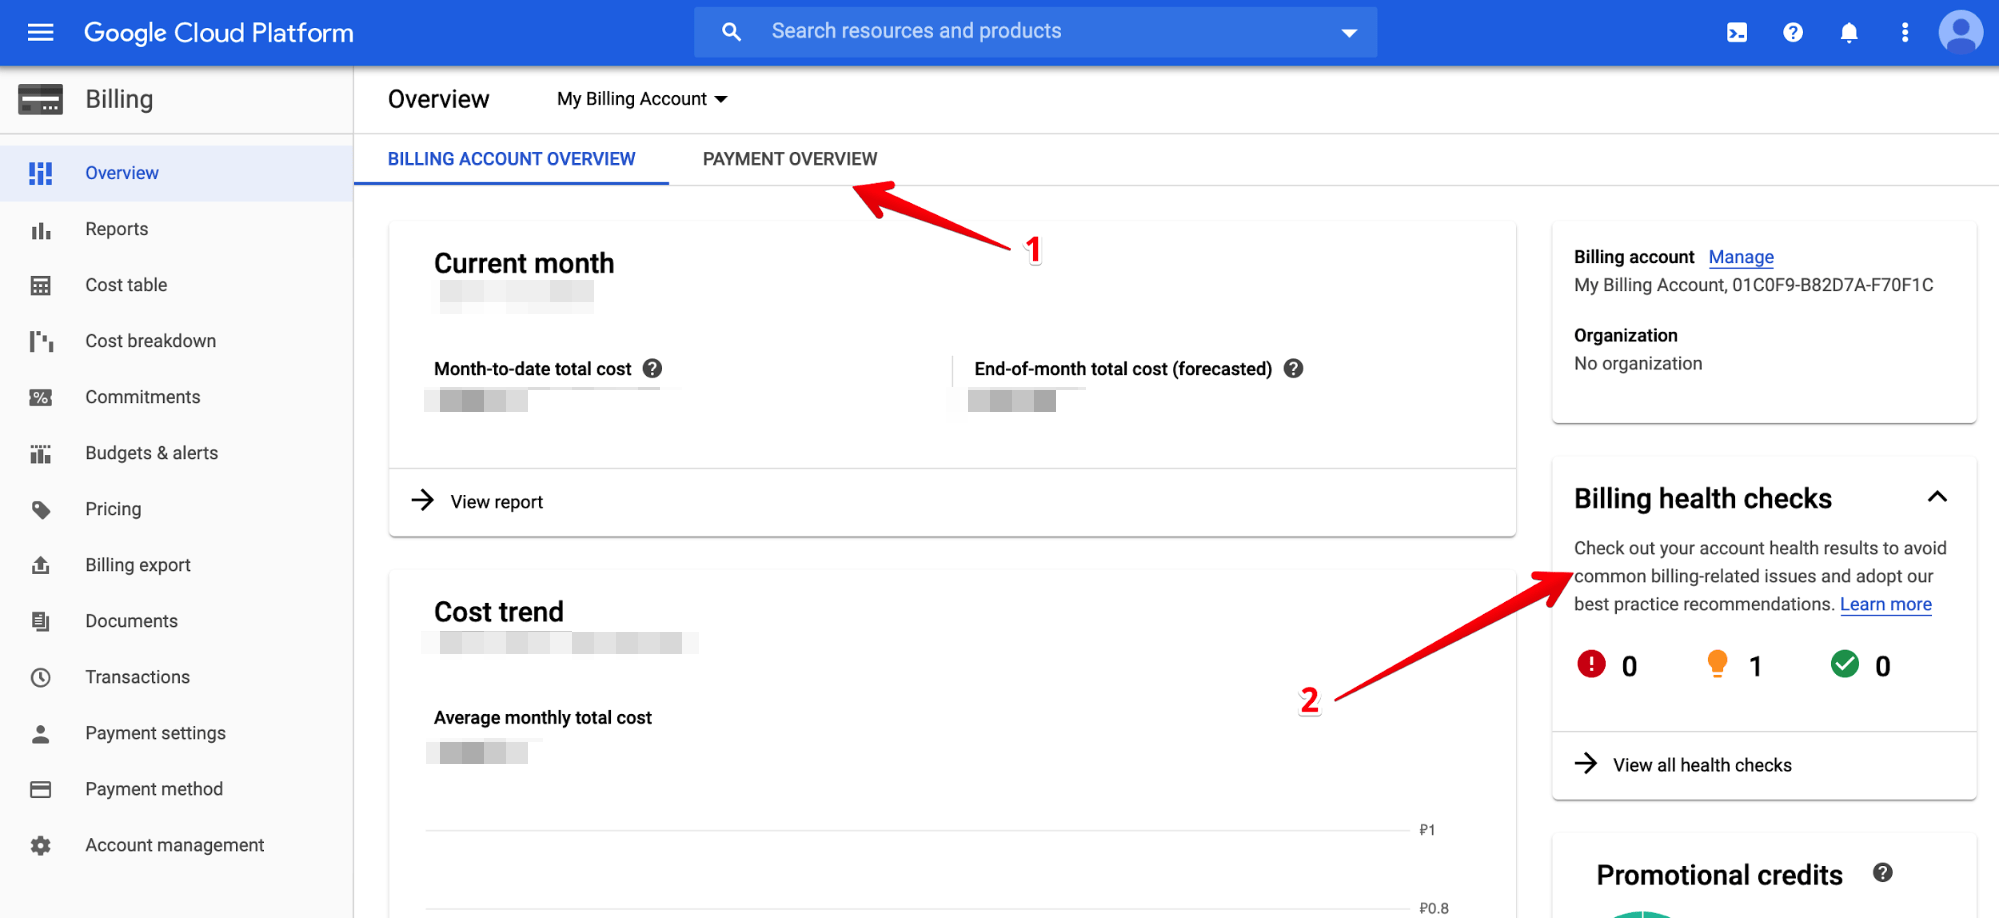
3. Create a Google Cloud project
1
Navigate to Manage resources
Navigate to the Manage resources page in the Google Cloud console.
2
Select organisation
On the Select organisation drop-down list at the top of the page, select the organisation resource in which you want to create a project. If you are a free trial user, skip this step, as this list does not appear.
3
Create the project
Click Create Project. In the New Project window that appears, enter a project name and select a billing account as applicable.
4
Set parent organisation
Enter the parent organisation or folder resource in the Location box. That resource will be the hierarchical parent of the new project. If No organisation is an option, you can select it to create your new project as the top level of its own resource hierarchy.
5
Finish creation
When you’re finished entering new project details, click Create.
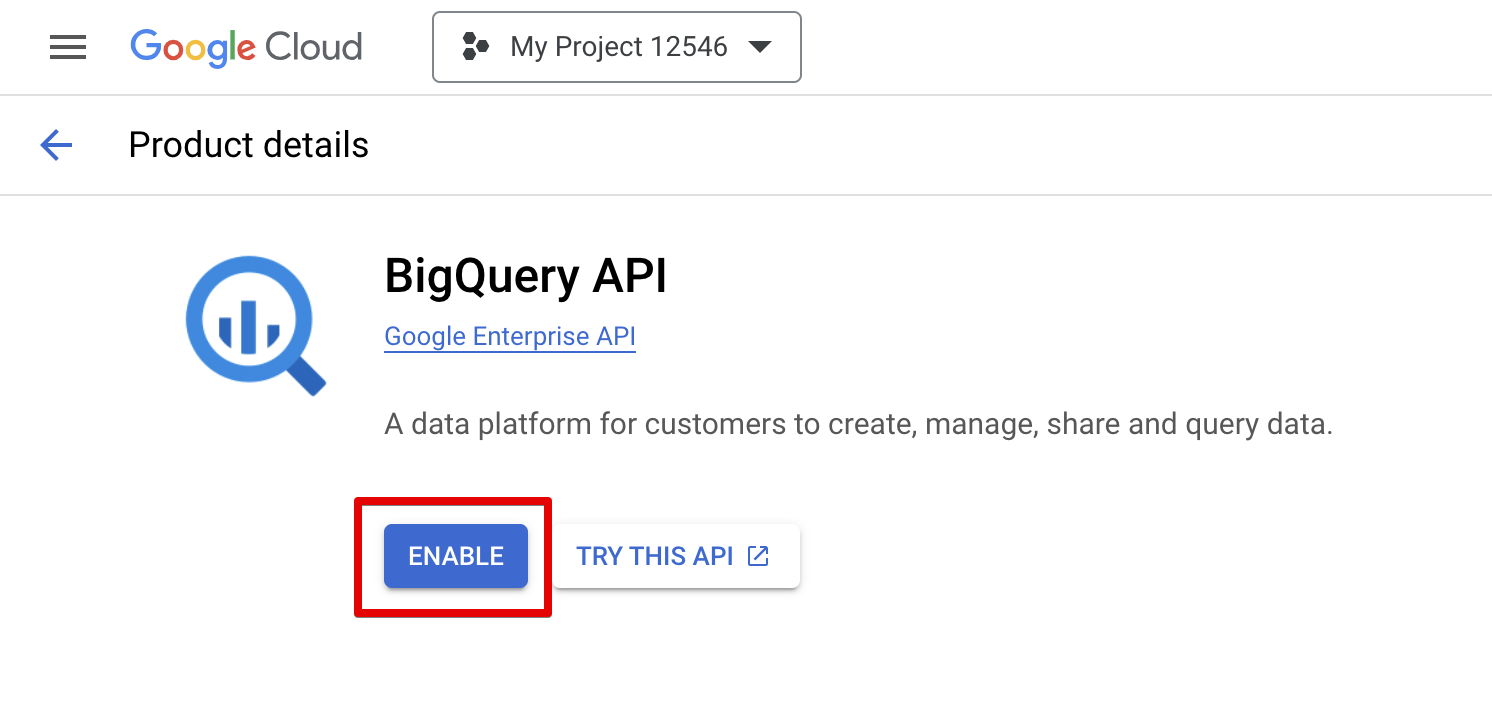
Before continuing, please ensure that your Google Cloud project has the BigQuery API enabled by navigating to the BigQuery API page and clicking “ENABLE” if it isn’t already.