> ## Documentation Index
> Fetch the complete documentation index at: https://docs.segmentstream.com/llms.txt
> Use this file to discover all available pages before exploring further.
# Getting started
> Connect your AI tool to SegmentStream MCP in under a minute.
SegmentStream MCP is a self-contained server with built-in measurement skills. Connect your AI tool using the server URL — authentication is handled automatically via OAuth.
## Prerequisites
1. **A SegmentStream account** with access to at least one project
2. **An MCP-compatible AI tool** — Claude.ai, Claude Code, Claude Cowork, Claude Desktop, Codex, Cursor, VS Code, or Windsurf
## Setup by tool
The fastest way to get started. Once connected in claude.ai, the connection is automatically available in Claude Code, Claude Desktop, and Cowork — no additional setup needed.
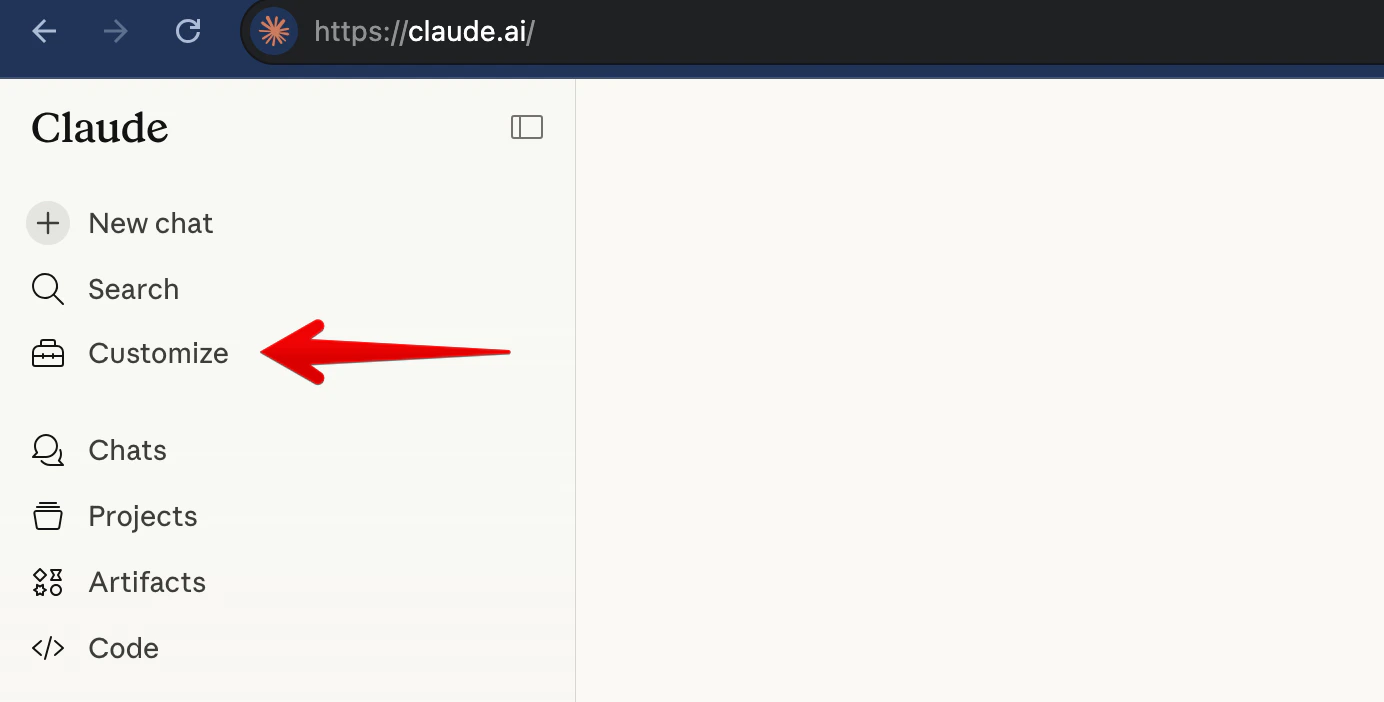
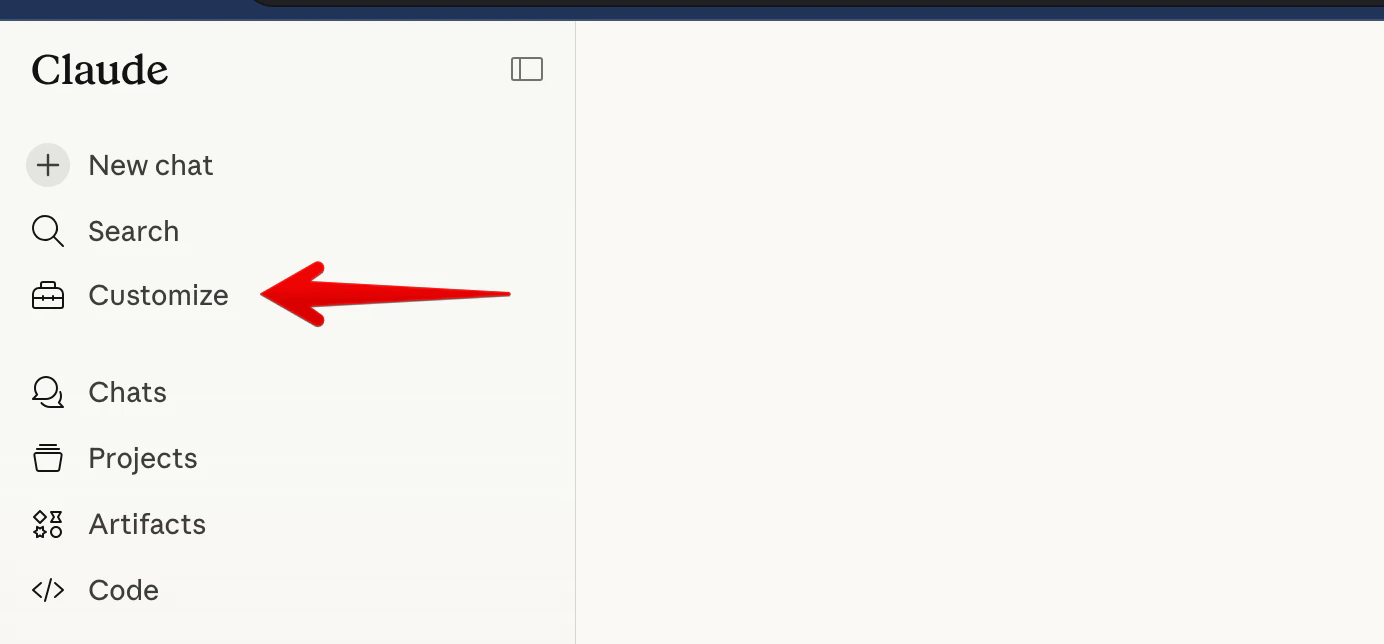
Go to [claude.ai](https://claude.ai) and click **Customize** in the left sidebar.
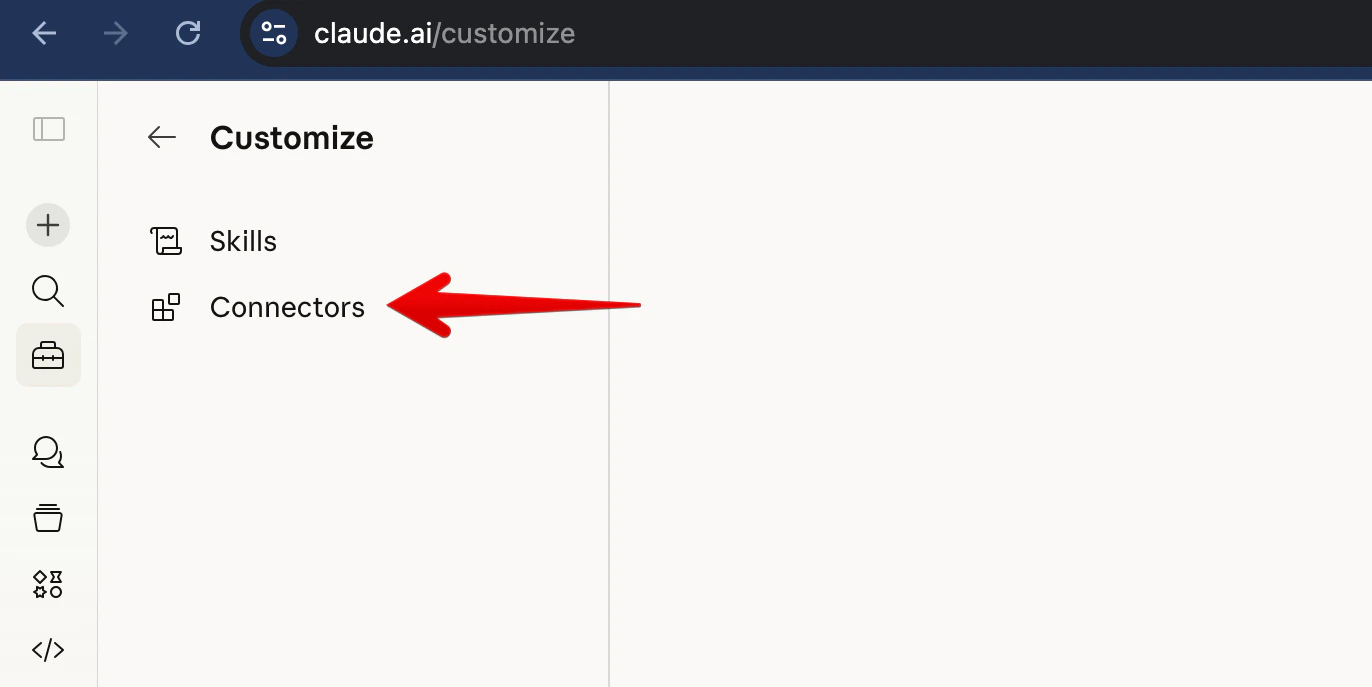
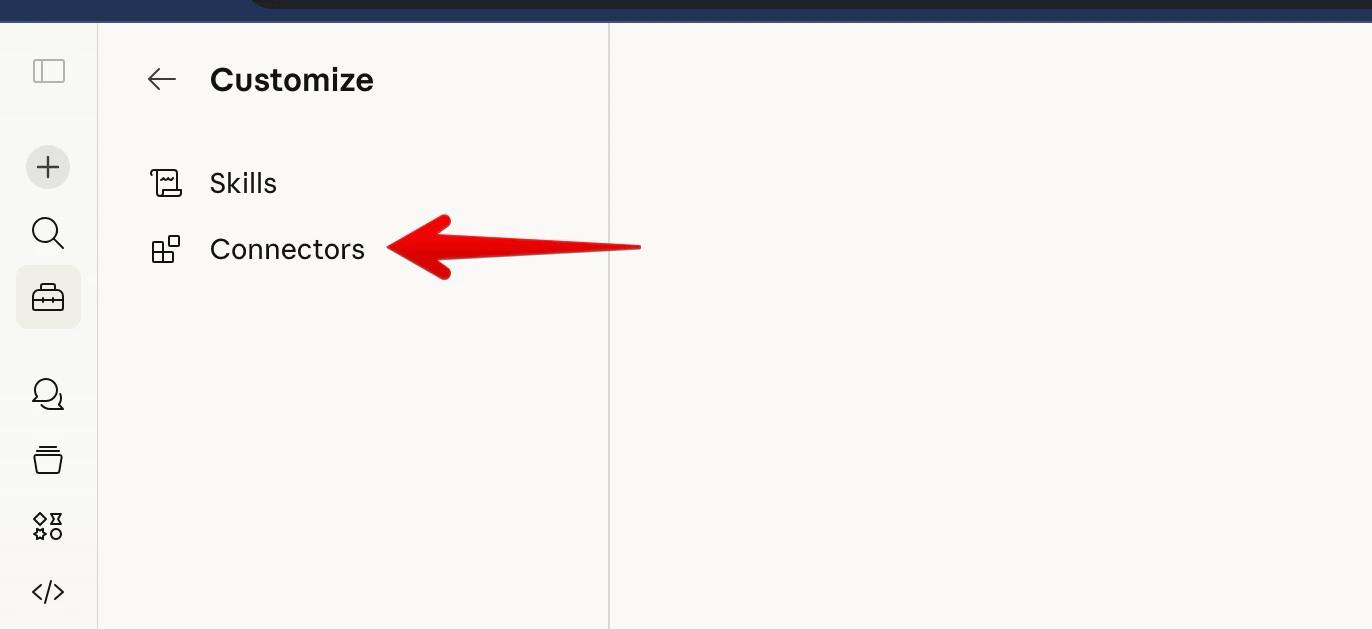
 Click **Connectors**.
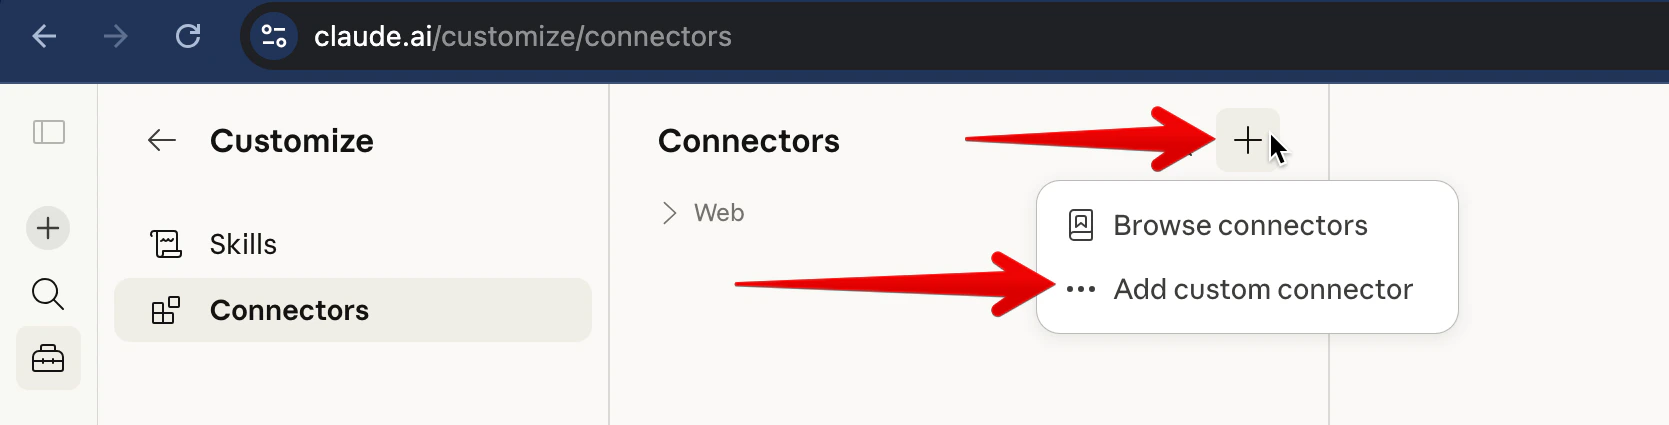
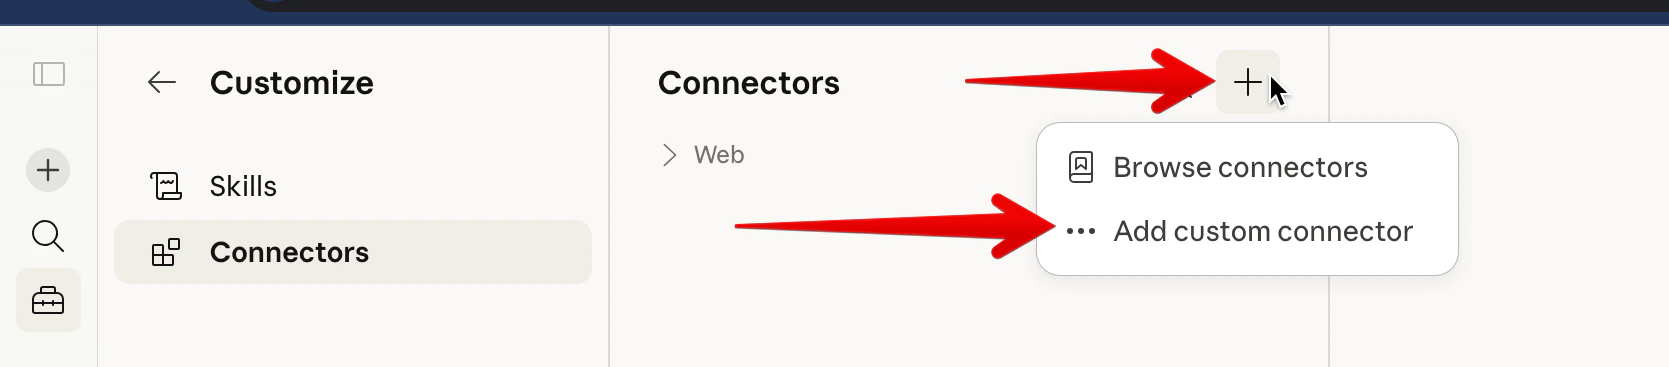
 Click the **+** button, then select **Add custom connector**.
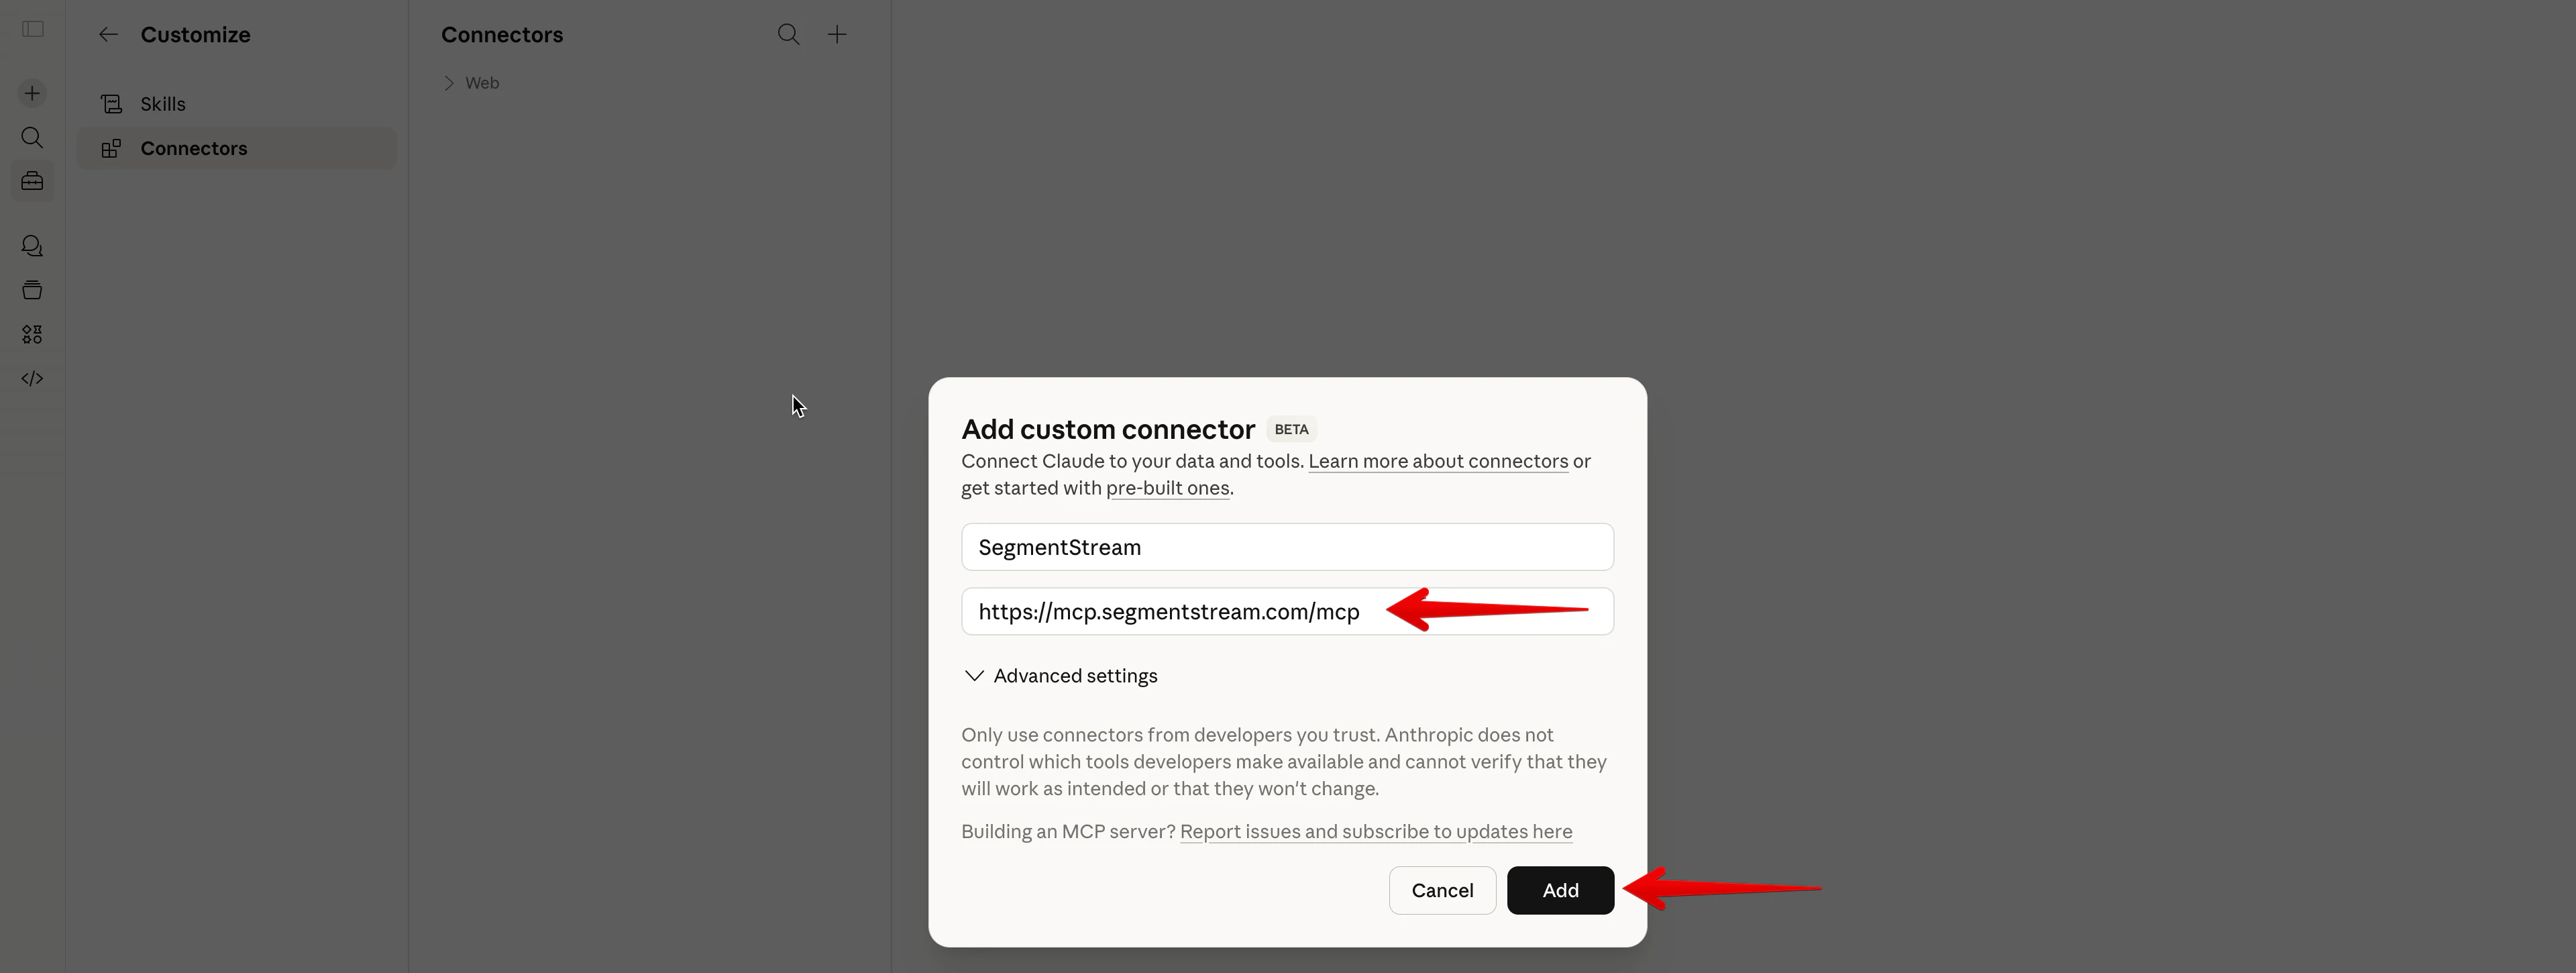
 Enter a name (e.g. "SegmentStream") and paste the server URL, then click **Add**:
```
https://mcp.segmentstream.com/mcp
```
Enter a name (e.g. "SegmentStream") and paste the server URL, then click **Add**:
```
https://mcp.segmentstream.com/mcp
```
 The connector appears as "Not connected". Click **Connect** to start the OAuth flow.
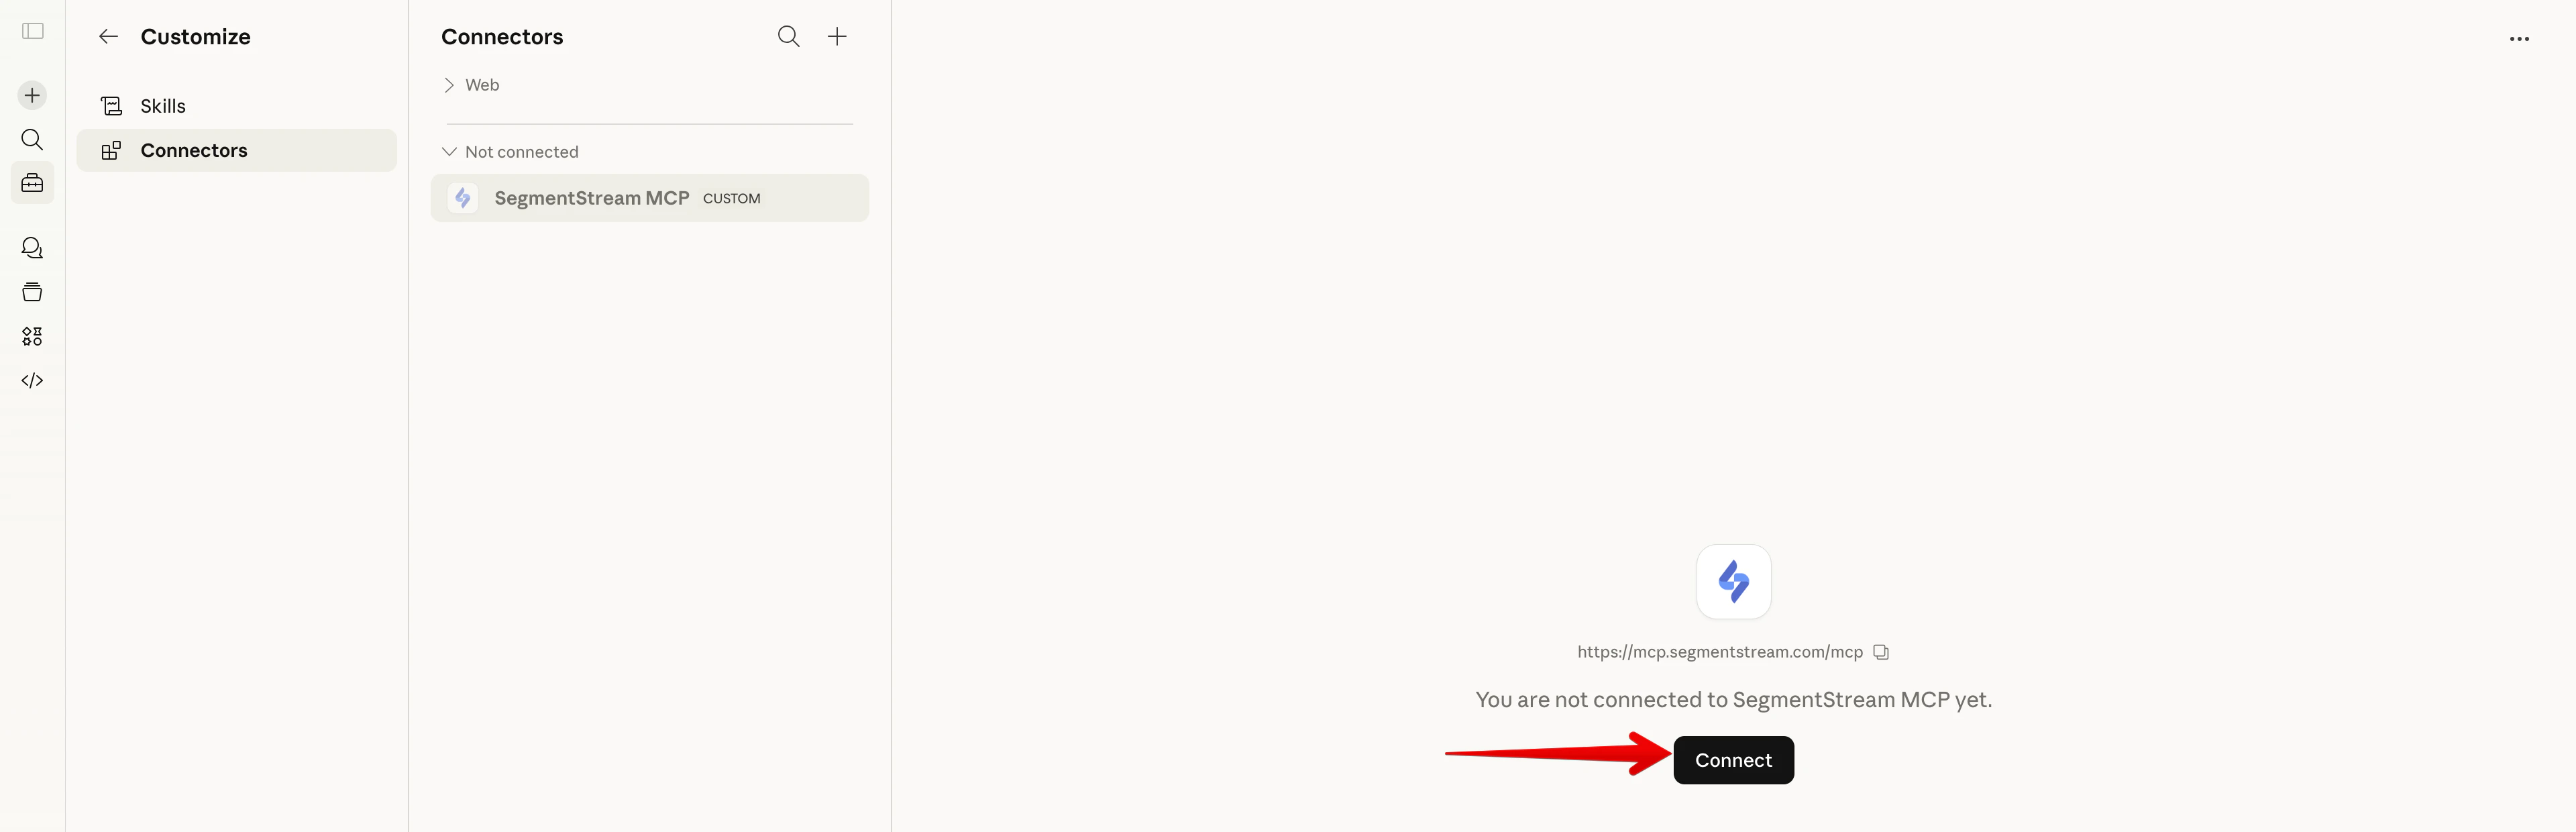 Sign in with your SegmentStream account and click **Allow**.
 Cowork uses the same Connectors interface as claude.ai.
Click **Customize** in the left sidebar.
Cowork uses the same Connectors interface as claude.ai.
Click **Customize** in the left sidebar.
 Click **Connectors**.
 Click the **+** button, then select **Add custom connector**.
 Enter a name (e.g. "SegmentStream") and paste the server URL, then click **Add**:
```
https://mcp.segmentstream.com/mcp
```
The connector appears as "Not connected". Click **Connect** to start the OAuth flow.
Sign in with your SegmentStream account and click **Allow**.
Once connected, start a new task and ask the agent about your marketing data.
Run this command in your terminal:
```bash theme={null}
claude mcp add segmentstream \
--transport http \
https://mcp.segmentstream.com/mcp
```
On first use, you'll be prompted to authenticate via your browser.
You can scope the server to your project or your user profile:
| Flag | Scope | Config file |
| ------------ | ------------------------------------- | --------------------------- |
| `-s project` | Shared with your team via `.mcp.json` | `.mcp.json` in project root |
| `-s user` | Personal, across all projects | `~/.claude/settings.json` |
| *(default)* | Local to this project | `.mcp.json` in project root |
Open **Settings → MCP** and add a new server, or edit `.cursor/mcp.json` in your project root:
```json theme={null}
{
"mcpServers": {
"segmentstream": {
"type": "http",
"url": "https://mcp.segmentstream.com/mcp"
}
}
}
```
On first use, you'll be prompted to authenticate via your browser. Restart Cursor to activate the connection.
Create or edit `.vscode/mcp.json` in your project root:
```json theme={null}
{
"servers": {
"segmentstream": {
"type": "http",
"url": "https://mcp.segmentstream.com/mcp"
}
}
}
```
On first use, you'll be prompted to authenticate via your browser.
Open **Settings**, search for "MCP", and add:
```json theme={null}
{
"mcpServers": {
"segmentstream": {
"type": "http",
"url": "https://mcp.segmentstream.com/mcp"
}
}
}
```
On first use, you'll be prompted to authenticate via your browser.
In Codex, go to **Settings** → **MCP servers** and click **Add server**.
Switch the transport selector from **STDIO** to **Streamable HTTP**.
* **Name:** `SegmentStream`
* **URL:** `https://mcp.segmentstream.com/mcp`
Leave **Bearer token env var**, **Headers**, and **Headers from environment variables** empty — they aren't needed for the SegmentStream connection.
Click **Save**.
Click **Authenticate** on the saved server. A browser window opens — sign in with your SegmentStream account and click **Allow**. The connection becomes active as soon as the OAuth flow completes.
See OpenAI's [Codex MCP docs](https://developers.openai.com/codex/mcp) if you'd rather configure the server via `~/.codex/config.toml` or the `codex mcp` CLI.
Any MCP client that supports the **Streamable HTTP** transport can connect to SegmentStream MCP:
| Setting | Value |
| -------------- | ----------------------------------- |
| Transport | Streamable HTTP |
| URL | `https://mcp.segmentstream.com/mcp` |
| Authentication | OAuth (automatic) |
The server supports both Streamable HTTP and SSE transports.
## Verify the connection
After setup, test that the connection works by asking your AI assistant:
```
List my SegmentStream projects
```
The assistant should call the `list_active_projects` tool and return a list of projects you have access to. If you see your projects, the connection is working.
## Troubleshooting
Make sure your AI tool supports MCP and that you've restarted it after adding the server configuration.
Some MCP clients need a restart after adding a new server. Close and reopen your AI tool, then try again.
Make sure your browser allows popups from the AI tool. Some browsers block popups by default.
## Next steps
Browse the [supported tools](/mcp/supported-tools) to see everything you can do with SegmentStream MCP.
Enter a name (e.g. "SegmentStream") and paste the server URL, then click **Add**:
```
https://mcp.segmentstream.com/mcp
```
The connector appears as "Not connected". Click **Connect** to start the OAuth flow.
Sign in with your SegmentStream account and click **Allow**.
Once connected, start a new task and ask the agent about your marketing data.
Run this command in your terminal:
```bash theme={null}
claude mcp add segmentstream \
--transport http \
https://mcp.segmentstream.com/mcp
```
On first use, you'll be prompted to authenticate via your browser.
You can scope the server to your project or your user profile:
| Flag | Scope | Config file |
| ------------ | ------------------------------------- | --------------------------- |
| `-s project` | Shared with your team via `.mcp.json` | `.mcp.json` in project root |
| `-s user` | Personal, across all projects | `~/.claude/settings.json` |
| *(default)* | Local to this project | `.mcp.json` in project root |
Open **Settings → MCP** and add a new server, or edit `.cursor/mcp.json` in your project root:
```json theme={null}
{
"mcpServers": {
"segmentstream": {
"type": "http",
"url": "https://mcp.segmentstream.com/mcp"
}
}
}
```
On first use, you'll be prompted to authenticate via your browser. Restart Cursor to activate the connection.
Create or edit `.vscode/mcp.json` in your project root:
```json theme={null}
{
"servers": {
"segmentstream": {
"type": "http",
"url": "https://mcp.segmentstream.com/mcp"
}
}
}
```
On first use, you'll be prompted to authenticate via your browser.
Open **Settings**, search for "MCP", and add:
```json theme={null}
{
"mcpServers": {
"segmentstream": {
"type": "http",
"url": "https://mcp.segmentstream.com/mcp"
}
}
}
```
On first use, you'll be prompted to authenticate via your browser.
In Codex, go to **Settings** → **MCP servers** and click **Add server**.
Switch the transport selector from **STDIO** to **Streamable HTTP**.
* **Name:** `SegmentStream`
* **URL:** `https://mcp.segmentstream.com/mcp`
Leave **Bearer token env var**, **Headers**, and **Headers from environment variables** empty — they aren't needed for the SegmentStream connection.
Click **Save**.
Click **Authenticate** on the saved server. A browser window opens — sign in with your SegmentStream account and click **Allow**. The connection becomes active as soon as the OAuth flow completes.
See OpenAI's [Codex MCP docs](https://developers.openai.com/codex/mcp) if you'd rather configure the server via `~/.codex/config.toml` or the `codex mcp` CLI.
Any MCP client that supports the **Streamable HTTP** transport can connect to SegmentStream MCP:
| Setting | Value |
| -------------- | ----------------------------------- |
| Transport | Streamable HTTP |
| URL | `https://mcp.segmentstream.com/mcp` |
| Authentication | OAuth (automatic) |
The server supports both Streamable HTTP and SSE transports.
## Verify the connection
After setup, test that the connection works by asking your AI assistant:
```
List my SegmentStream projects
```
The assistant should call the `list_active_projects` tool and return a list of projects you have access to. If you see your projects, the connection is working.
## Troubleshooting
Make sure your AI tool supports MCP and that you've restarted it after adding the server configuration.
Some MCP clients need a restart after adding a new server. Close and reopen your AI tool, then try again.
Make sure your browser allows popups from the AI tool. Some browsers block popups by default.
## Next steps
Browse the [supported tools](/mcp/supported-tools) to see everything you can do with SegmentStream MCP.