> ## Documentation Index
> Fetch the complete documentation index at: https://docs.segmentstream.com/llms.txt
> Use this file to discover all available pages before exploring further.
# Customisation
> Customise attribution report tables by modifying dimensions, metrics, conversions, sorting, and visualisation options.
Customise your tables in SegmentStream using the **Dimensions**, **Metrics**, and **Conversions** controls.
## Dimensions
Dimensions represent specific categories or slices of data you want to analyse, often in the form of strings such as campaign names, countries, or keywords.
You can find the description of all available dimensions on the [dimensions](/attribution/dimensions) page.
### How to modify
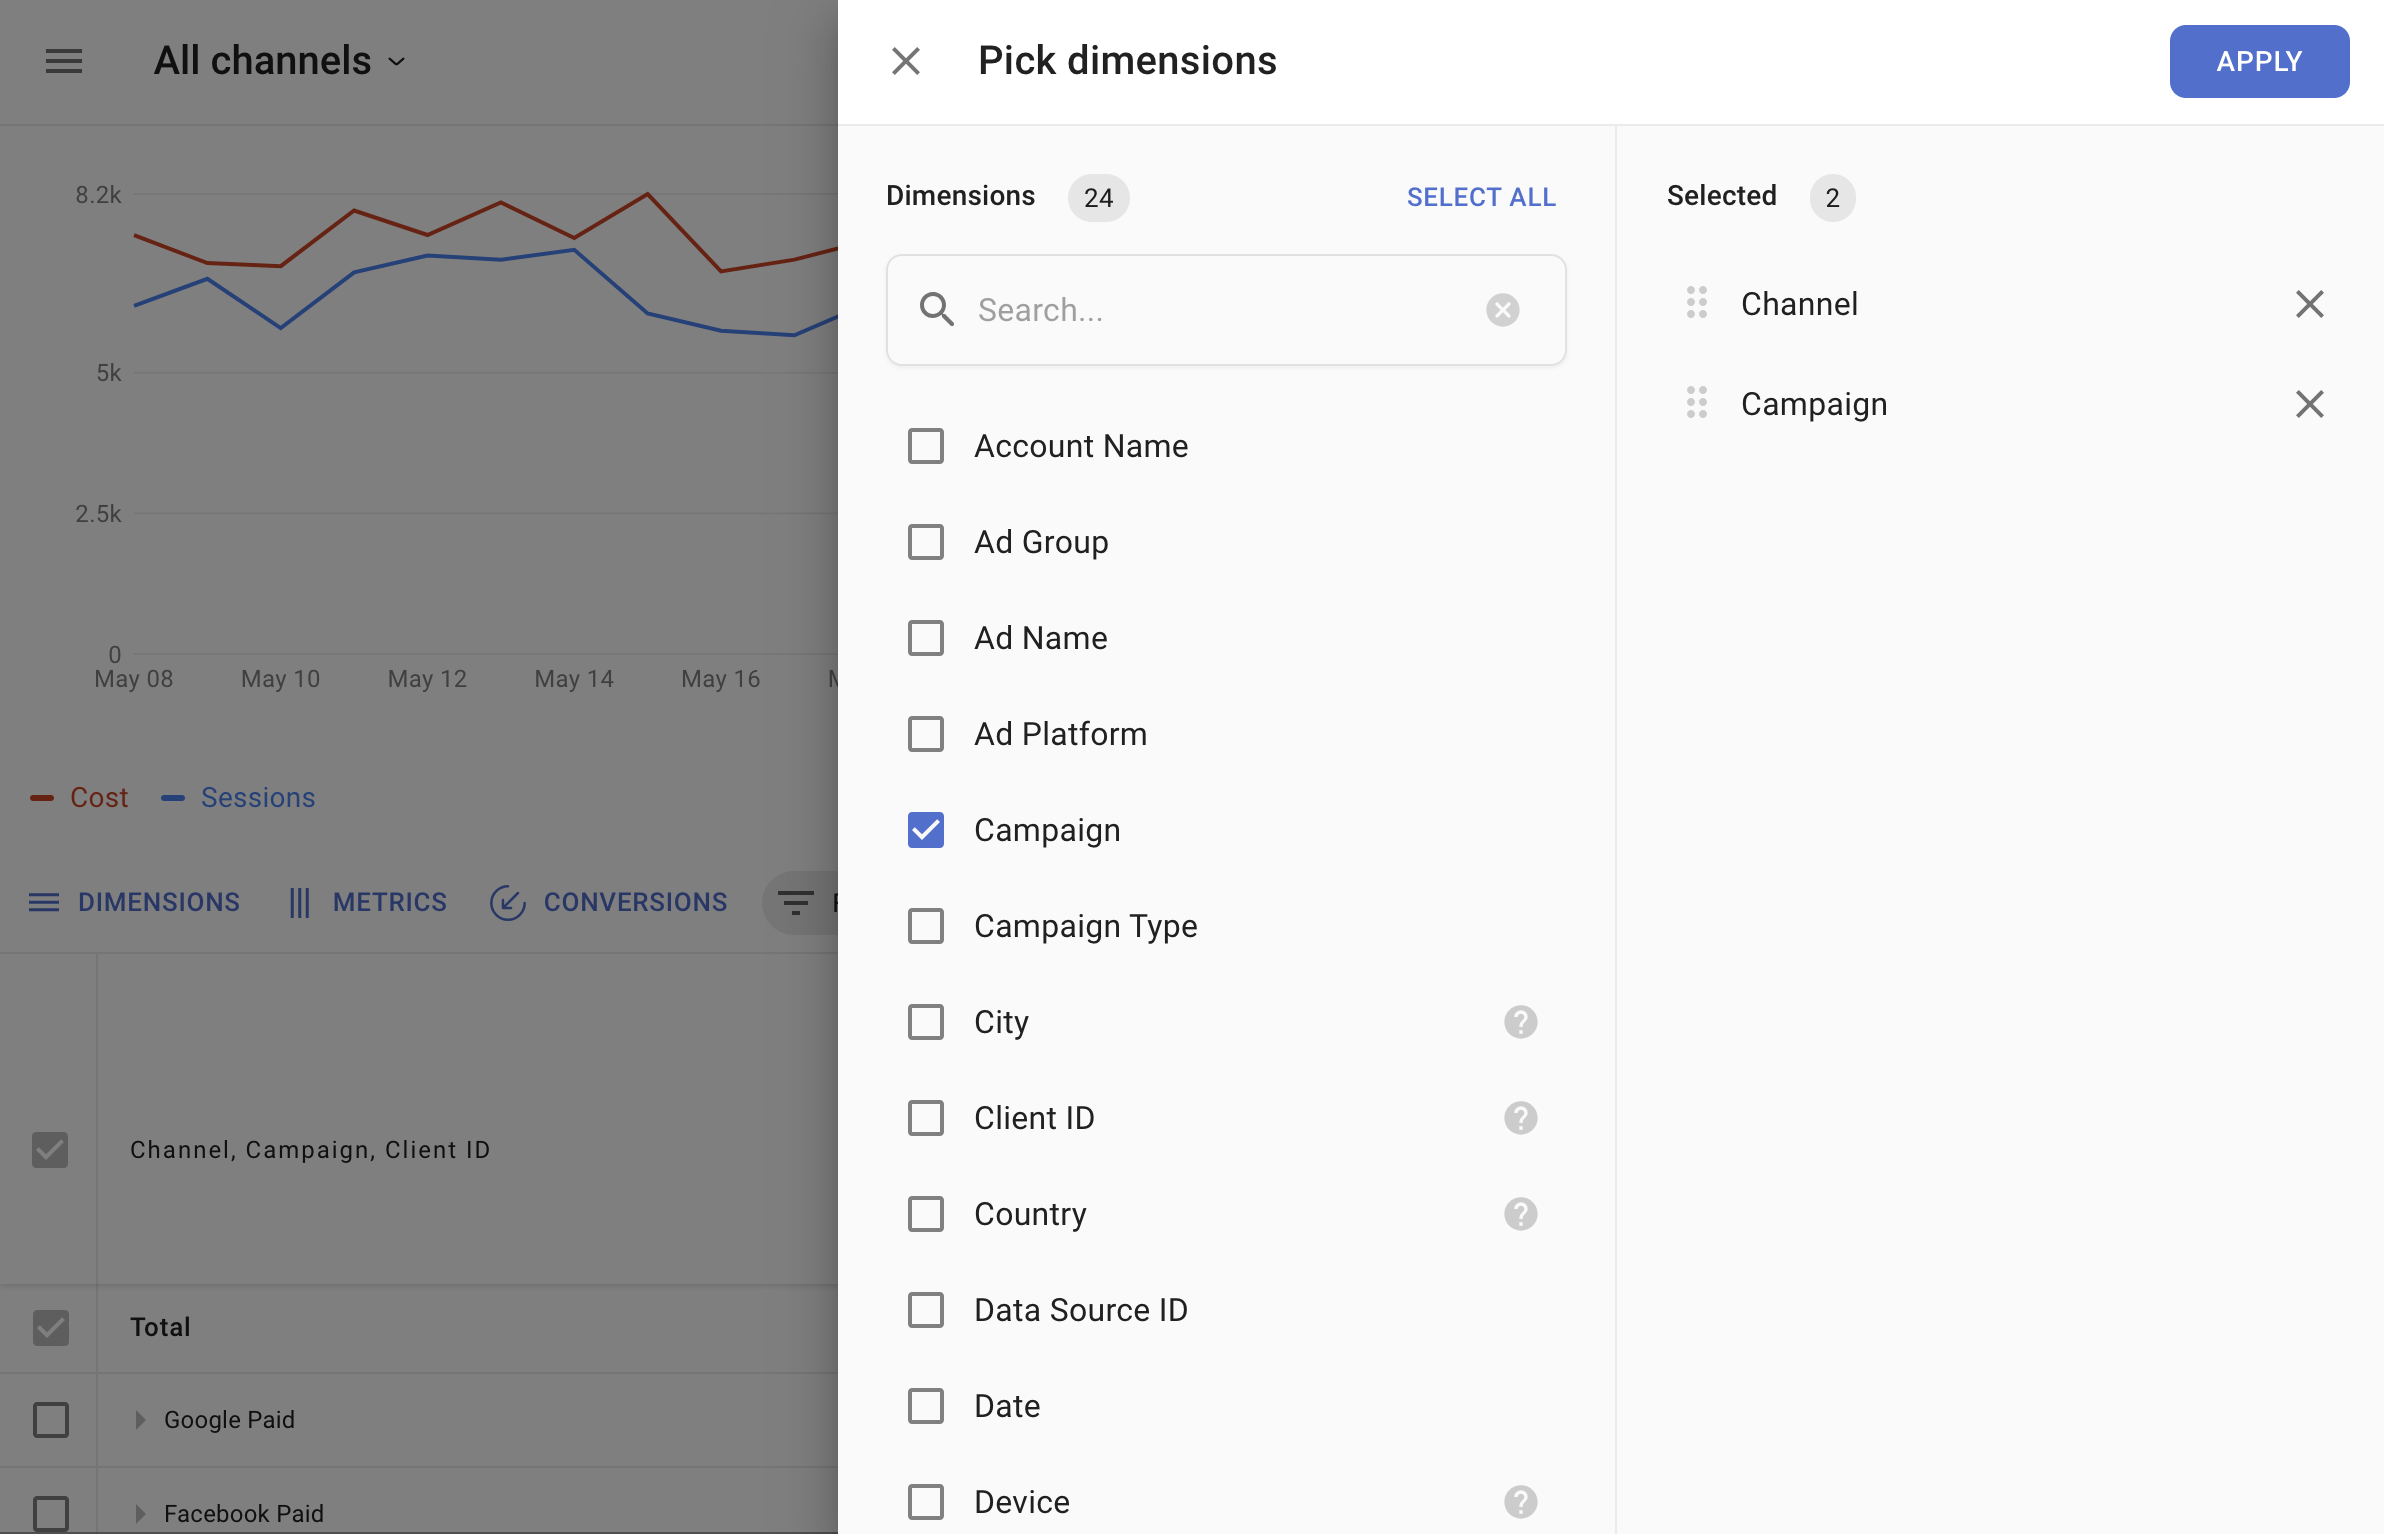
Click the **Dimensions** button above the table.
In the window that appears, select the dimensions you want on the left and arrange their order on the right.
Order matters. SegmentStream uses a drill-down logic, letting you explore more detailed views with a single click.
 ## Metrics
Metrics are numerical values corresponding to dimension values.
### How to modify
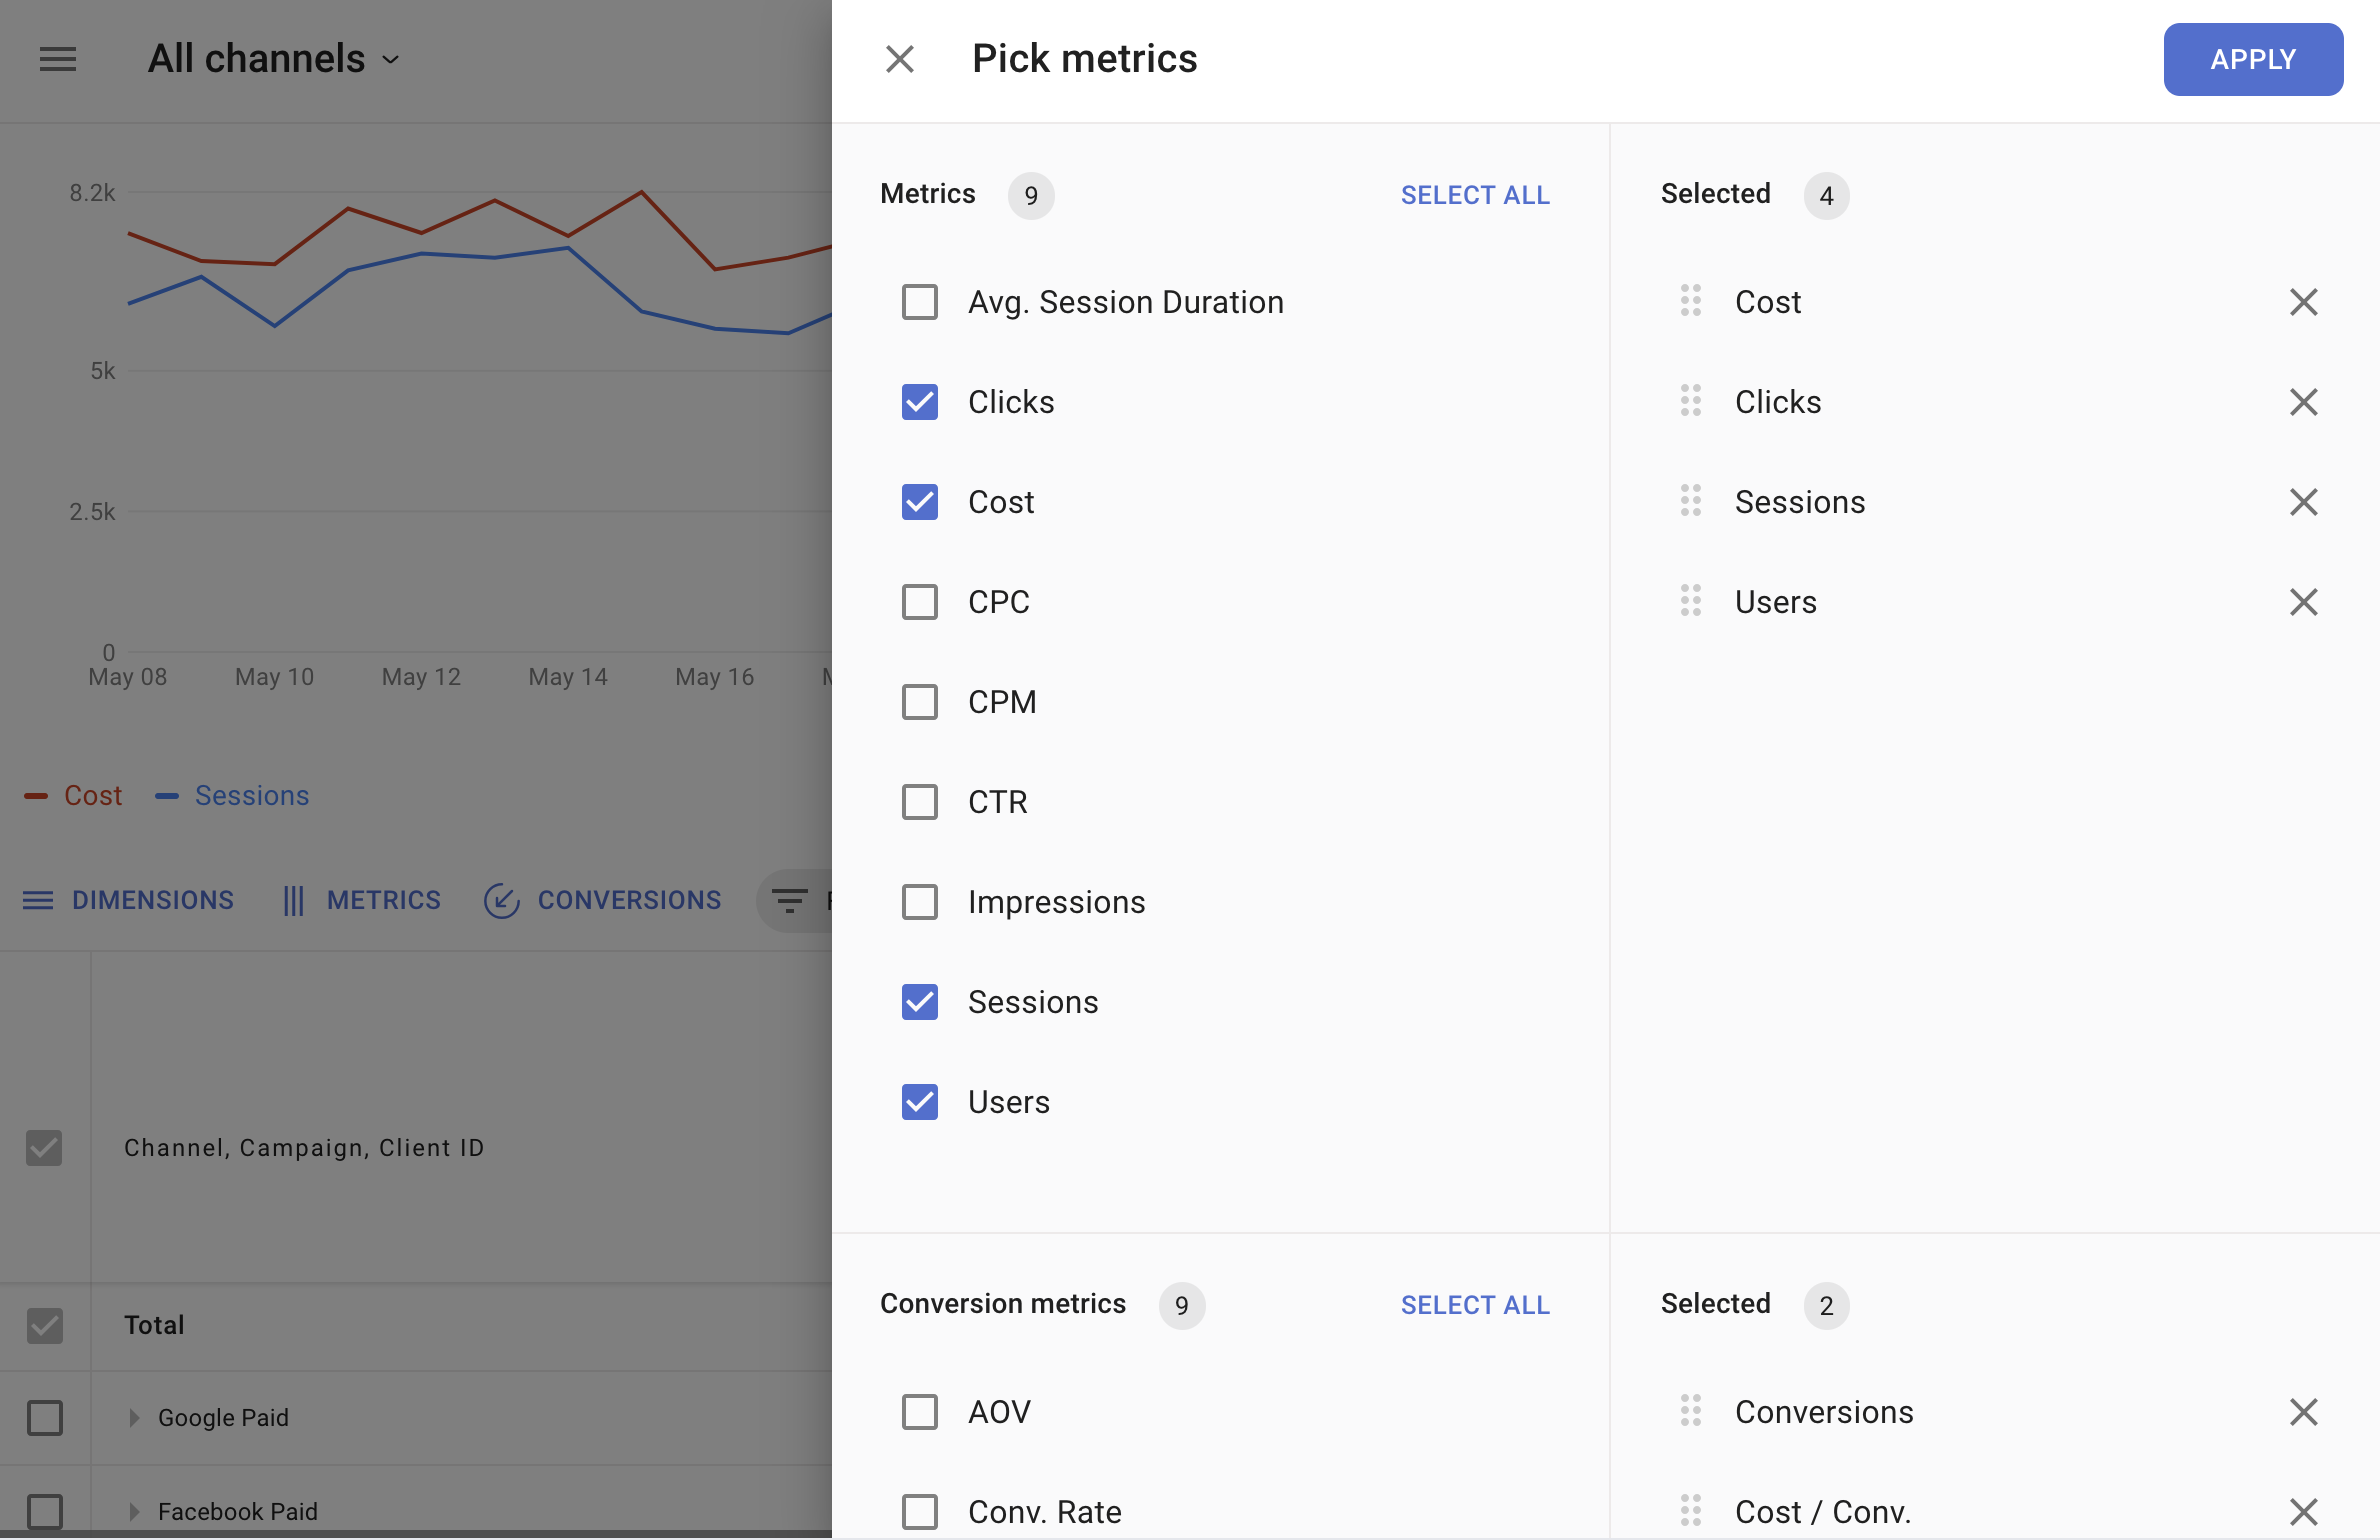
Click the **Metrics** button above the table.
In the window that appears:
* The **Metrics** section contains general metrics (for example, Clicks, Sessions, Users).
* The **Conversion metrics** section contains performance-related metrics such as conversion rate or ROAS.
## Metrics
Metrics are numerical values corresponding to dimension values.
### How to modify
Click the **Metrics** button above the table.
In the window that appears:
* The **Metrics** section contains general metrics (for example, Clicks, Sessions, Users).
* The **Conversion metrics** section contains performance-related metrics such as conversion rate or ROAS.
 ## Conversions
SegmentStream lets you add and compare multiple conversions and attribution models side by side.
### How to modify
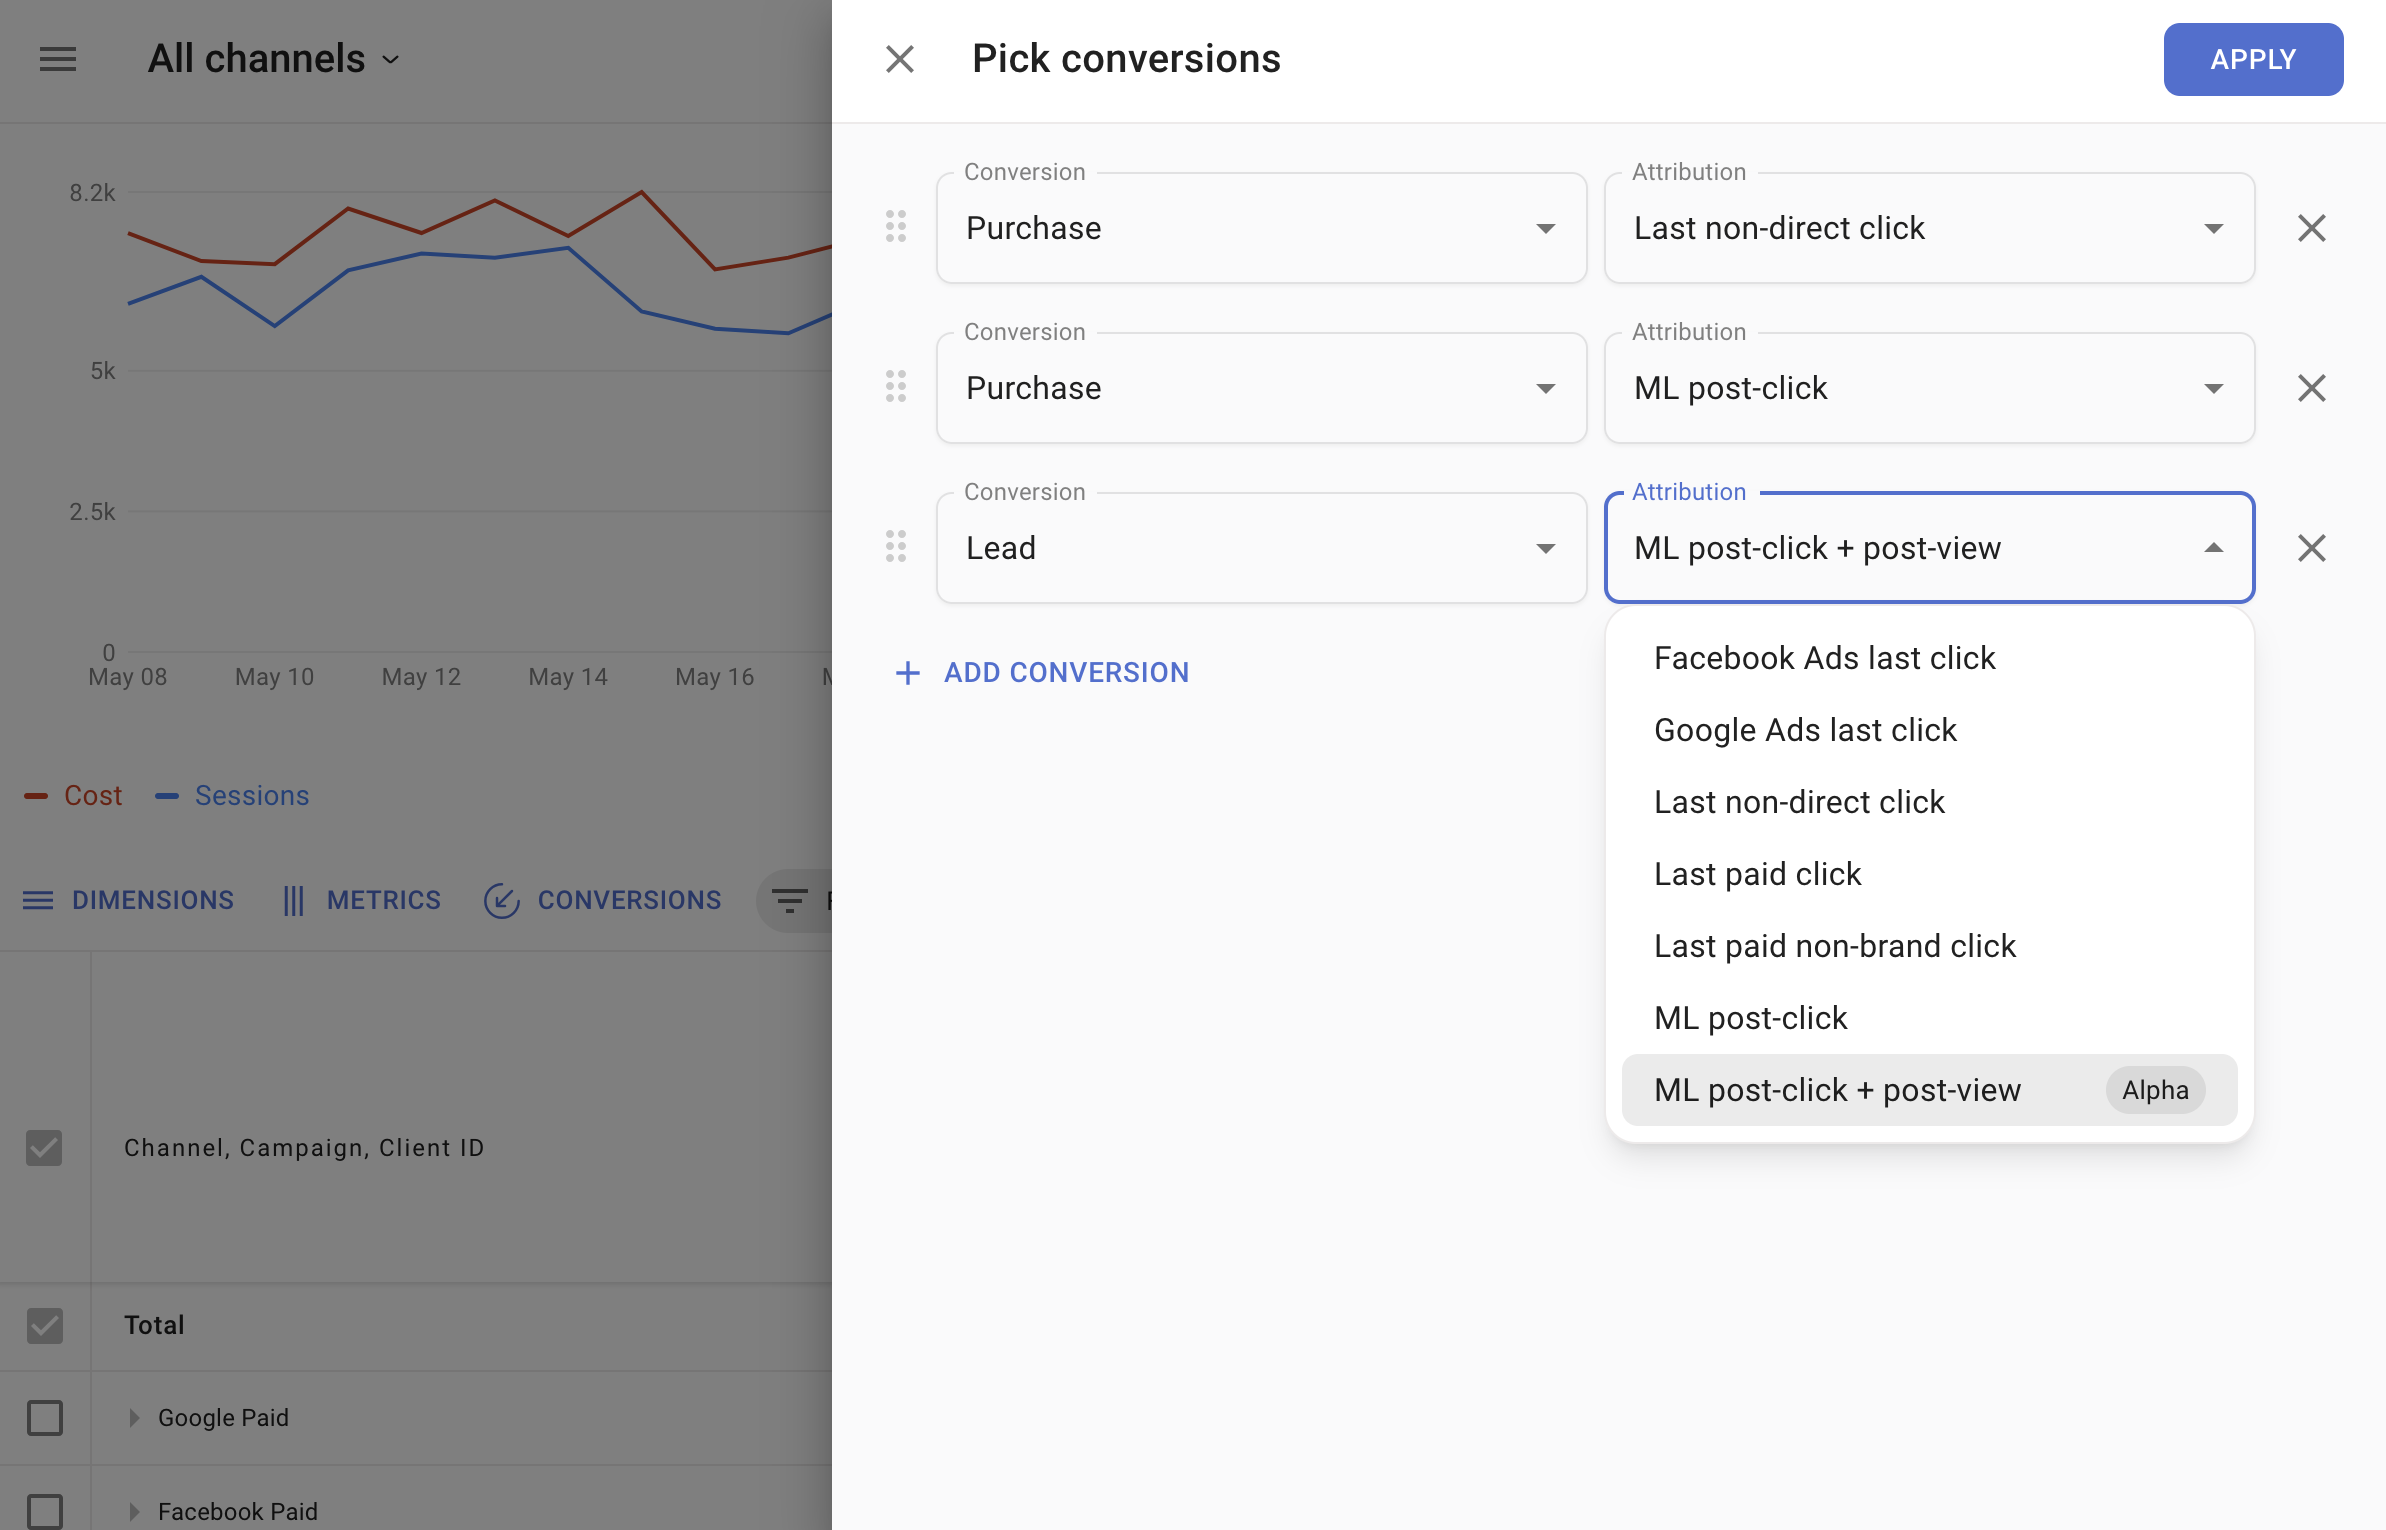
Click the **Conversions** button.
In the window that appears, select the desired conversions and attribution models.
Use drag-and-drop with the handler to the left of each conversion name.
## Conversions
SegmentStream lets you add and compare multiple conversions and attribution models side by side.
### How to modify
Click the **Conversions** button.
In the window that appears, select the desired conversions and attribution models.
Use drag-and-drop with the handler to the left of each conversion name.
 ## Sorting and visualisation
### Sorting
Click a metric name to sort data. Click again to reverse the order.
SegmentStream does not currently support ordering by dimension values.
### Visualisation options
Under the name of each metric you will find icons for three visualisation types:
* **Show on chart** -- display a metric on the chart.
* **Percentage of total** -- show values as a percentage of the total.
* **Percentage difference from average** -- available for metrics like Conv. Rate, Cost / Conv., CRR, and ROAS.
### Selecting and analysing dimension values
To visualise specific dimensions on your chart:
1. In the dimensions column, find the checkbox next to each dimension value.
2. Select one or more checkboxes. For instance, check both "Campaign 1" and "Campaign 2" for a comparative analysis.
3. Uncheck the **Total** option to focus only on specific dimensions.
4. The chart updates to display data for the checked dimensions.
5. To reset selections, click the top checkbox which toggles select all/deselect all.
## Saving your customisations
1. Click the **Save** button in the top right to save changes.
2. To save your current view as a new one, click the dropdown next to **Save** and choose **Save as new**. Provide a name for your new view in the window that appears.
## Sorting and visualisation
### Sorting
Click a metric name to sort data. Click again to reverse the order.
SegmentStream does not currently support ordering by dimension values.
### Visualisation options
Under the name of each metric you will find icons for three visualisation types:
* **Show on chart** -- display a metric on the chart.
* **Percentage of total** -- show values as a percentage of the total.
* **Percentage difference from average** -- available for metrics like Conv. Rate, Cost / Conv., CRR, and ROAS.
### Selecting and analysing dimension values
To visualise specific dimensions on your chart:
1. In the dimensions column, find the checkbox next to each dimension value.
2. Select one or more checkboxes. For instance, check both "Campaign 1" and "Campaign 2" for a comparative analysis.
3. Uncheck the **Total** option to focus only on specific dimensions.
4. The chart updates to display data for the checked dimensions.
5. To reset selections, click the top checkbox which toggles select all/deselect all.
## Saving your customisations
1. Click the **Save** button in the top right to save changes.
2. To save your current view as a new one, click the dropdown next to **Save** and choose **Save as new**. Provide a name for your new view in the window that appears.